This tutorial will allow you to install fonts on Android phones and other devices like tablets. Did you know, it is really easy to install custom fonts like TTF, OTF files in Android? Custom fonts are useful when you want to change the look and feel of your primary phone. It may not be possible to change fonts on iOS devices, but due to Android’s open nature and customizing capabilities, it is very much possible to do on Android.
Fonts come in various styles and aesthetics. By applying a different font to your phone, it makes it truly unique and yours. As we mentioned, the best thing about Android is its open source nature, it allows users to customize the OS exactly how they want it. Be it system-wide themes, color changes for menus or something as simple as clock widgets, Android’s edge over other mobile platforms is the customizability it offers. Fortunately, you can also modify the font on your Android phone. How? We have explained all the methods ahead!
As there are various Android manufacturers and hence, various skins, it is difficult to have a one-method-fits-all procedure. For each phone, there are slightly different ways to have custom fonts installed. Fortunately, we have compiled all of them in this singular guide. Hopefully, one will apply for your Android phone or tablet.
Why Install Custom Fonts?
If you are tired of using the same old fonts on your Android device and want to spice things up, installing custom fonts is a great option. With custom fonts, you can give a unique look to your device and make it stand out from the crowd.
The text you read on your phone has this singular design all across. Yes, there are text styles such as bold for button titles, thin for description and more. But, the overall design remains exactly the same across the board. However, you would have observed, the text style changes on each brand and that is where custom fonts come in.
Android allows users and even manufacturers to override the stock Google font package with their own. Samsung has its own font, Xiaomi uses its own, Huawei has a different one and so on. Thankfully, if you don’t like the stock font on your phone, you can install your own. Since you will be changing the official factory font, this will be referred to as a “custom font” style.
For vanilla Android that is found running on Pixel phones, there is no option to change the system font. Users have to rely on other methods to change fonts on these devices. However, major Android manufacturers like Samsung, LG and HTC include font customization as a built-in option within the official OS.
The option itself might be placed under a different name for different brand’s skins but the idea is pretty much the same. Users can open up settings app and change the fonts from there.
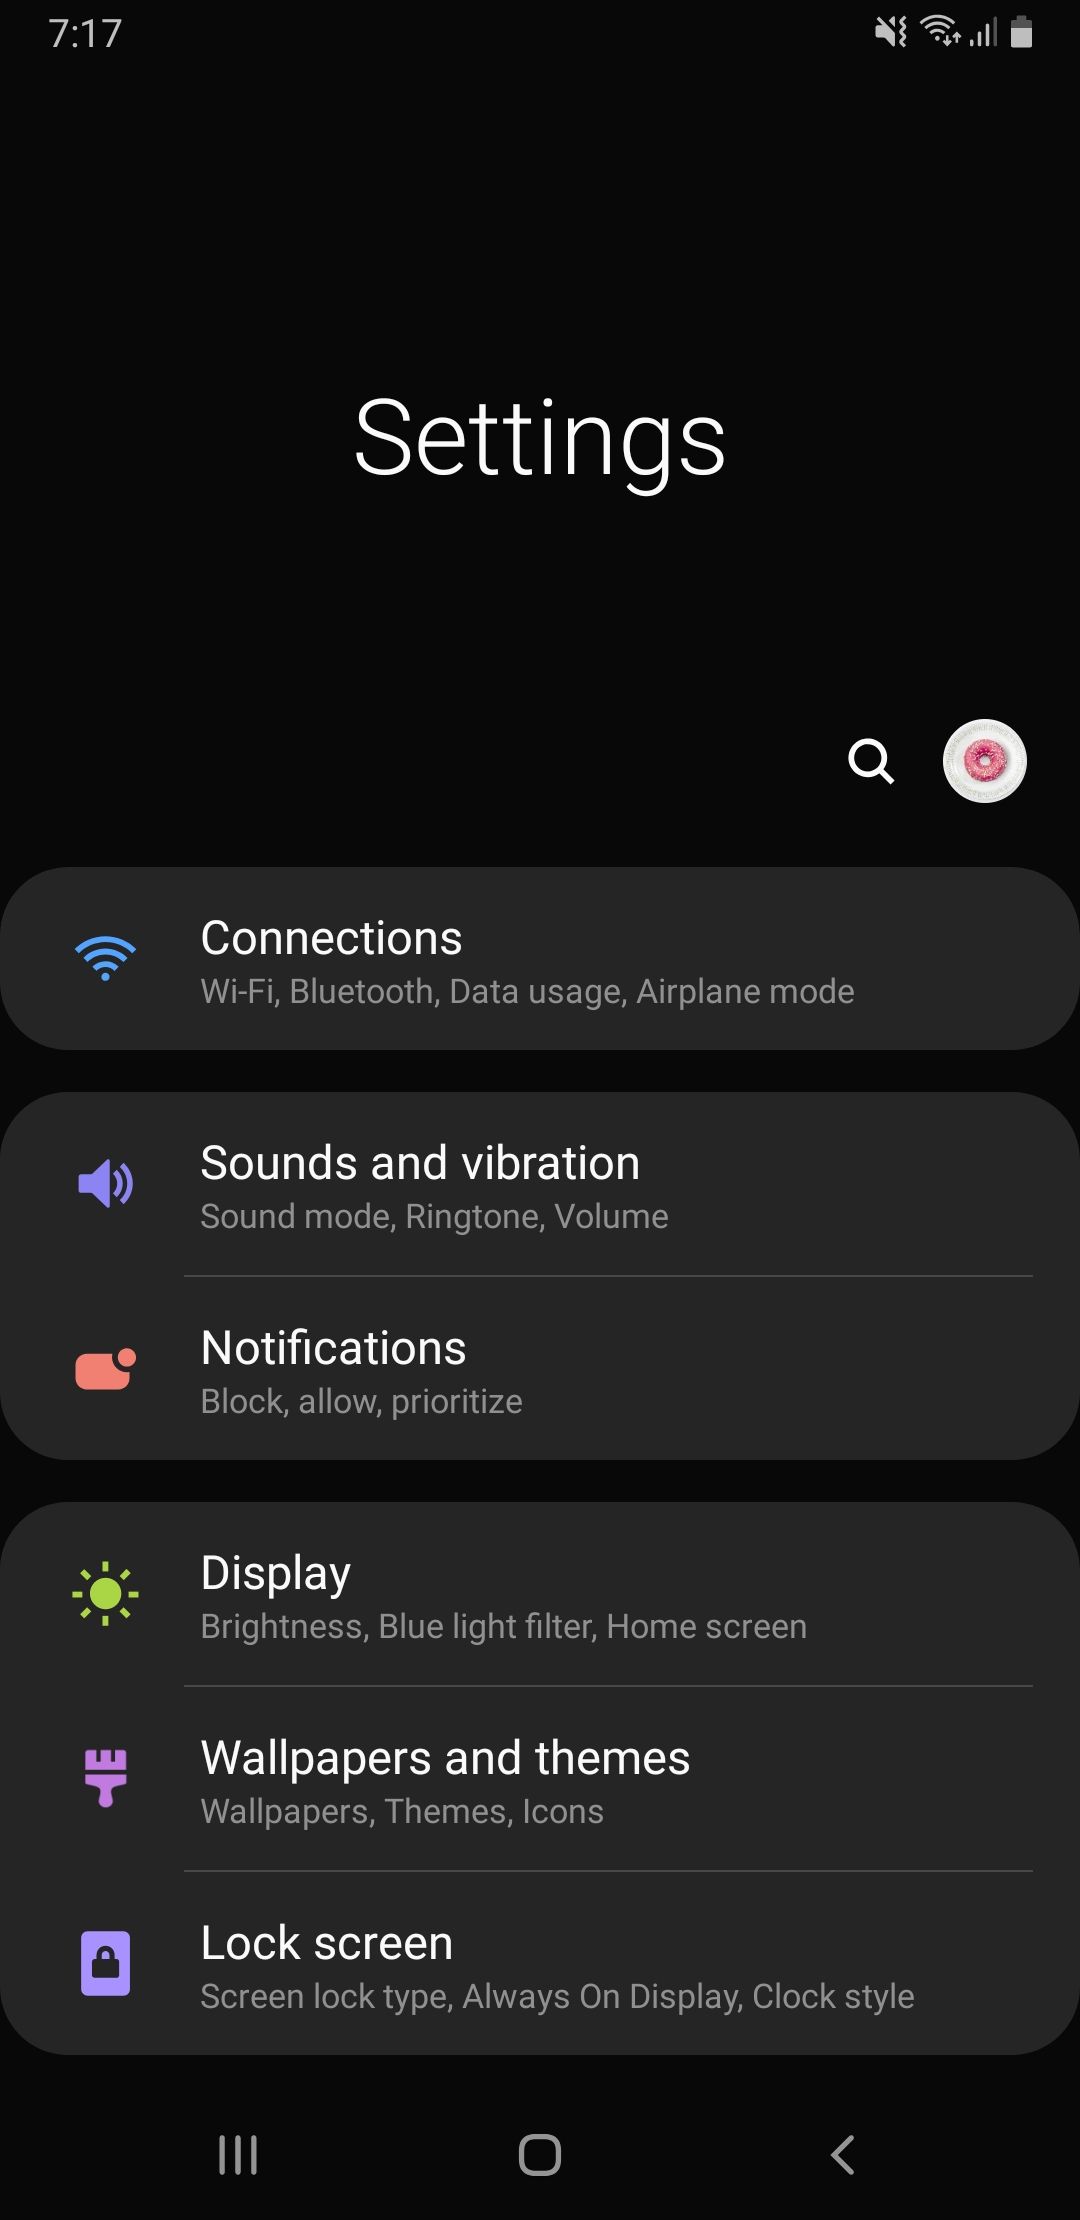
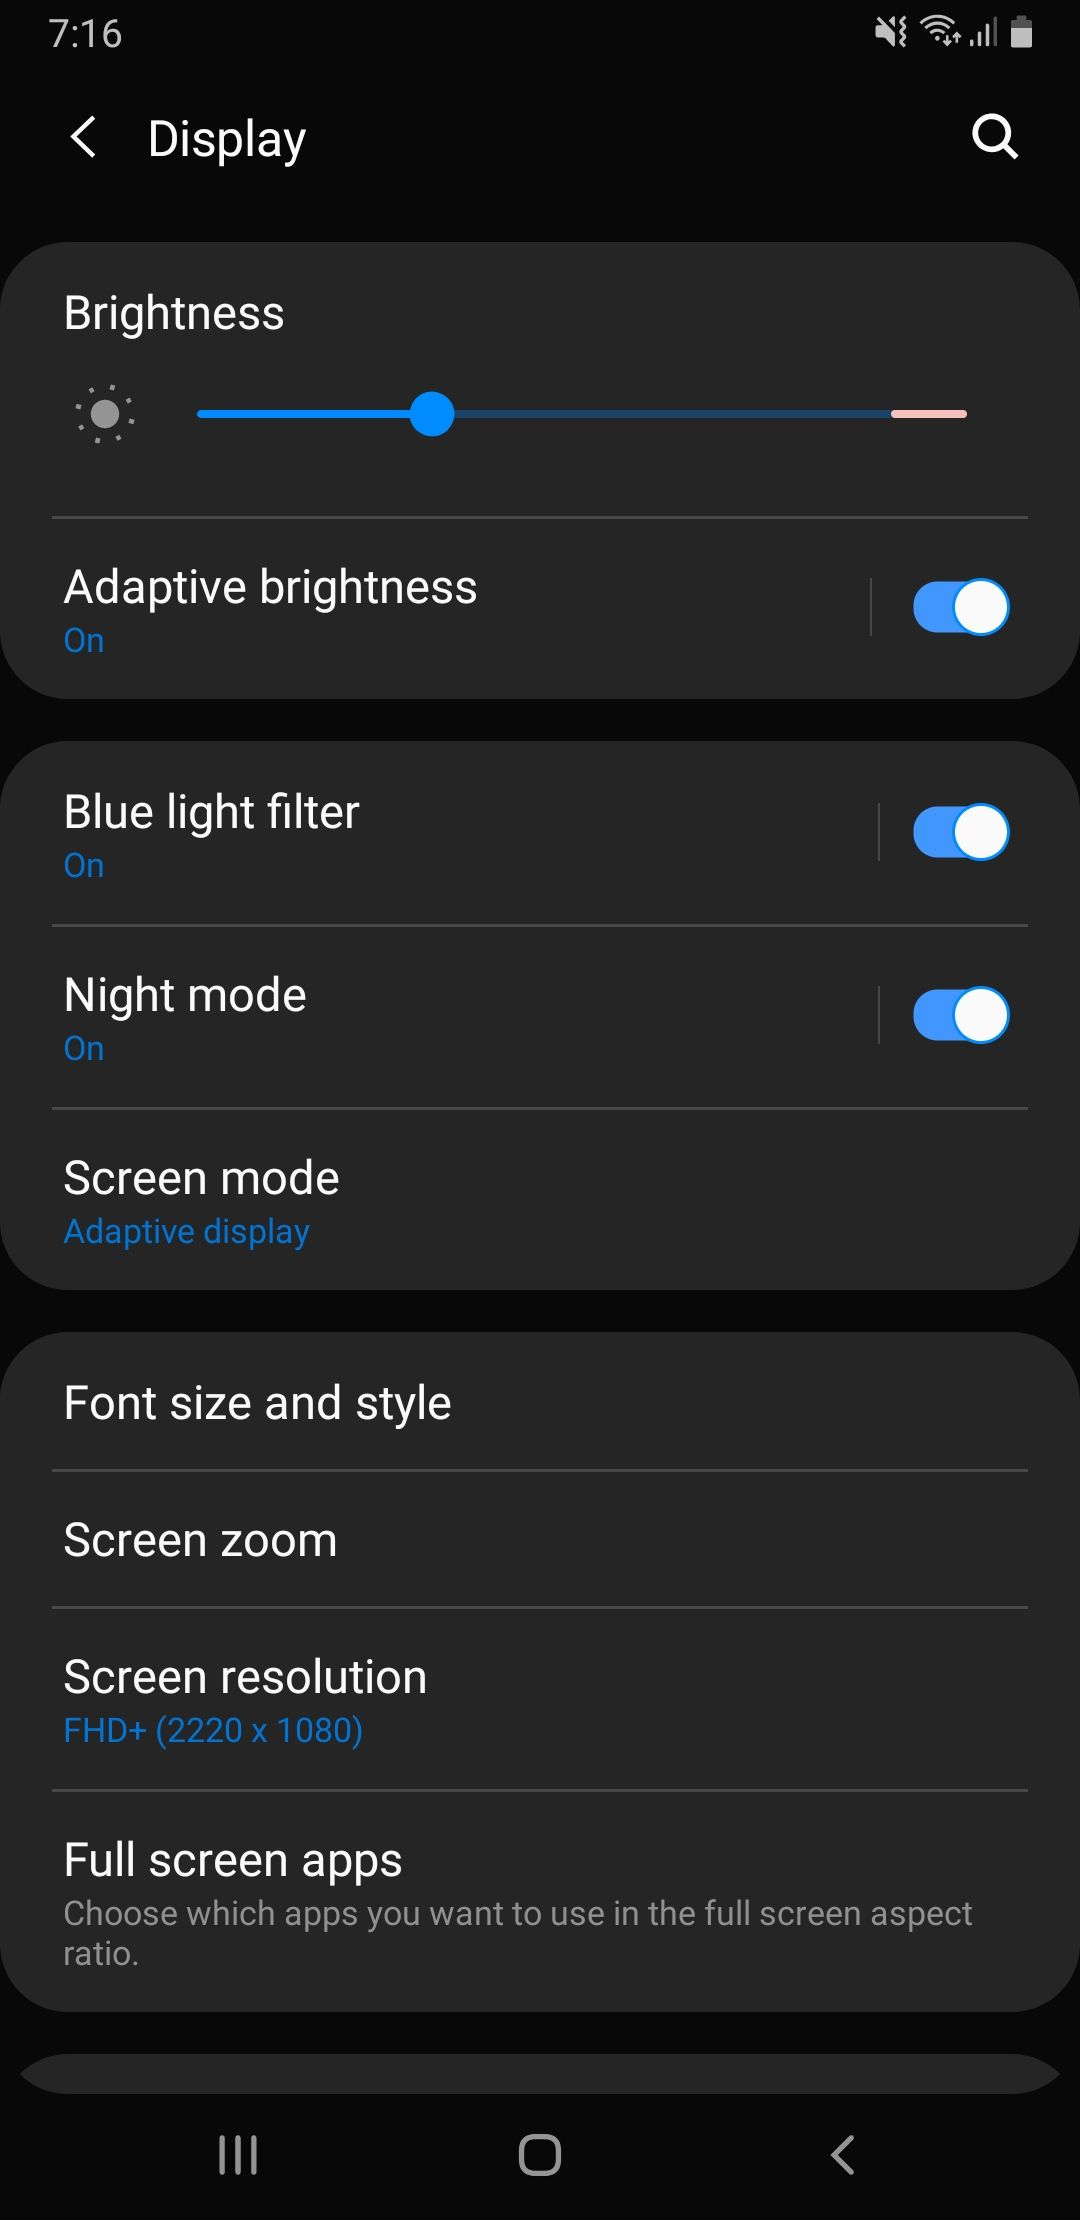
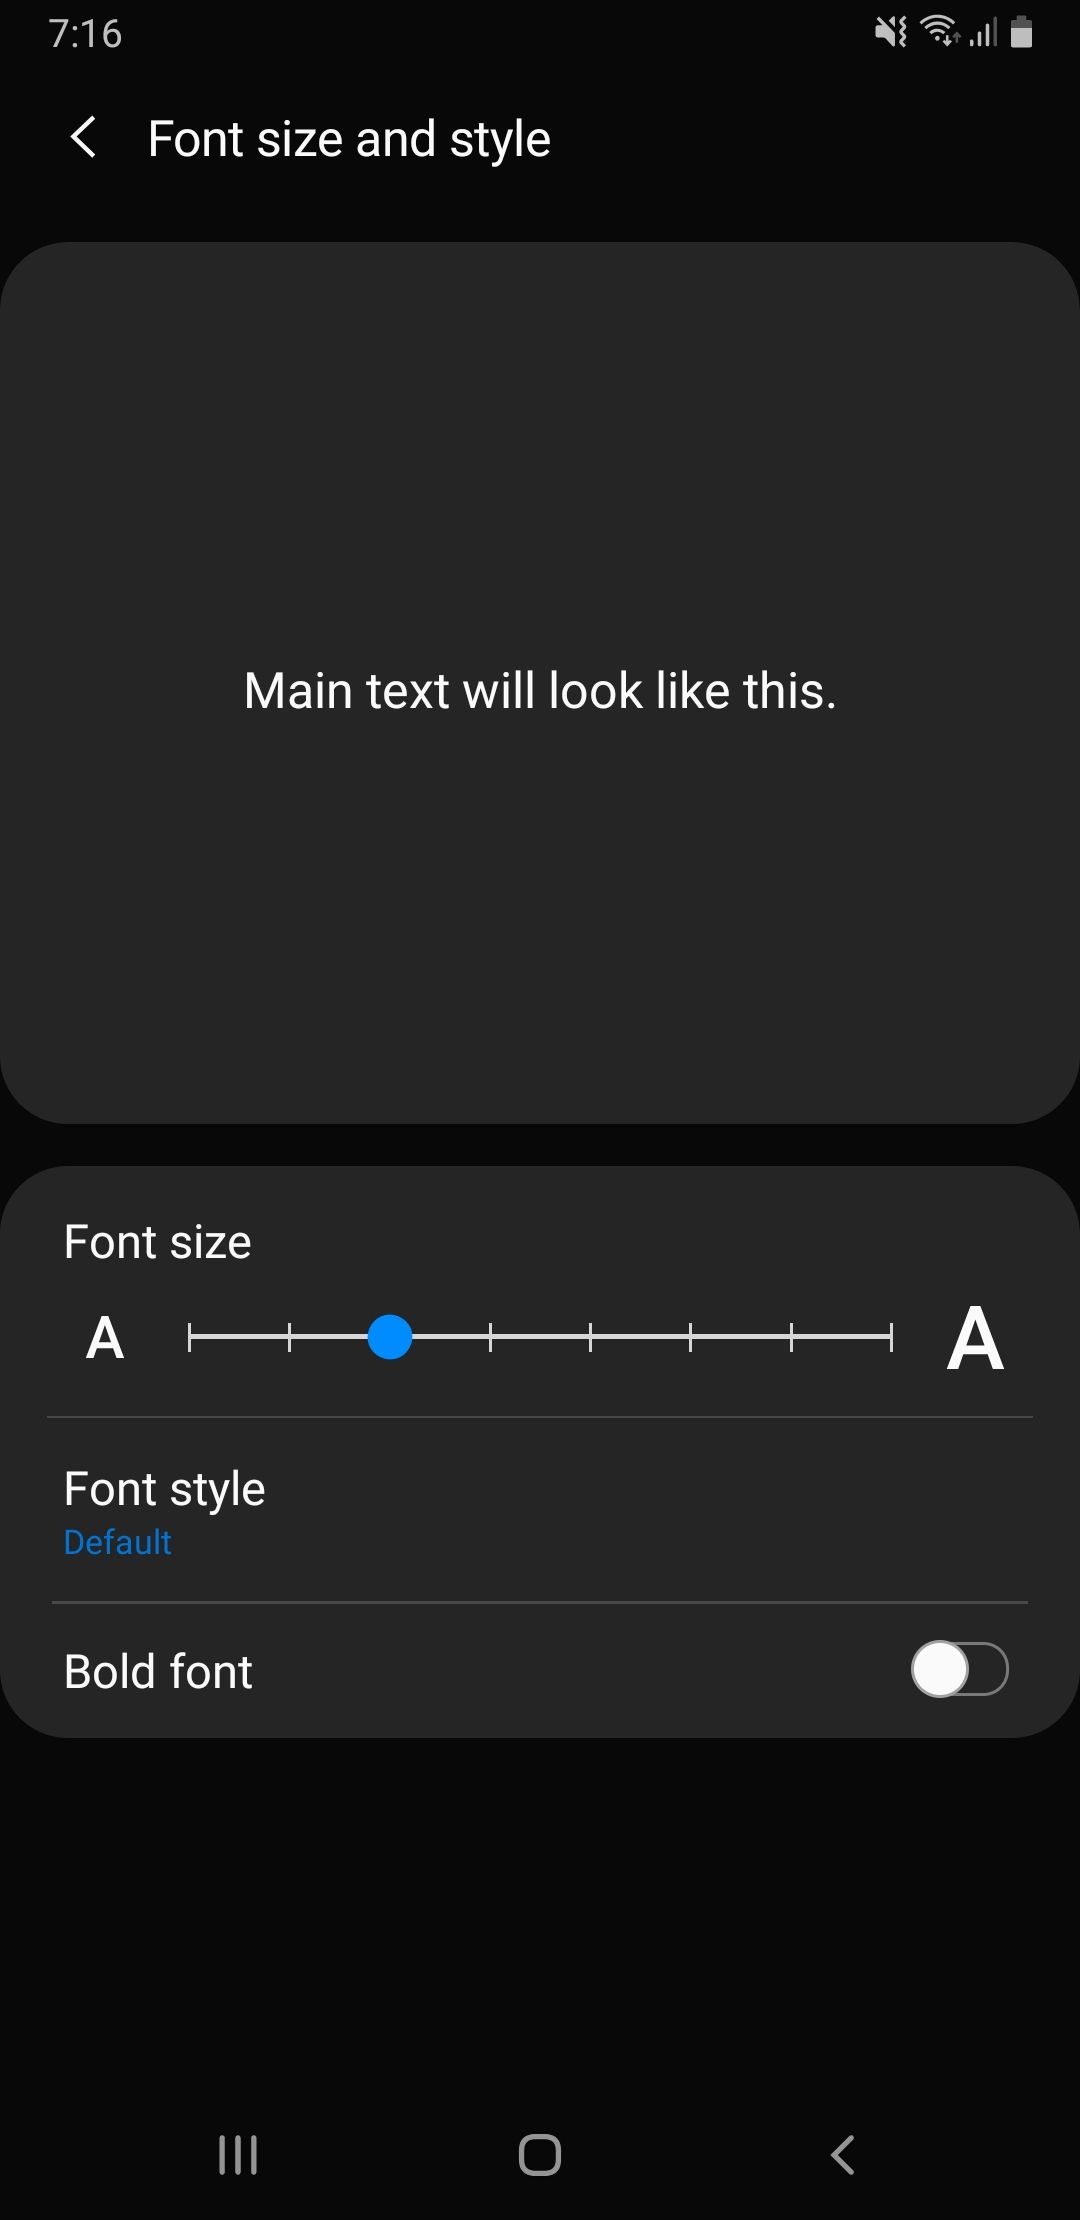
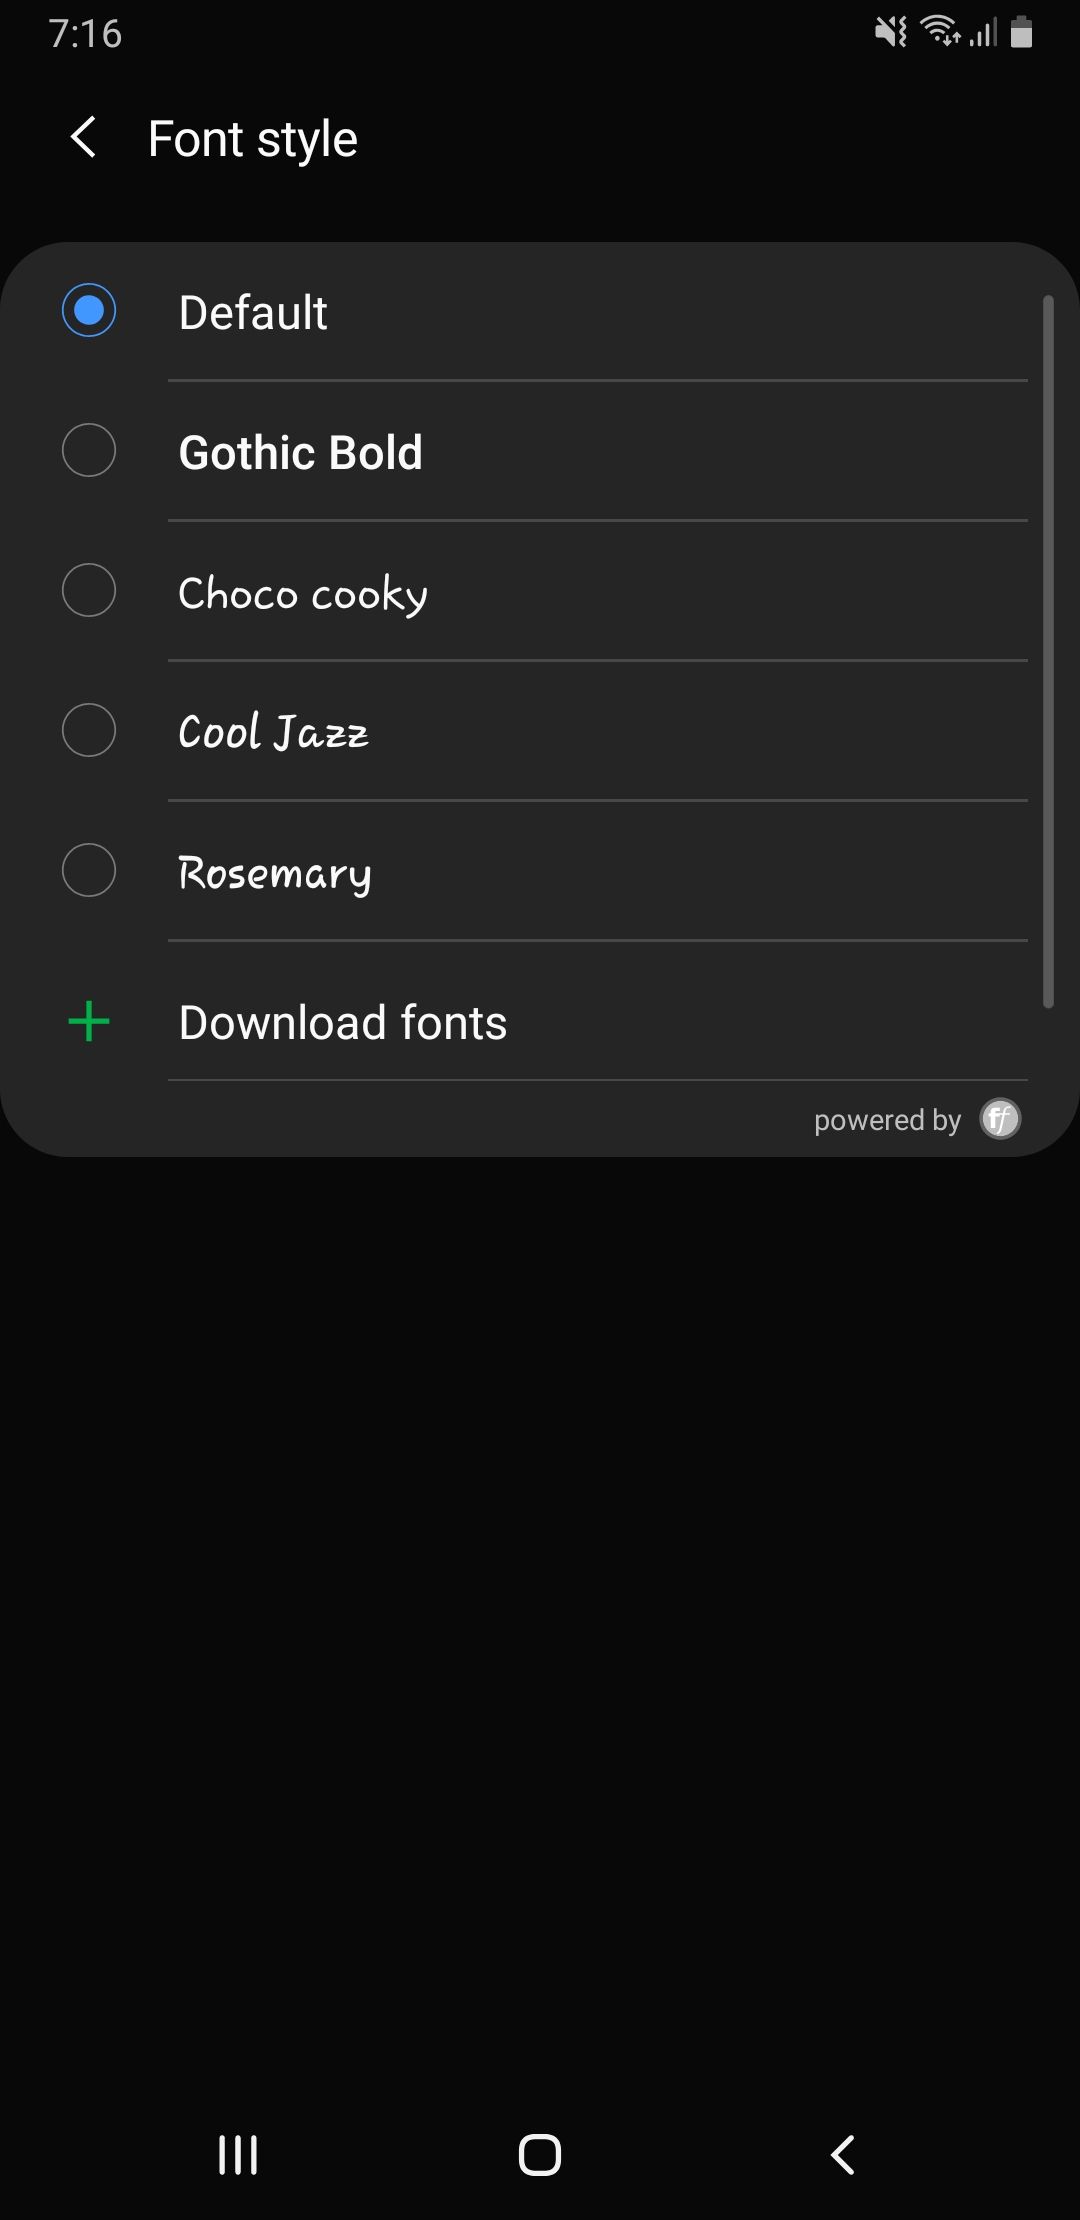
For Samsung users, they can go to Settings app then under Display menu, there is an option of Font and style. Once that is selected, you would be able to set the size and also, Font style. Numerous pre-installed fonts are displayed which you can choose and set immediately.
Further, there is an option of downloading more fonts. Through Galaxy Store, users can select more fonts that are available either for free or are paid. One example, you can download Samsung Sans from Galaxy Store!
Method 1: Install Fonts with Android Launchers
A third-party launcher on Android basically handles the main UI and layout of your phone’s homescreen. With custom launchers installed, you can use them to customize the font as well. However, the font style changed via a launcher wont effect apps themselves, just the main UI which you access to navigate the phone.
If you want to change or install fonts on Android devices with launchers from the Google Play Store, we have listed the steps below. We have covered the following popular Android launchers:
- Action Launcher
- Apex Launcher
- GO Launcher
- Smart Launcher
Action Launcher
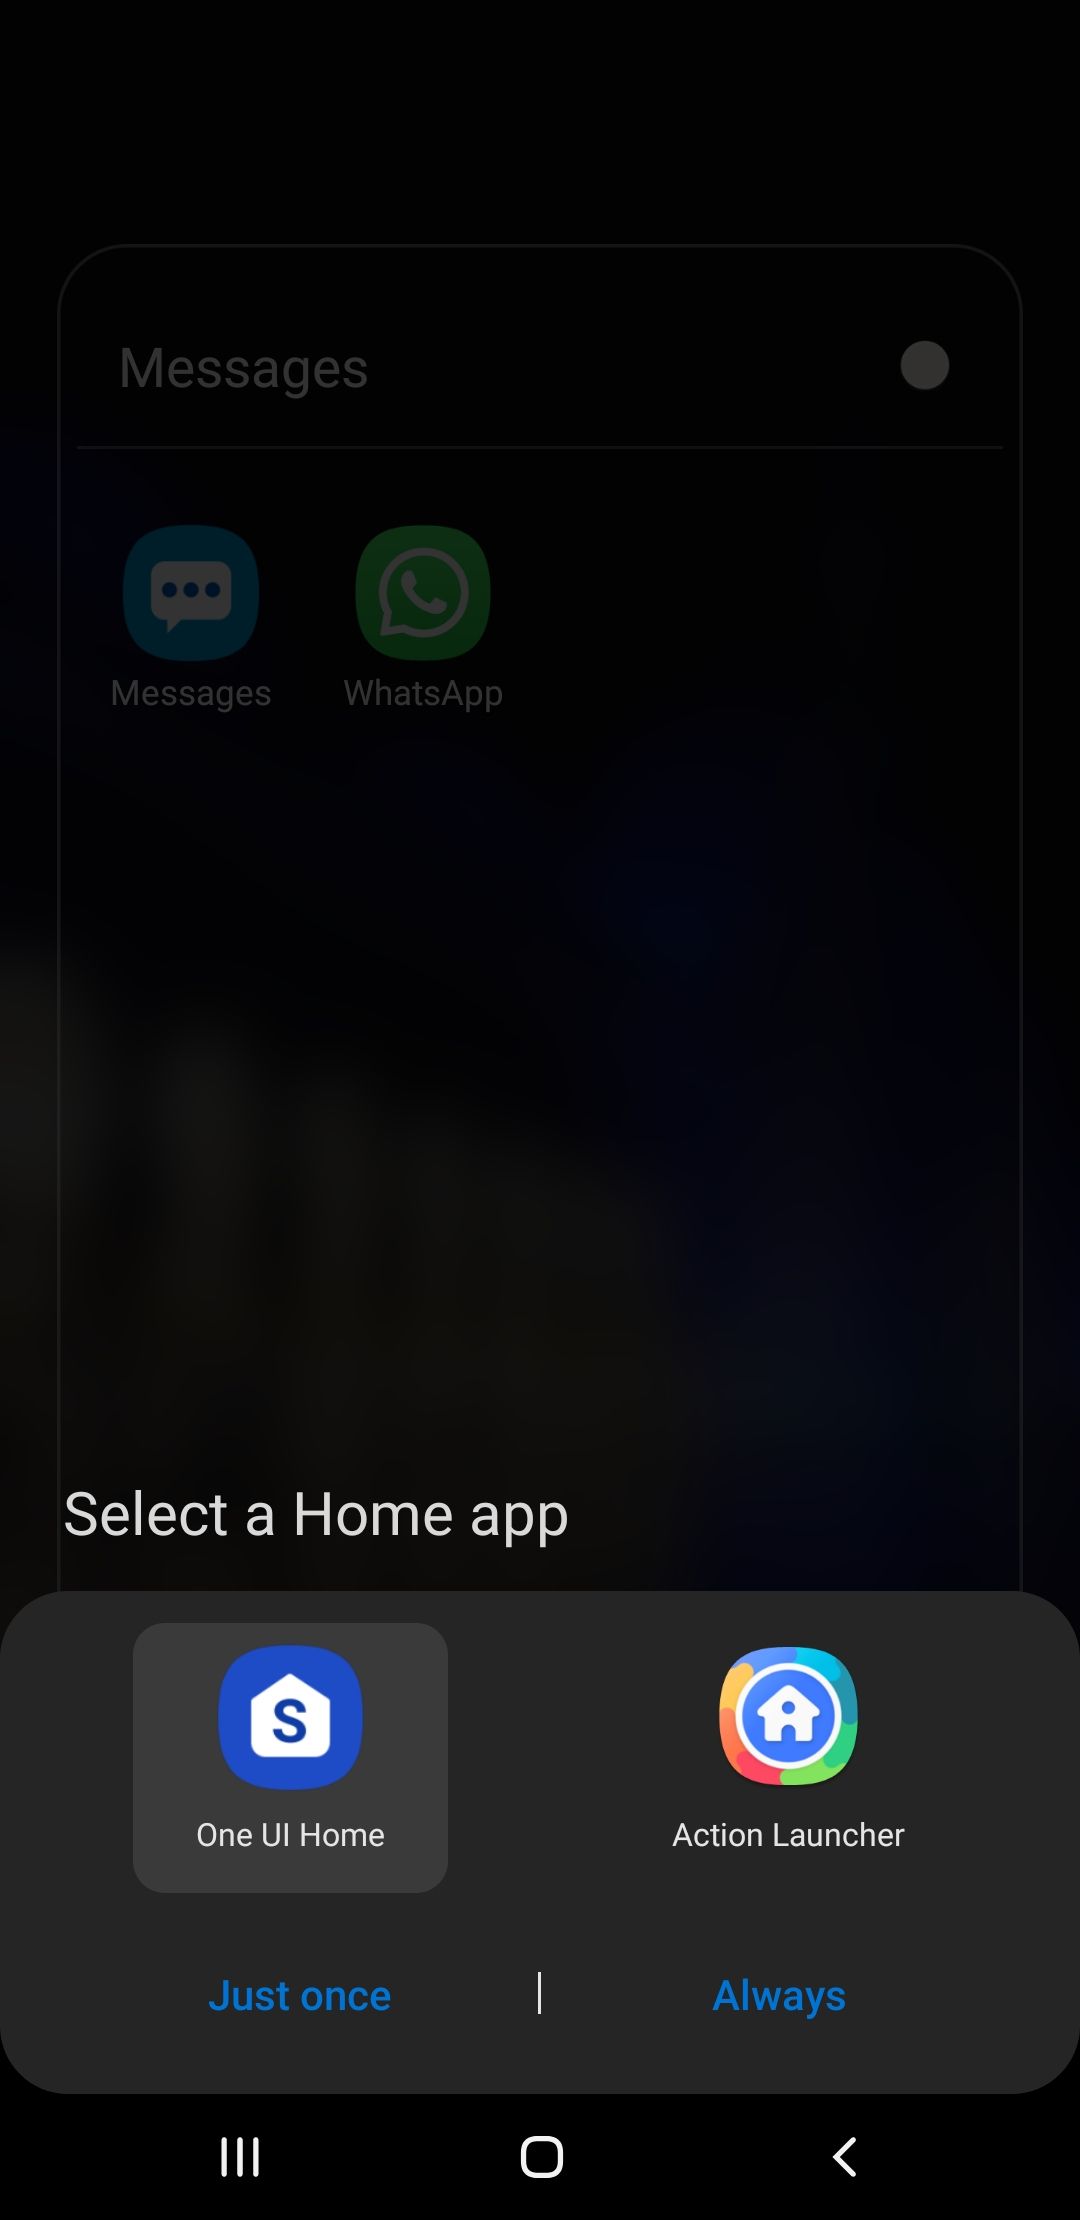
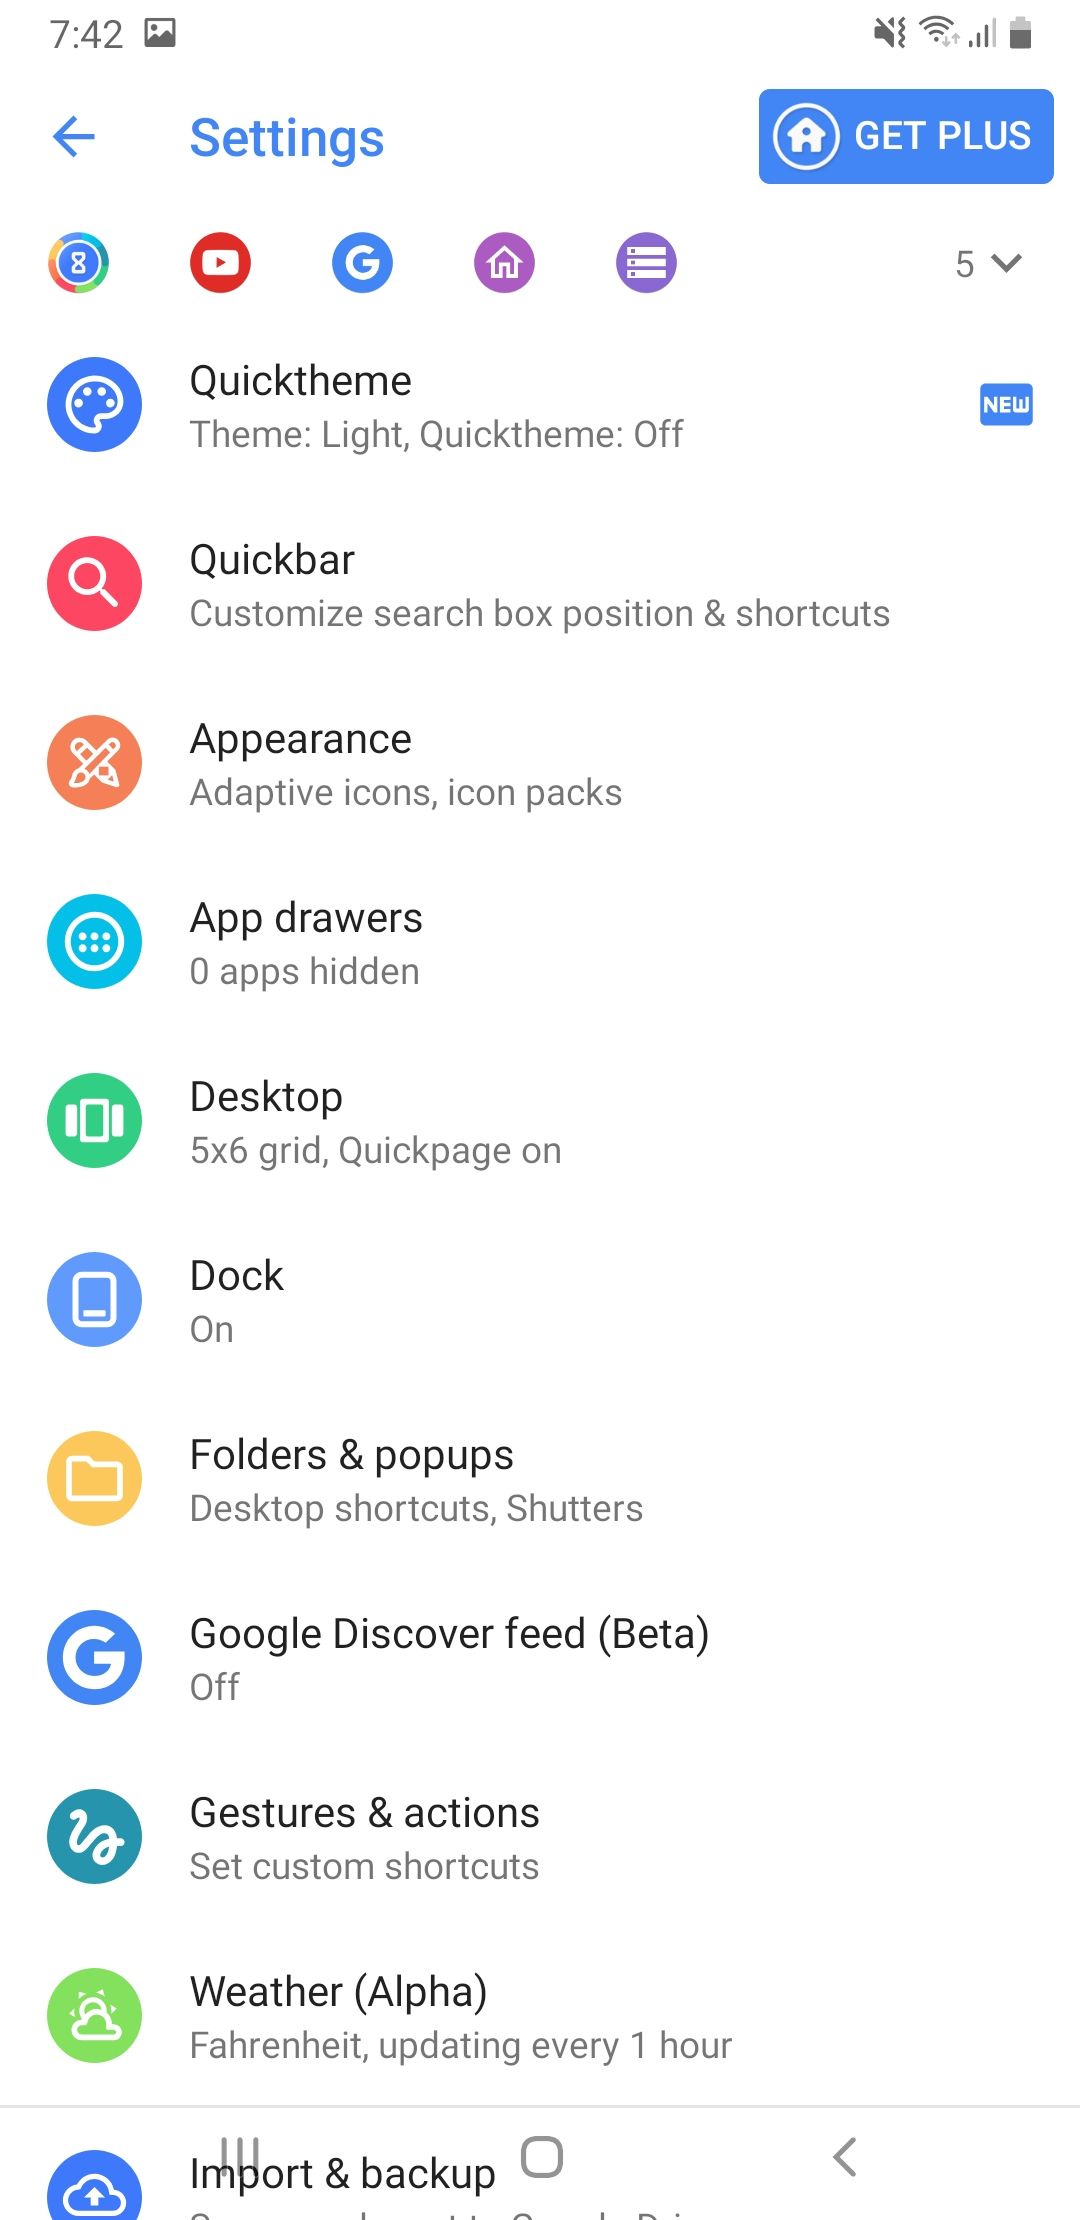
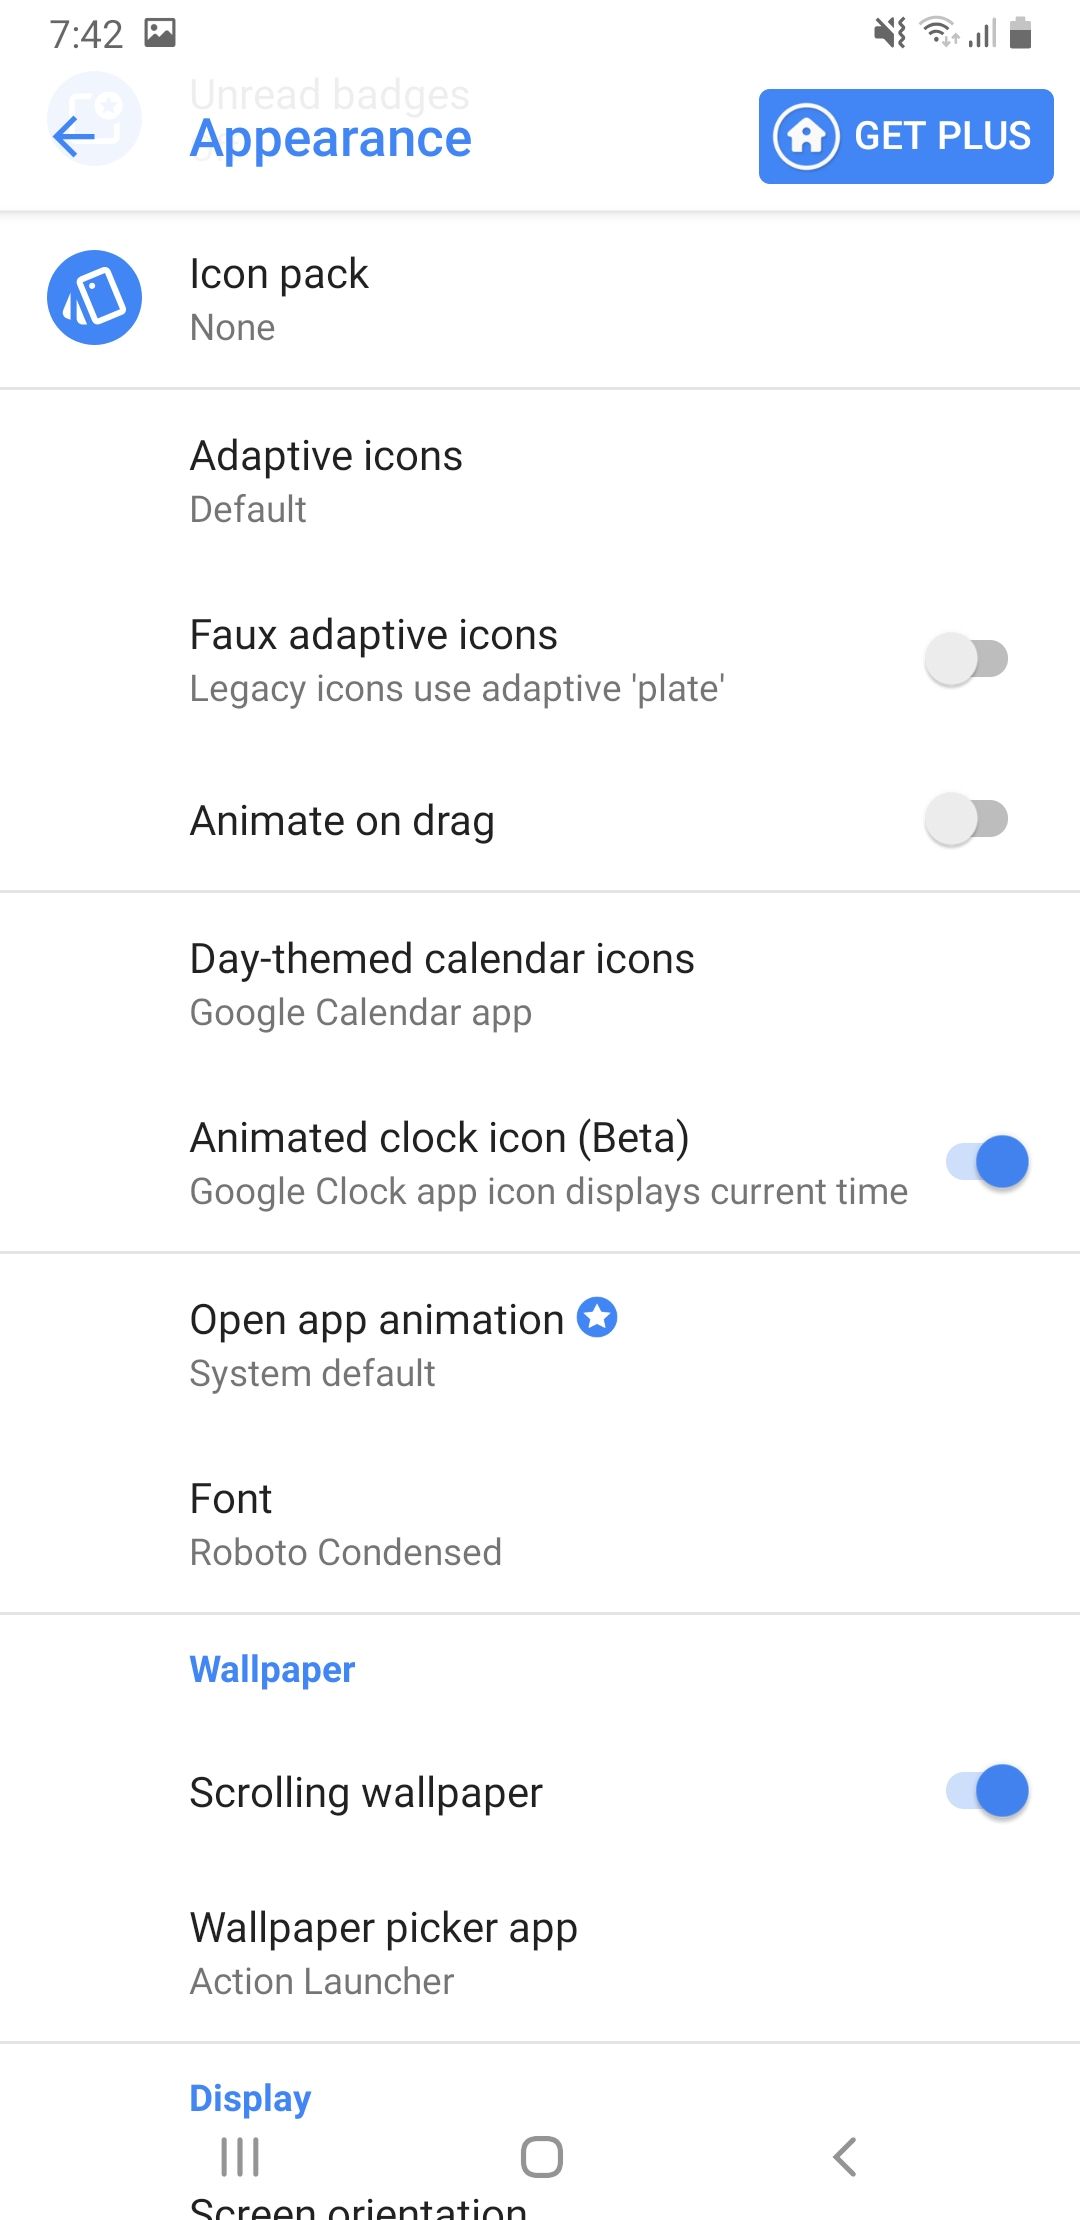
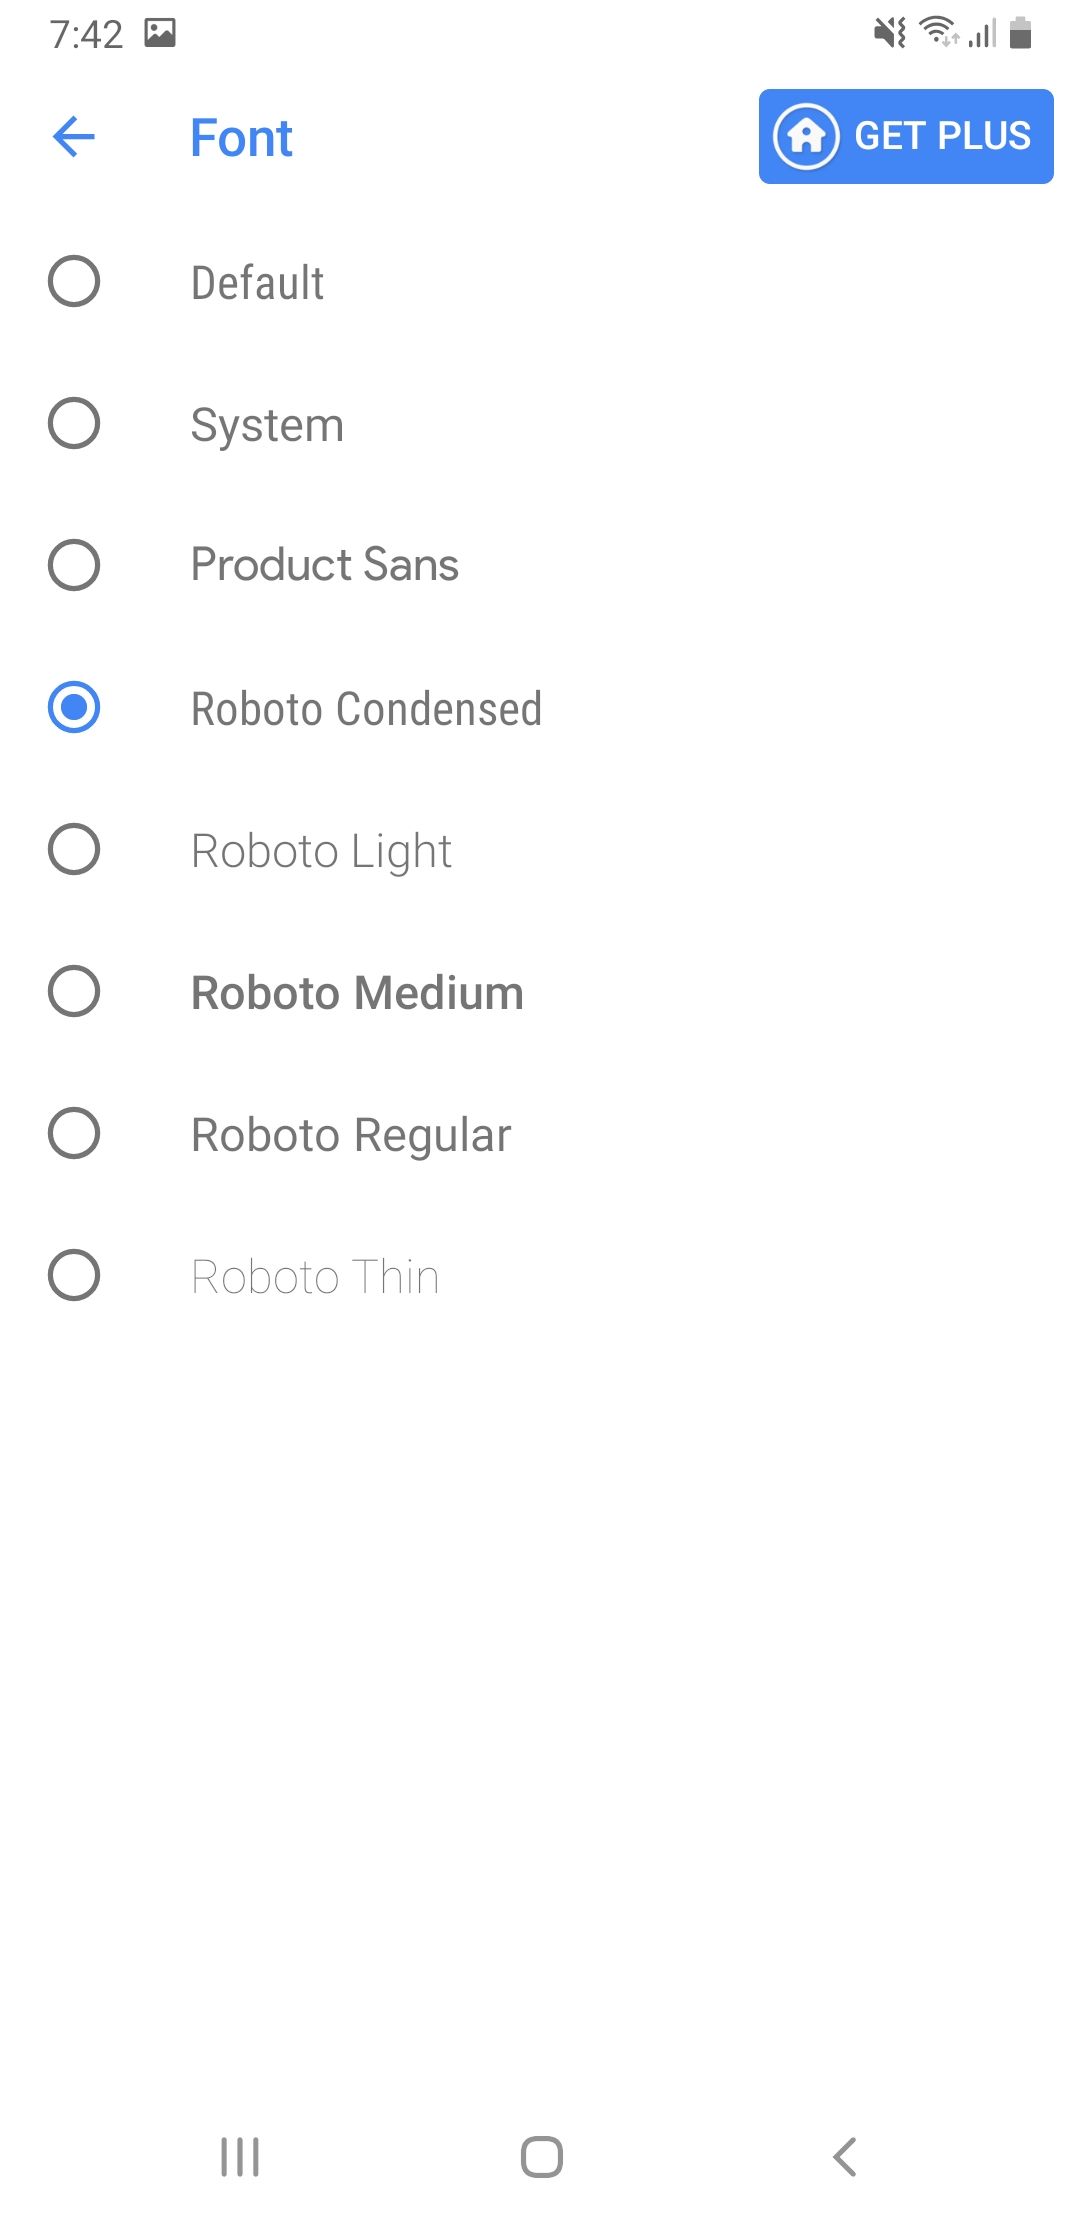
A great launcher that supports font customization is Action launcher. It is a free app which makes it even better. To use and customize fonts through action launcher, implement the following steps.
- Install Action Launcher on your phone.
- Go to home screen and set Action Launcher as default.
- Now, you will be seeing a Settings icon for Action launcher, open that.
- From the categories, select appearance and from there Fonts.
- You can select different fonts from here. Unfortunately, you can’t add on your on.
Apex Launcher
Apex launcher is feature packed and carries loads of functionality including custom fonts. However, the launcher is paid if you want to remove ads.
You can set various fonts for various things in apex launchers, here is how to do each.
Launcher itself
- Open up settings for Apex Launcher.
- Here, select Home Screen and then Layout and Style.
- Scroll down till you find Label Font, tap that.
- From resulting menu, select whatever font you like.
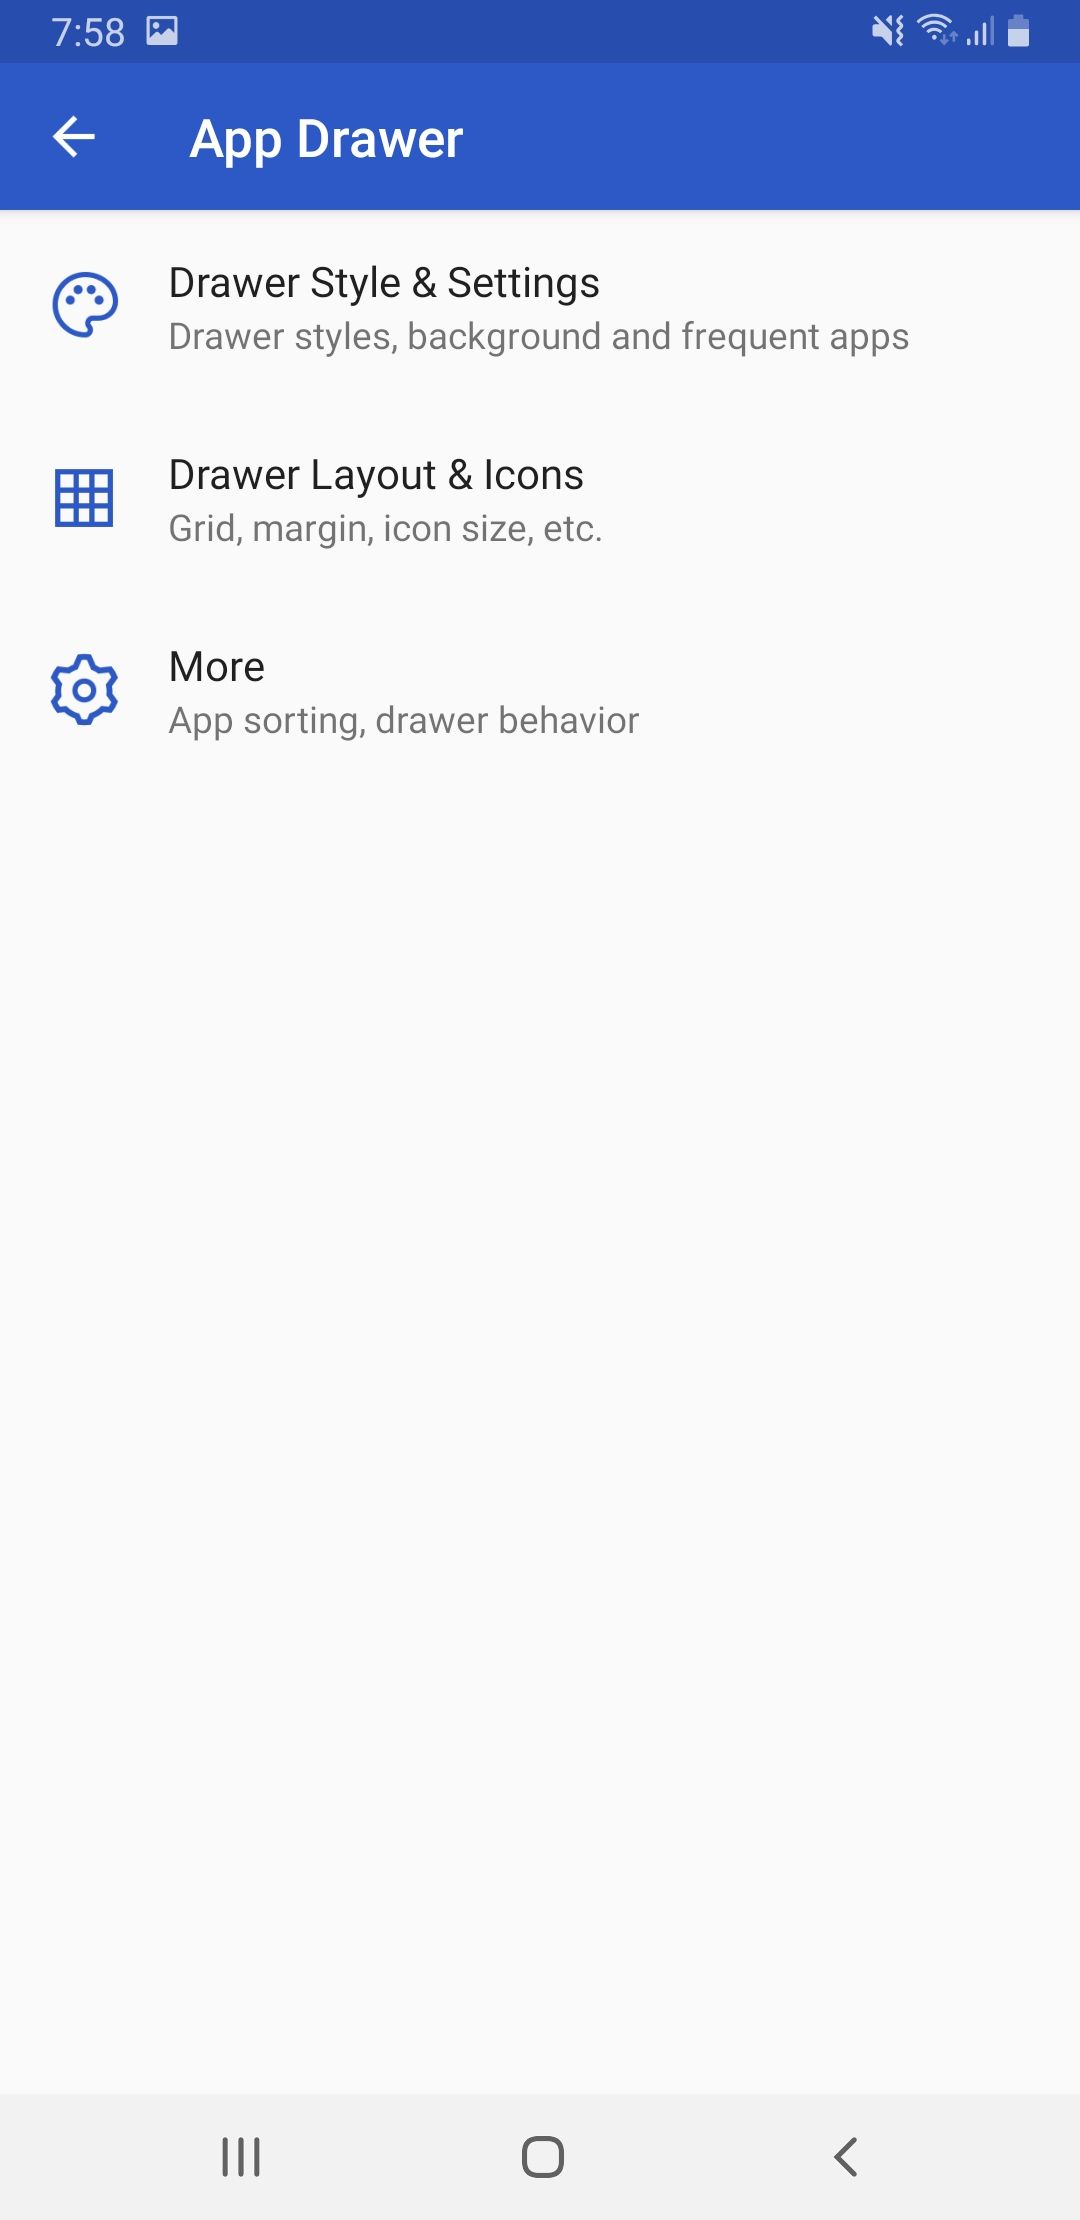
App Drawer
- Open up settings for Apex Launcher.
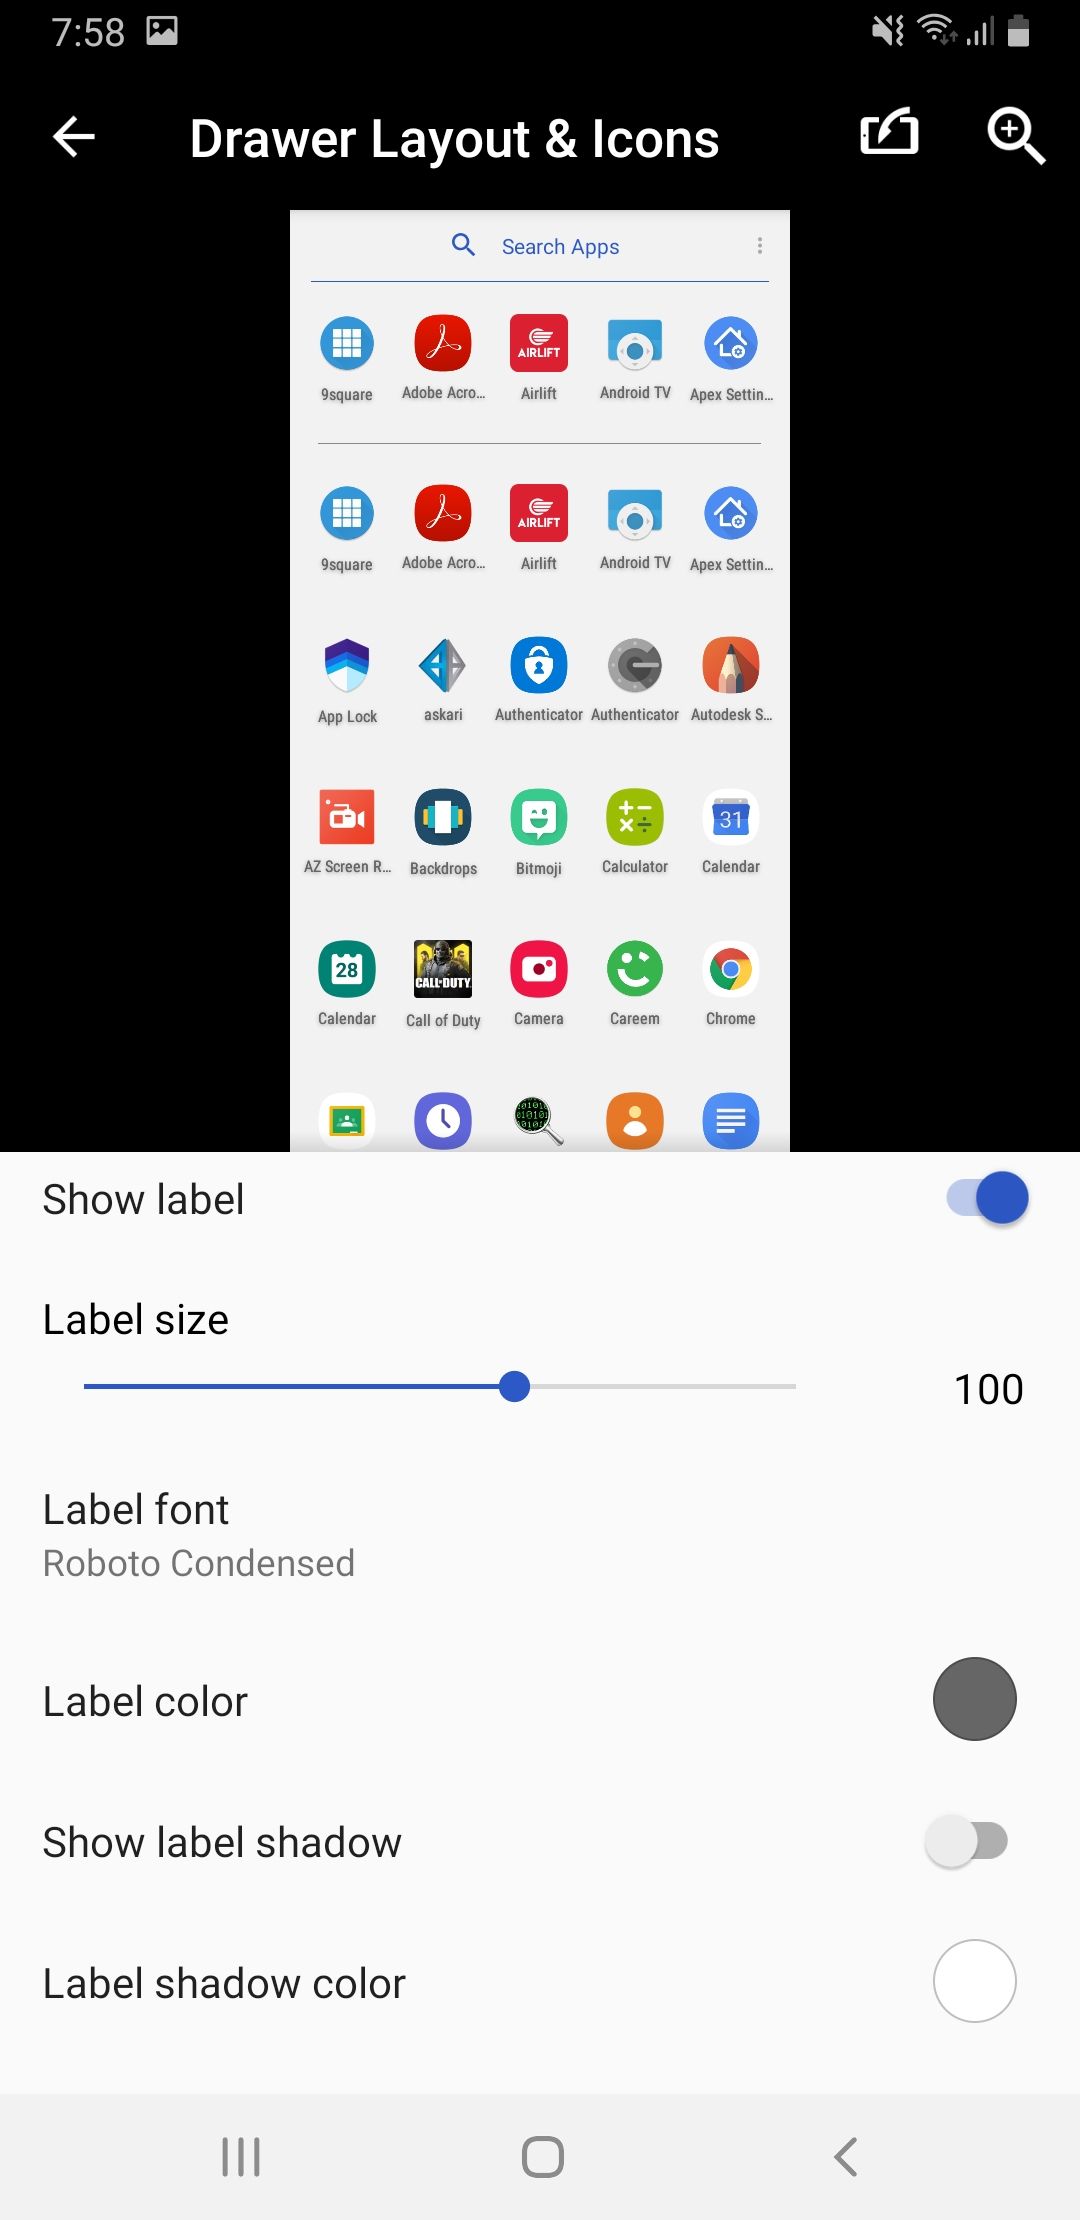
- Here, select App Drawer and then Layout and Style.
- Scroll down till you find Label Font, tap that.
- From resulting menu, select whatever font you like.
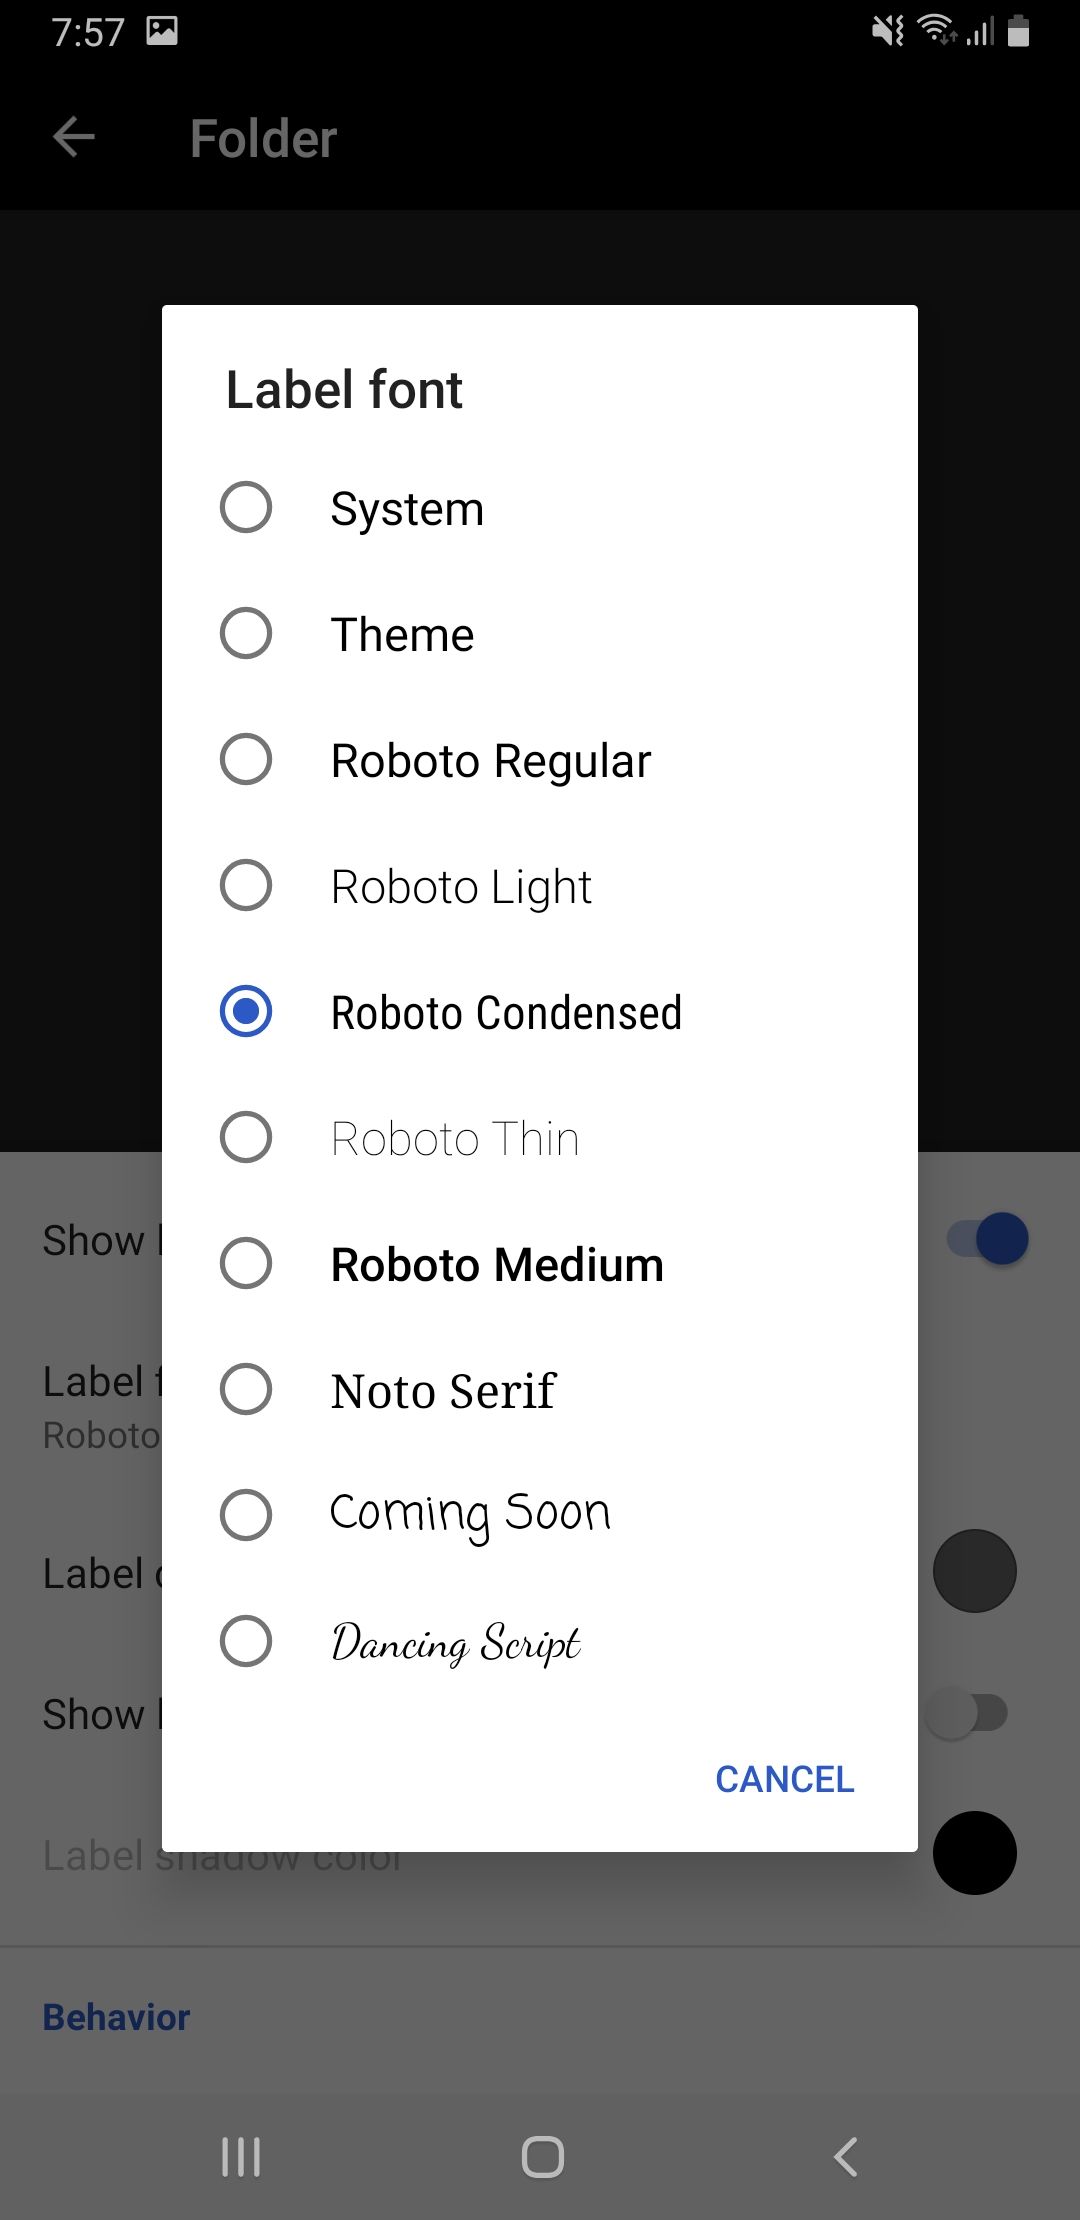
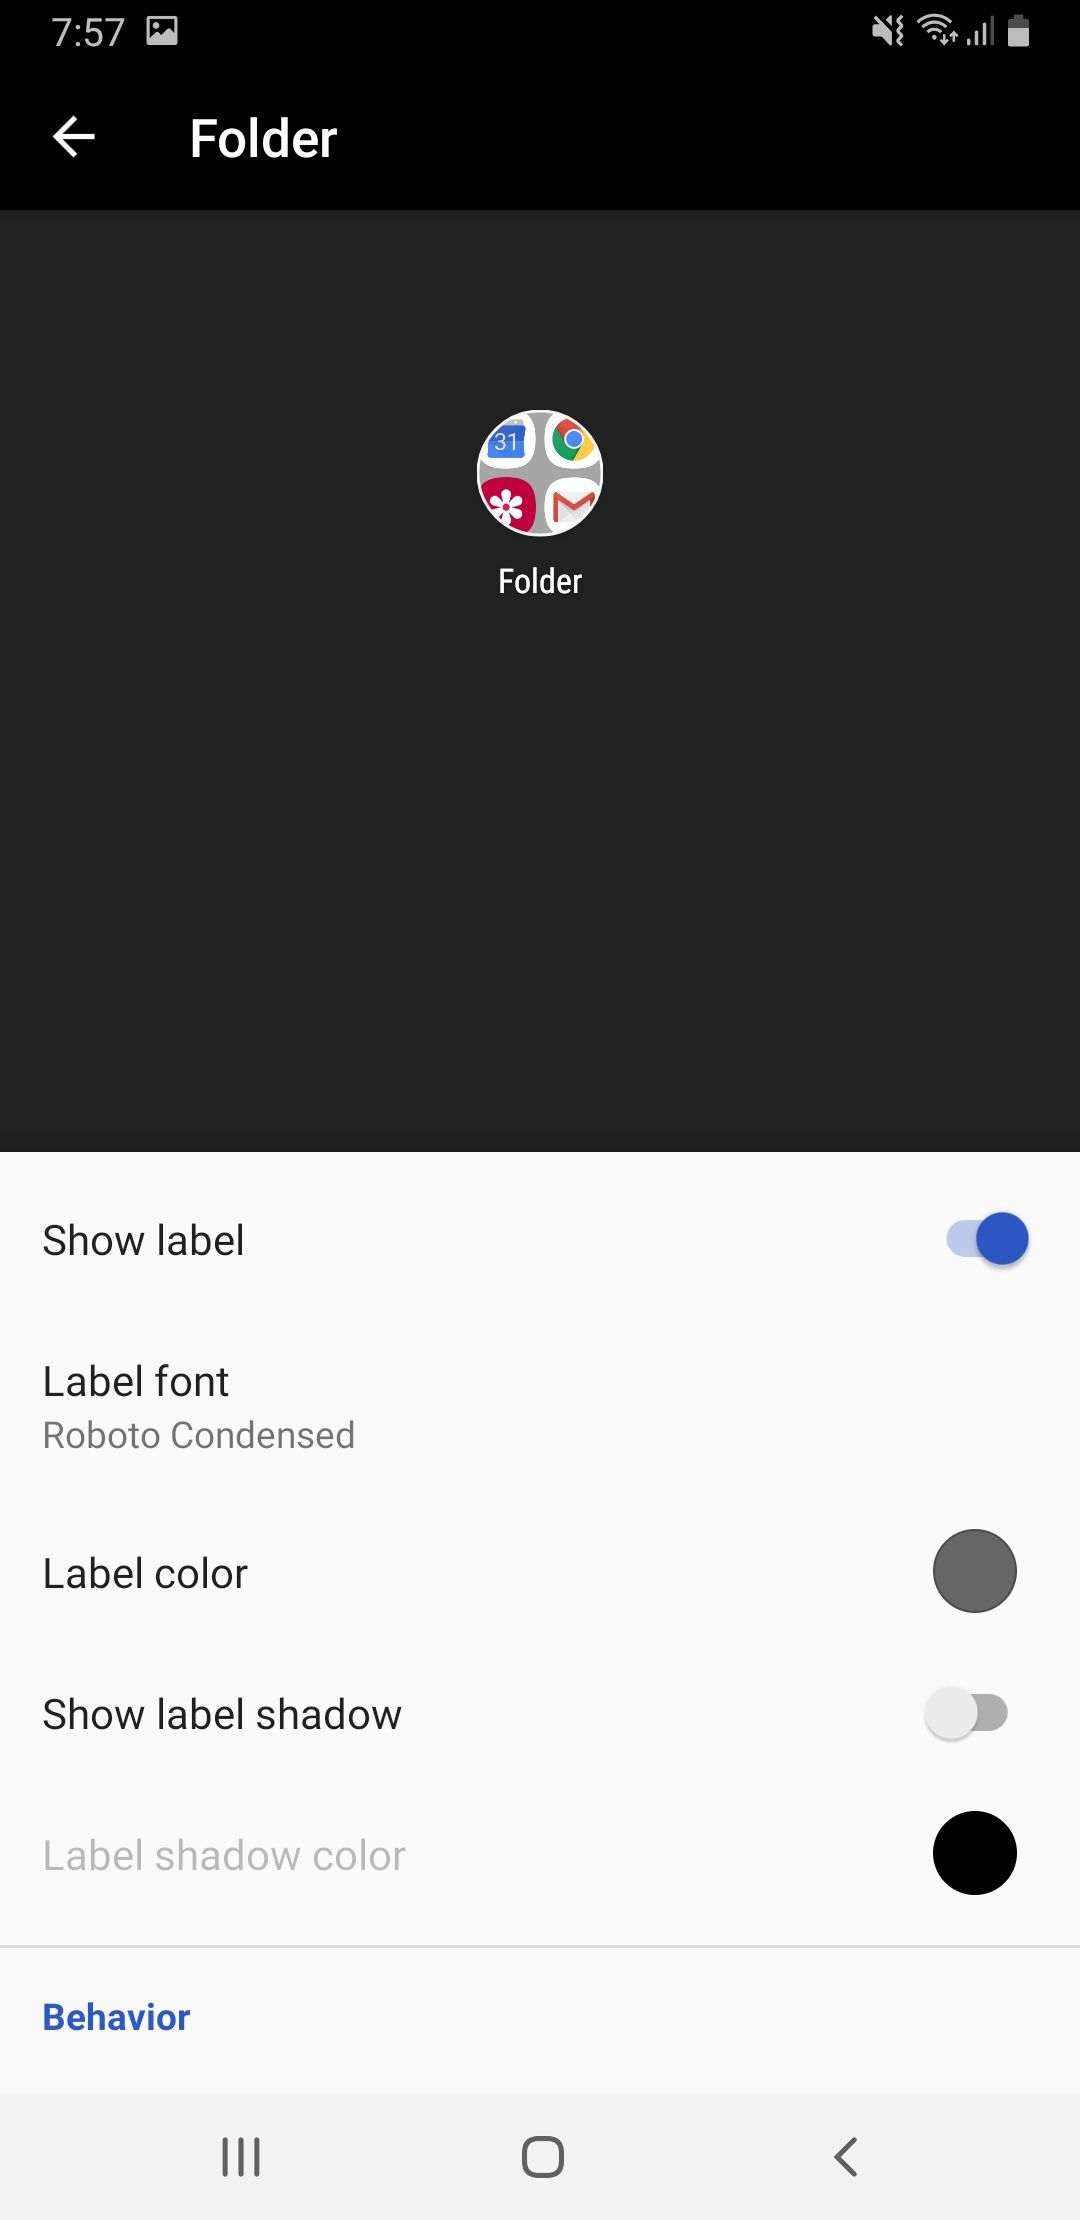
Folder Labels
- Open up settings for Apex Launcher.
- Here, select Folder and then Layout and Style.
- Scroll down till you find Label Font, tap that.
- From resulting menu, select whatever font you like.


GO Launcher
The best thing about GO launcher is the fact that you can load your own TTF or OTF files hence allowing you to download fonts from any website and installing it on your phone.
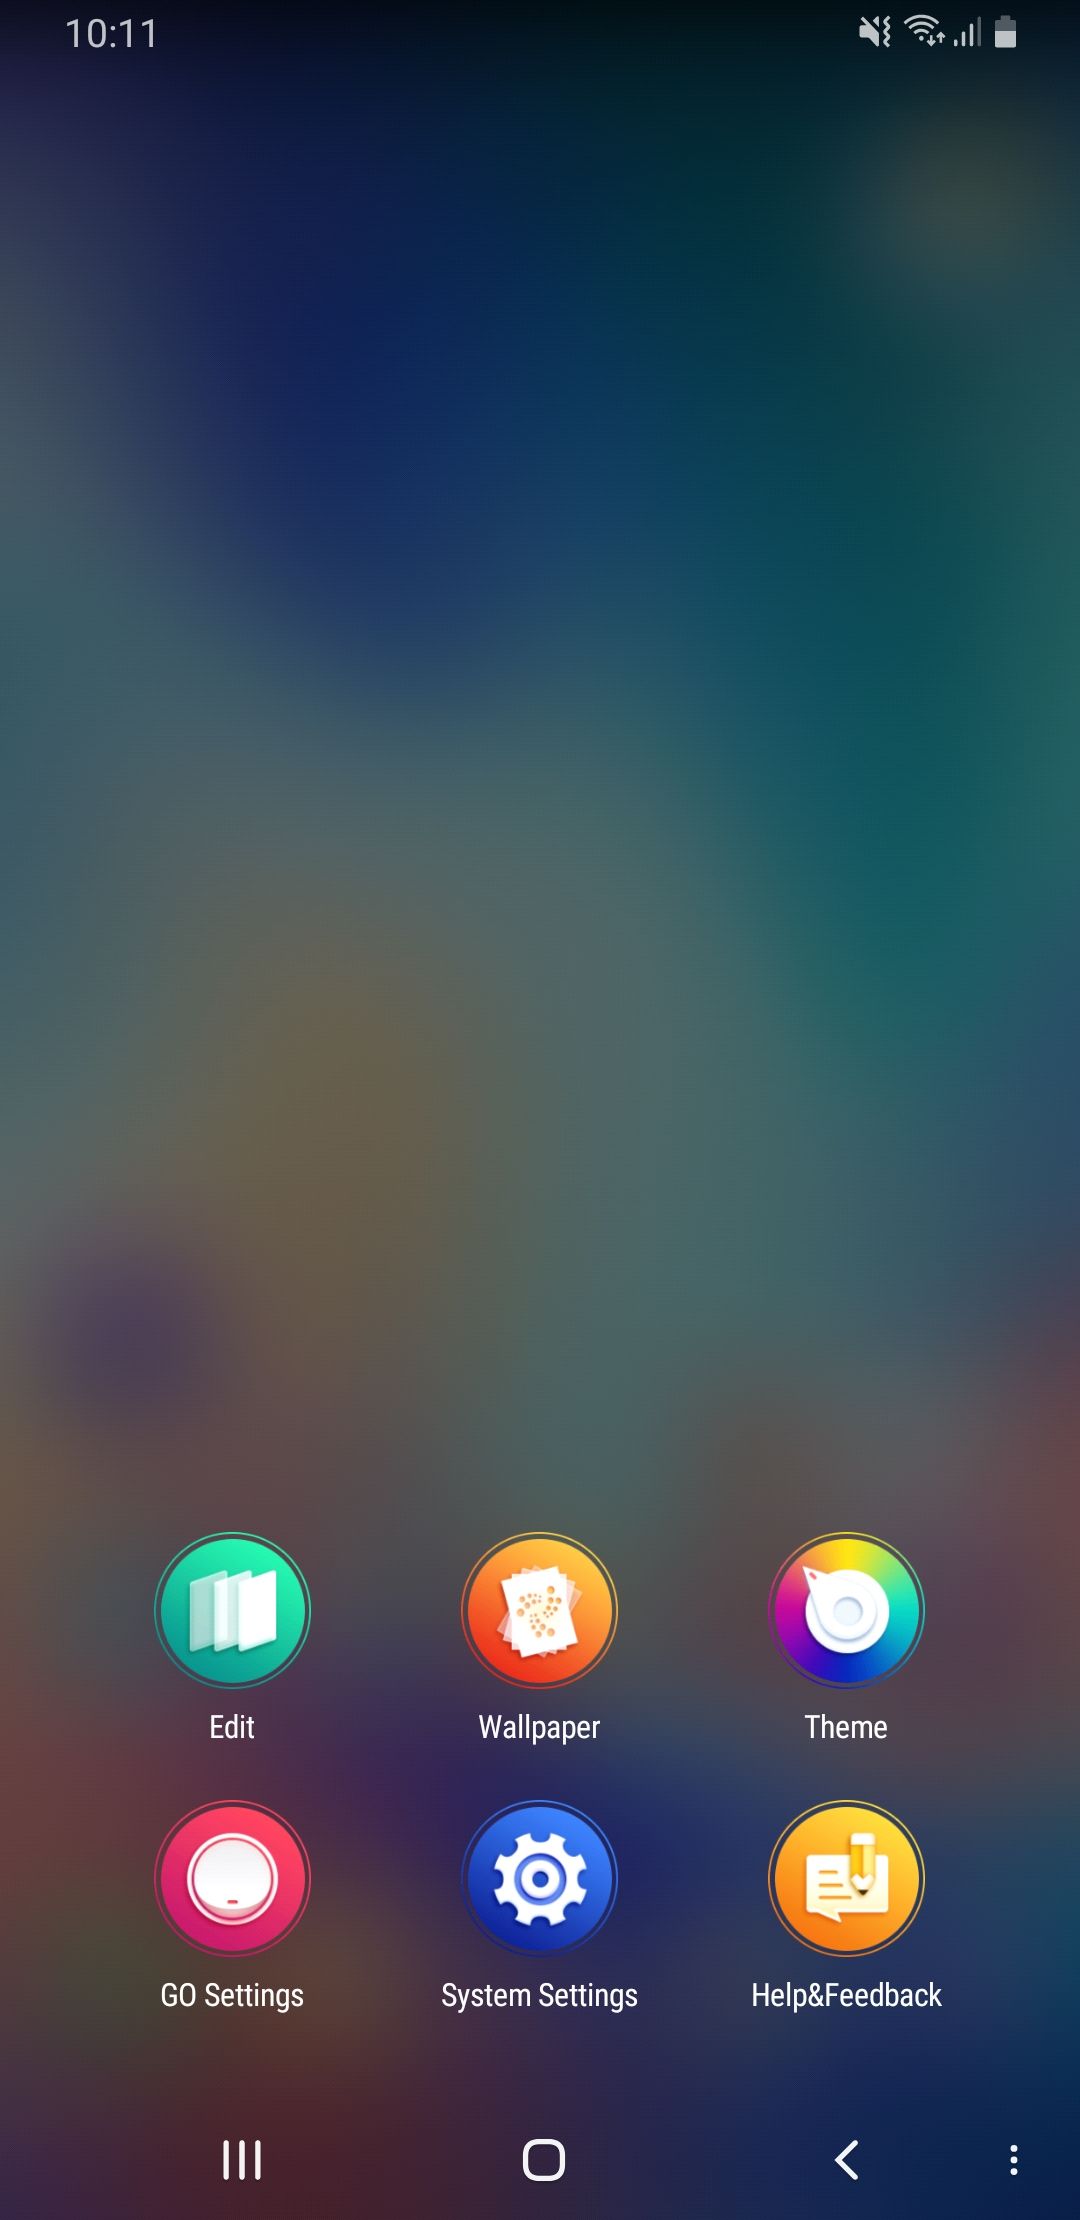
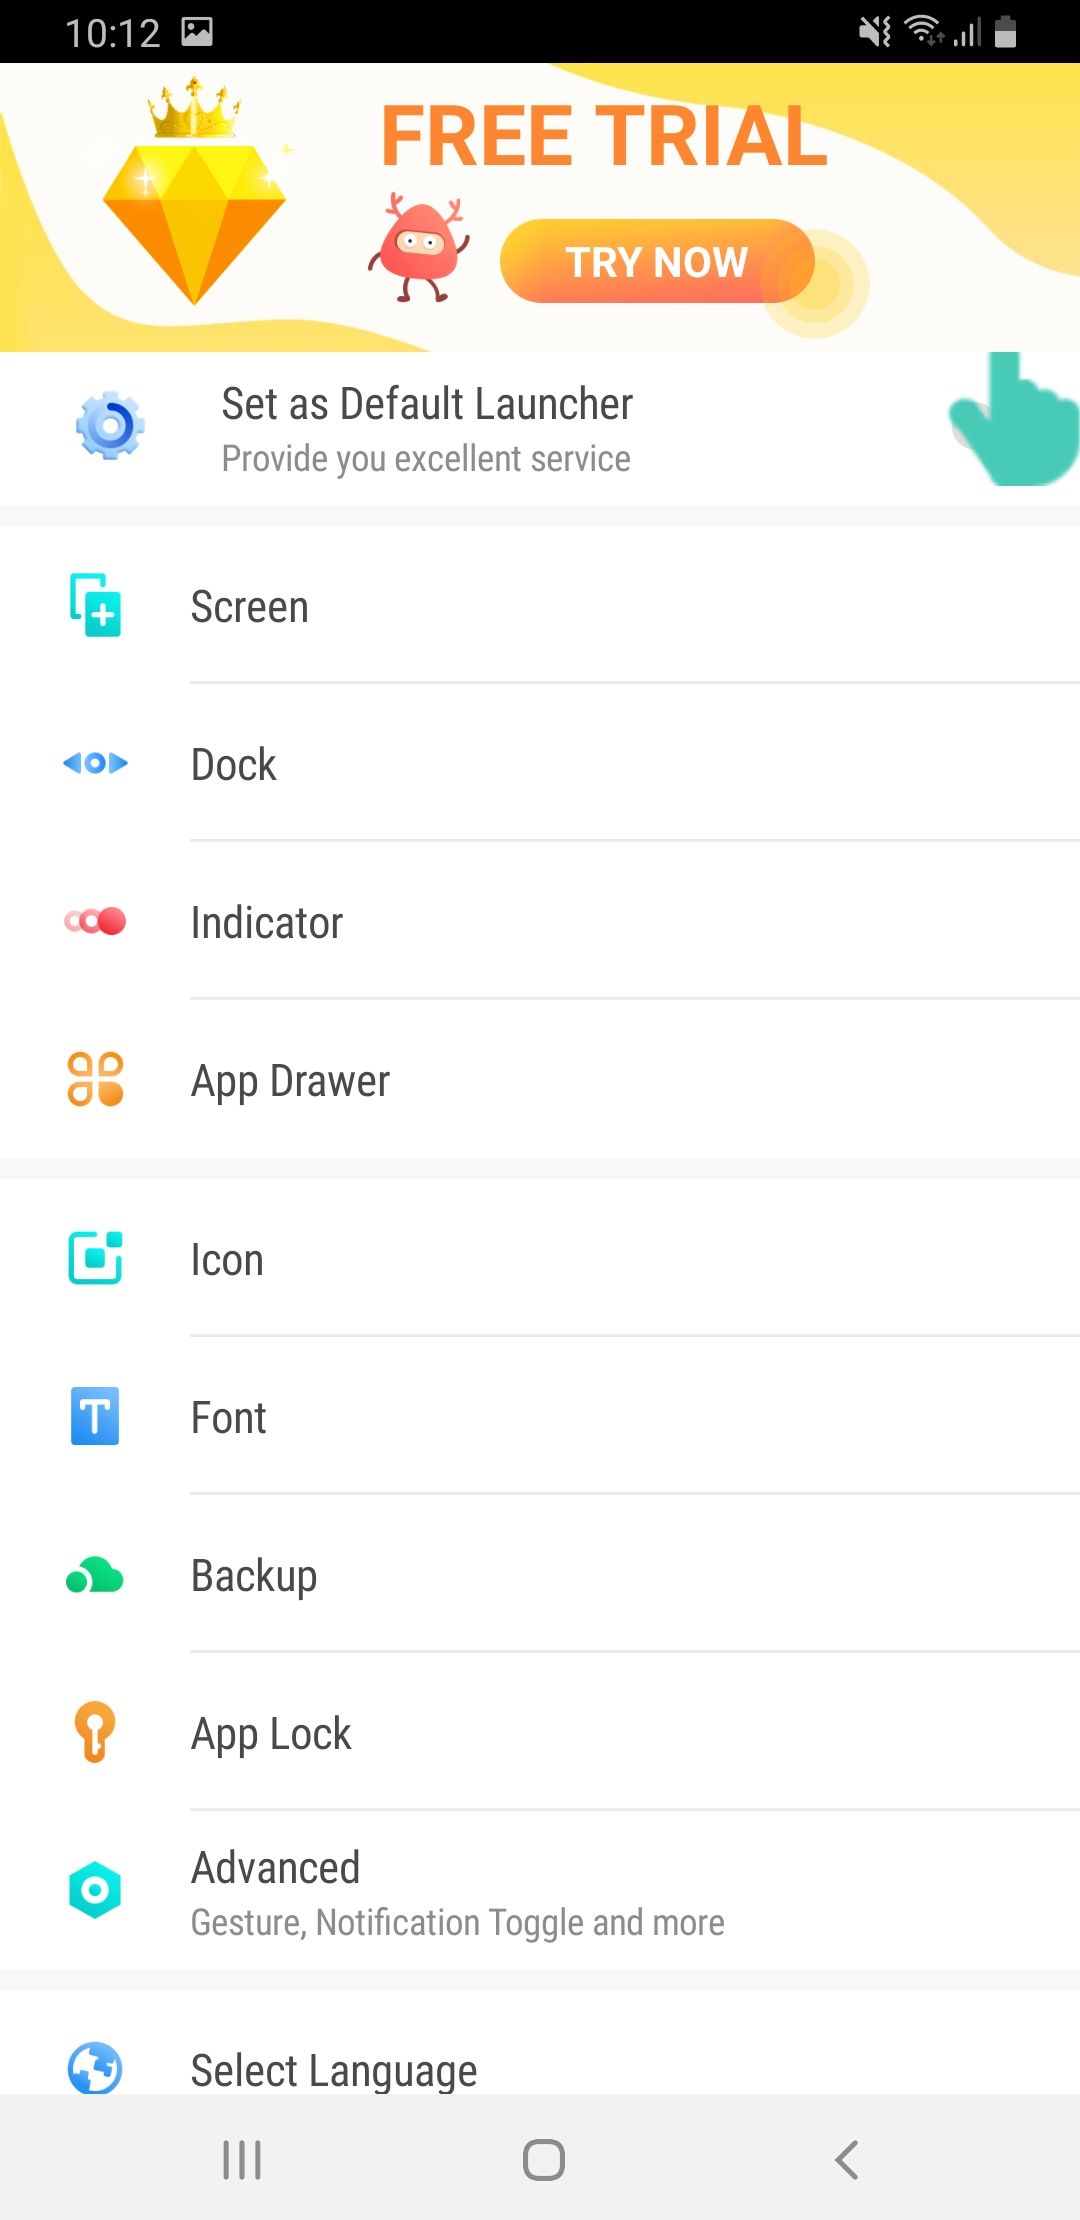
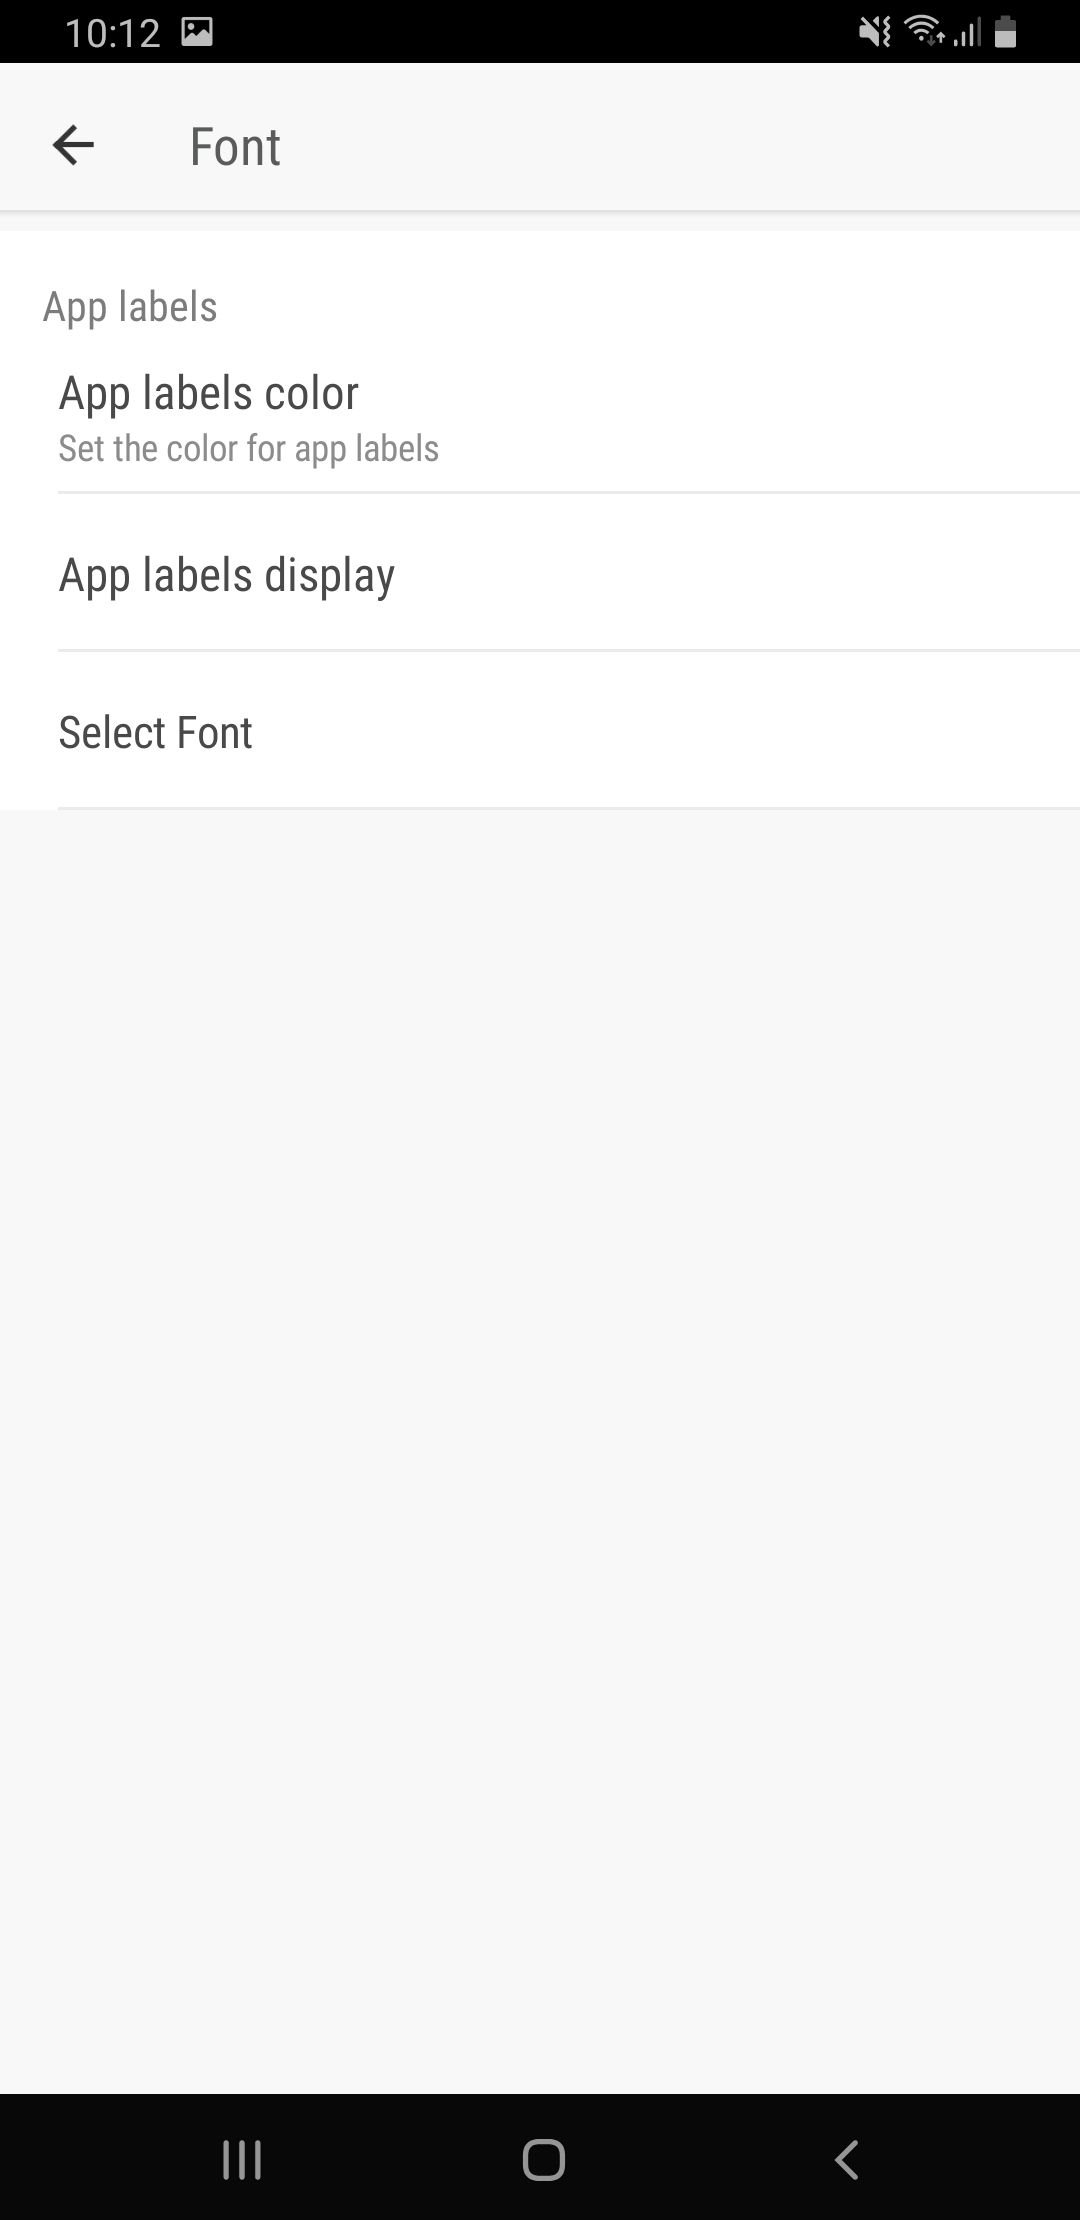
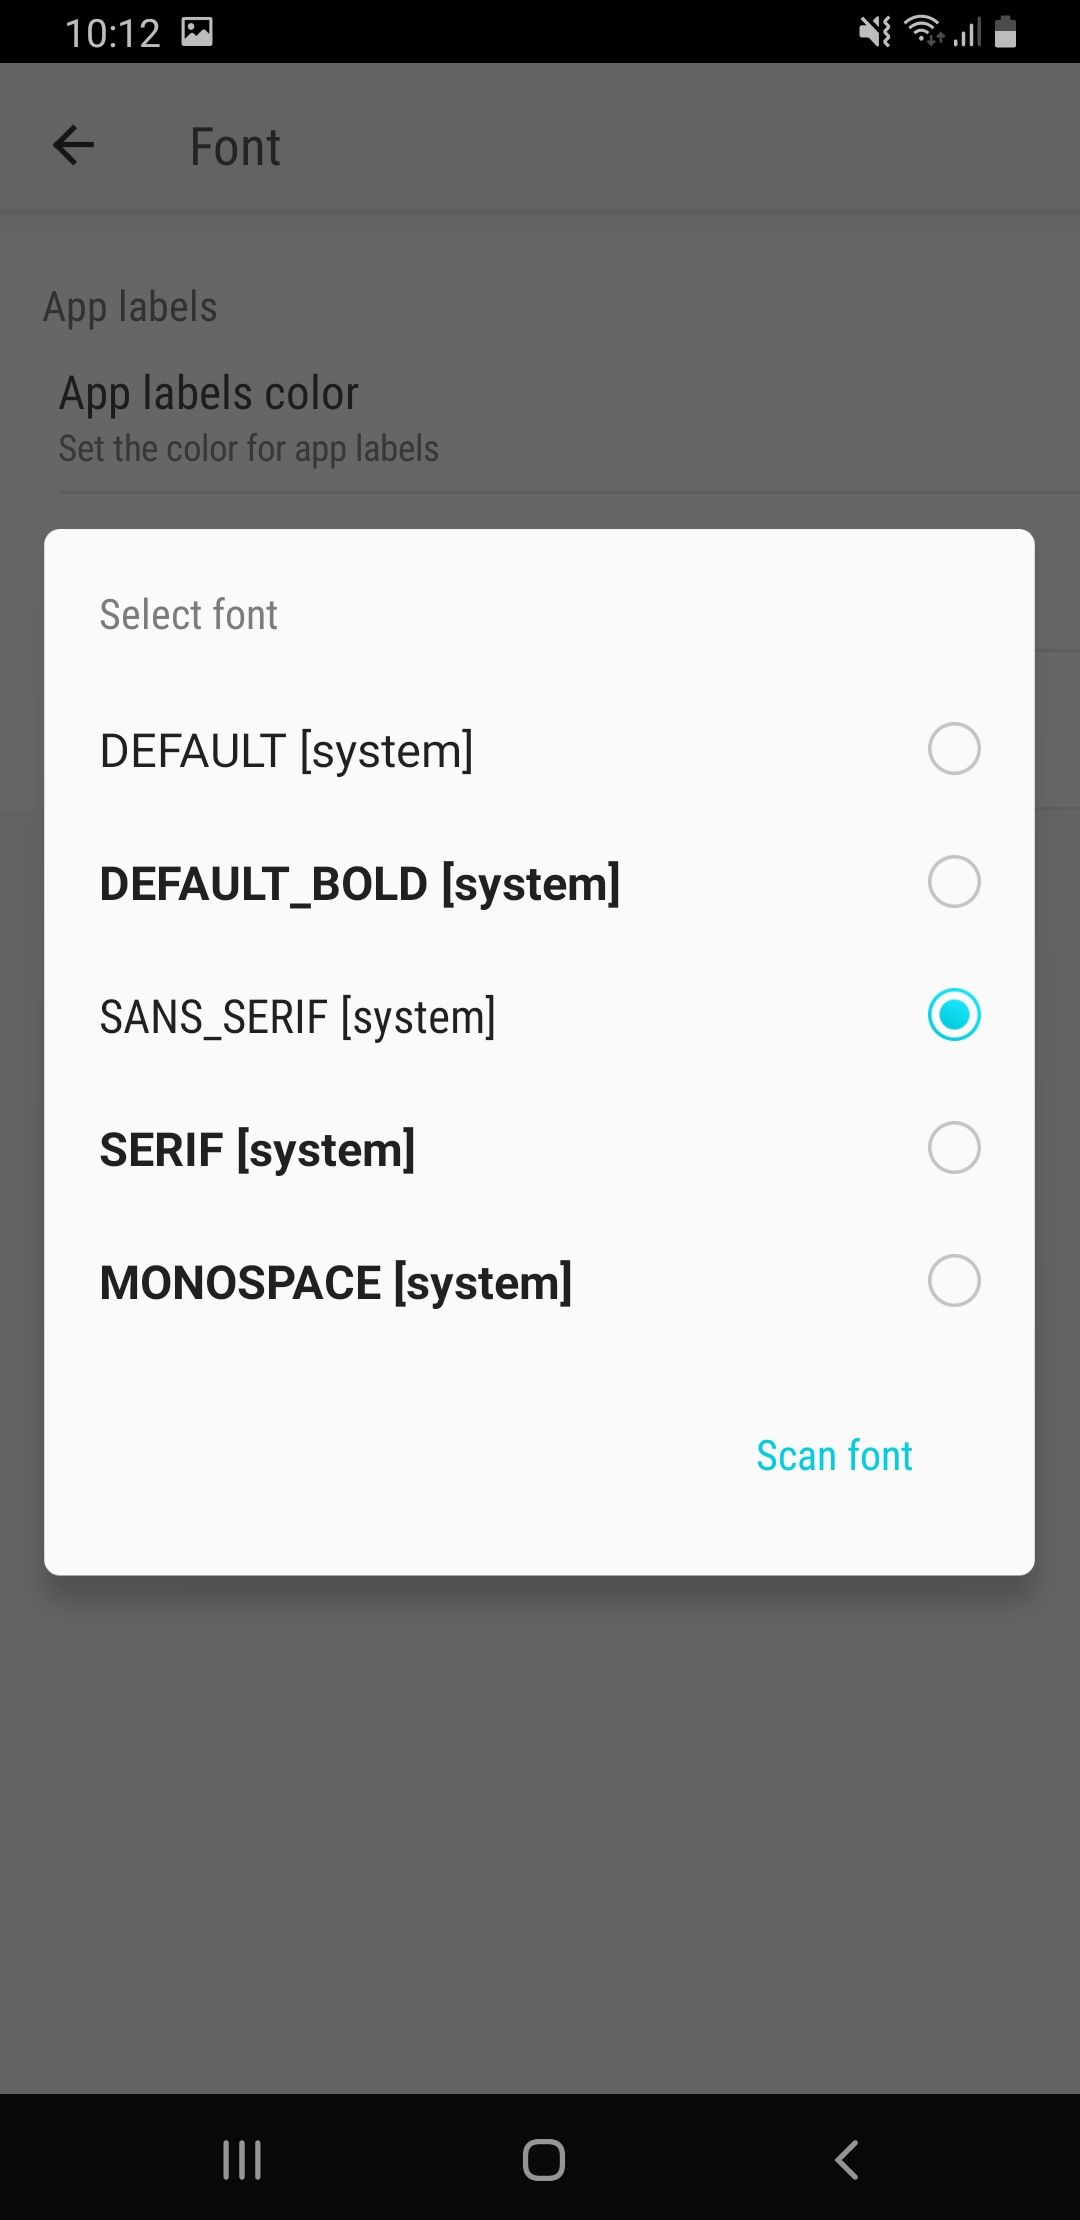
- First download the desired font in TTF or OTF file format to your phone.
- Install GO Launcher, enable it and then hold down your finger on the home screen.
- Select GO Settings.
- Then tap on Font and Select Font.
- You can choose from the given fonts or scan font to install your own.
Smart Launcher
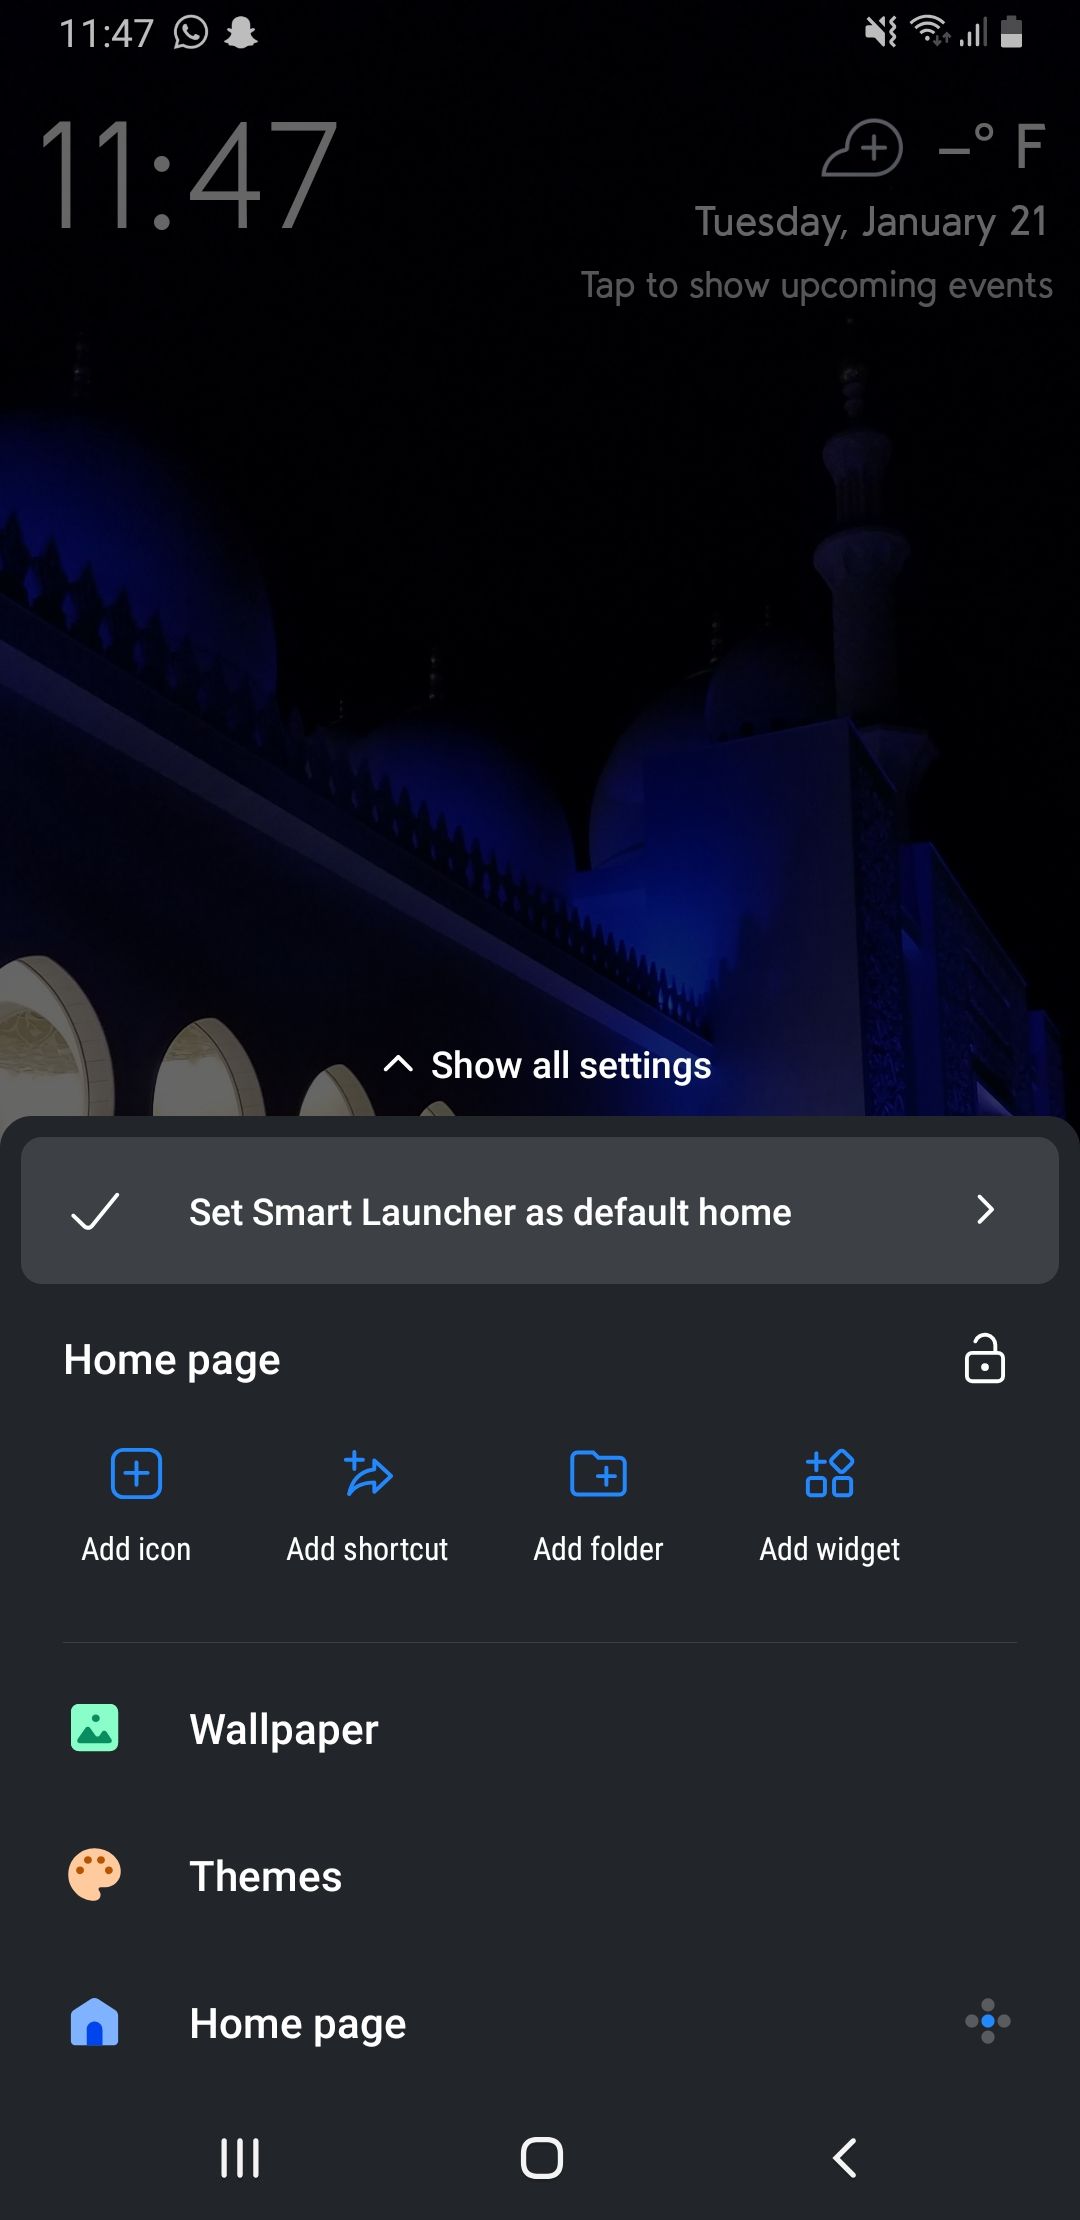
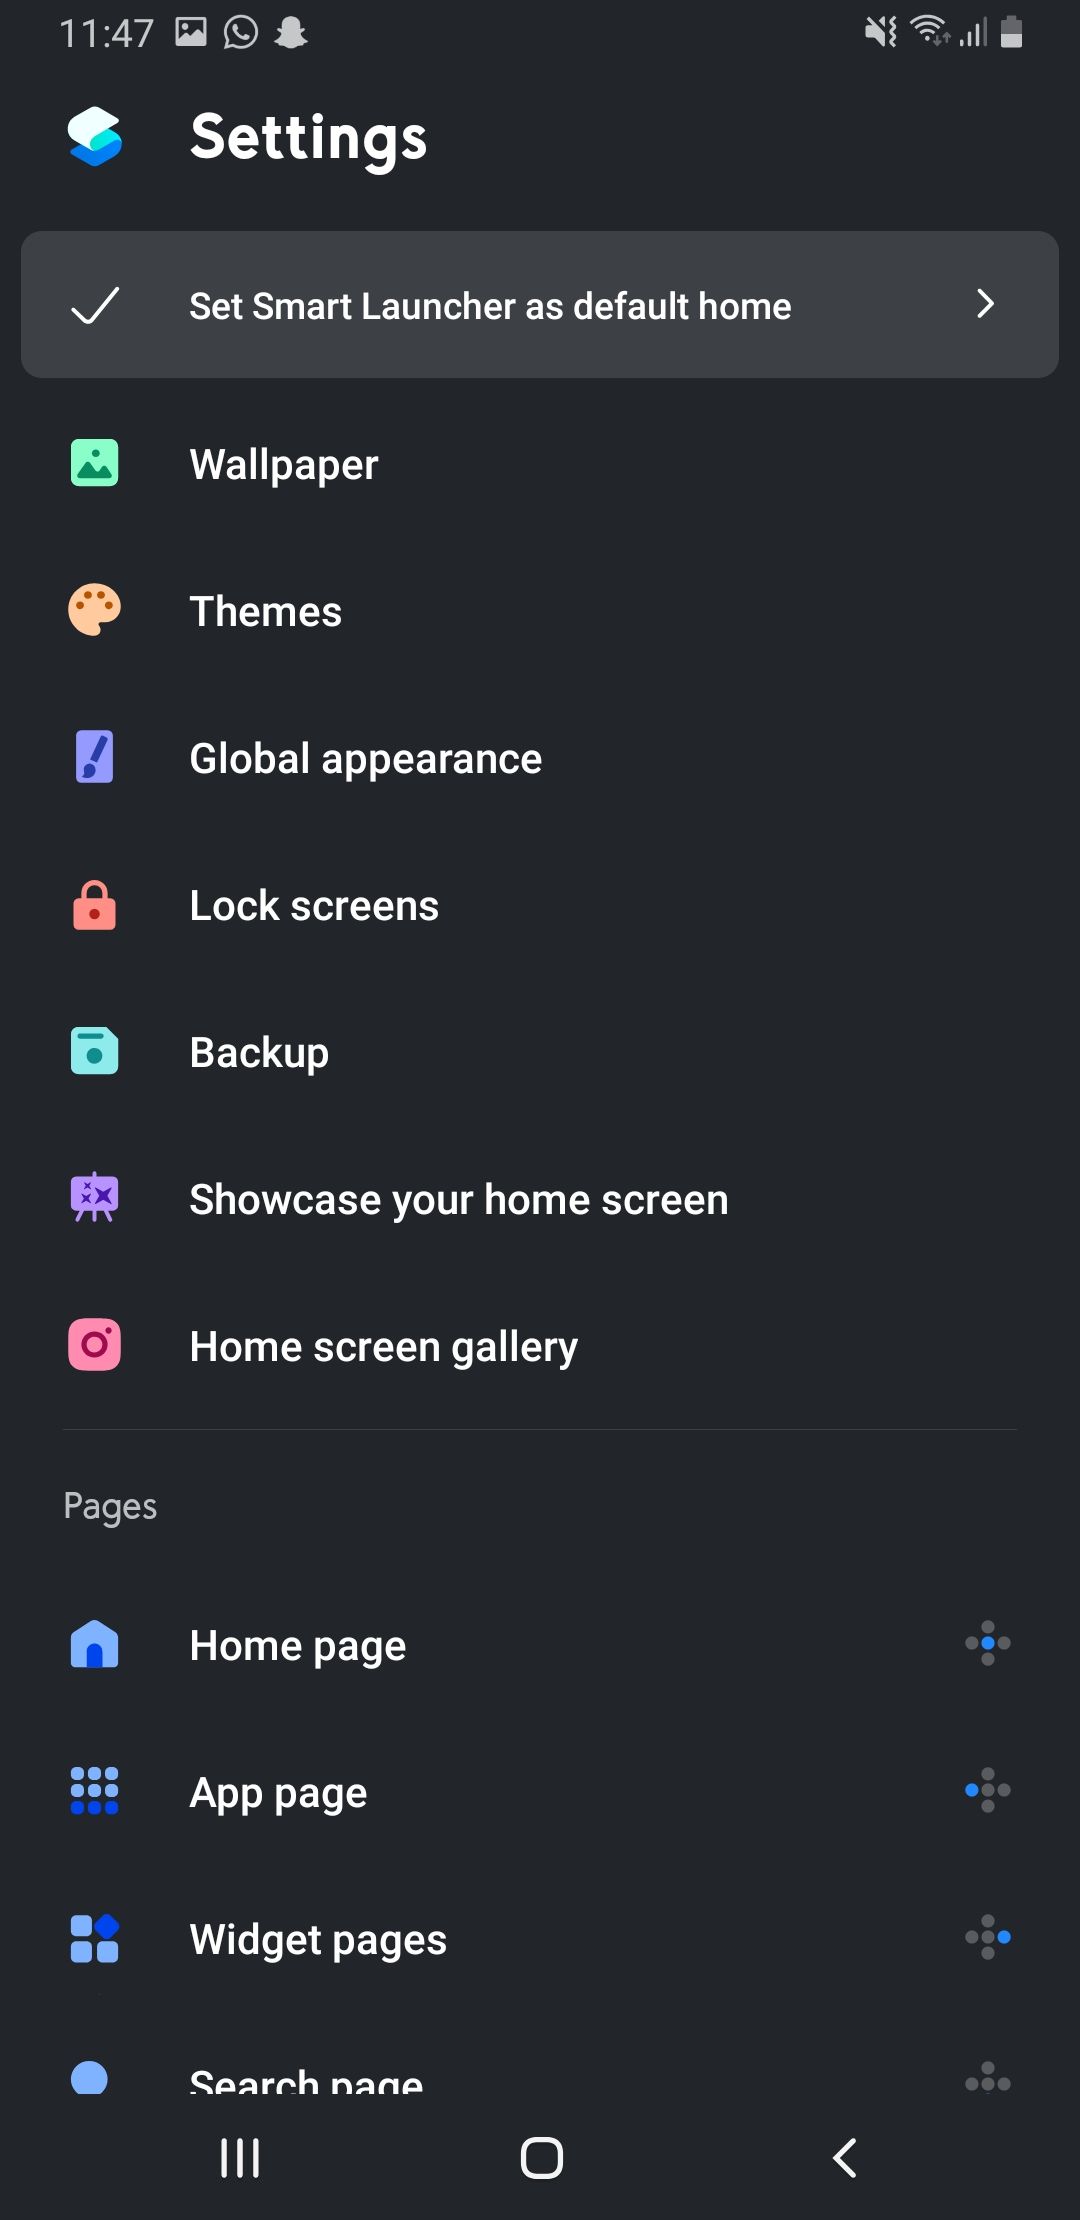
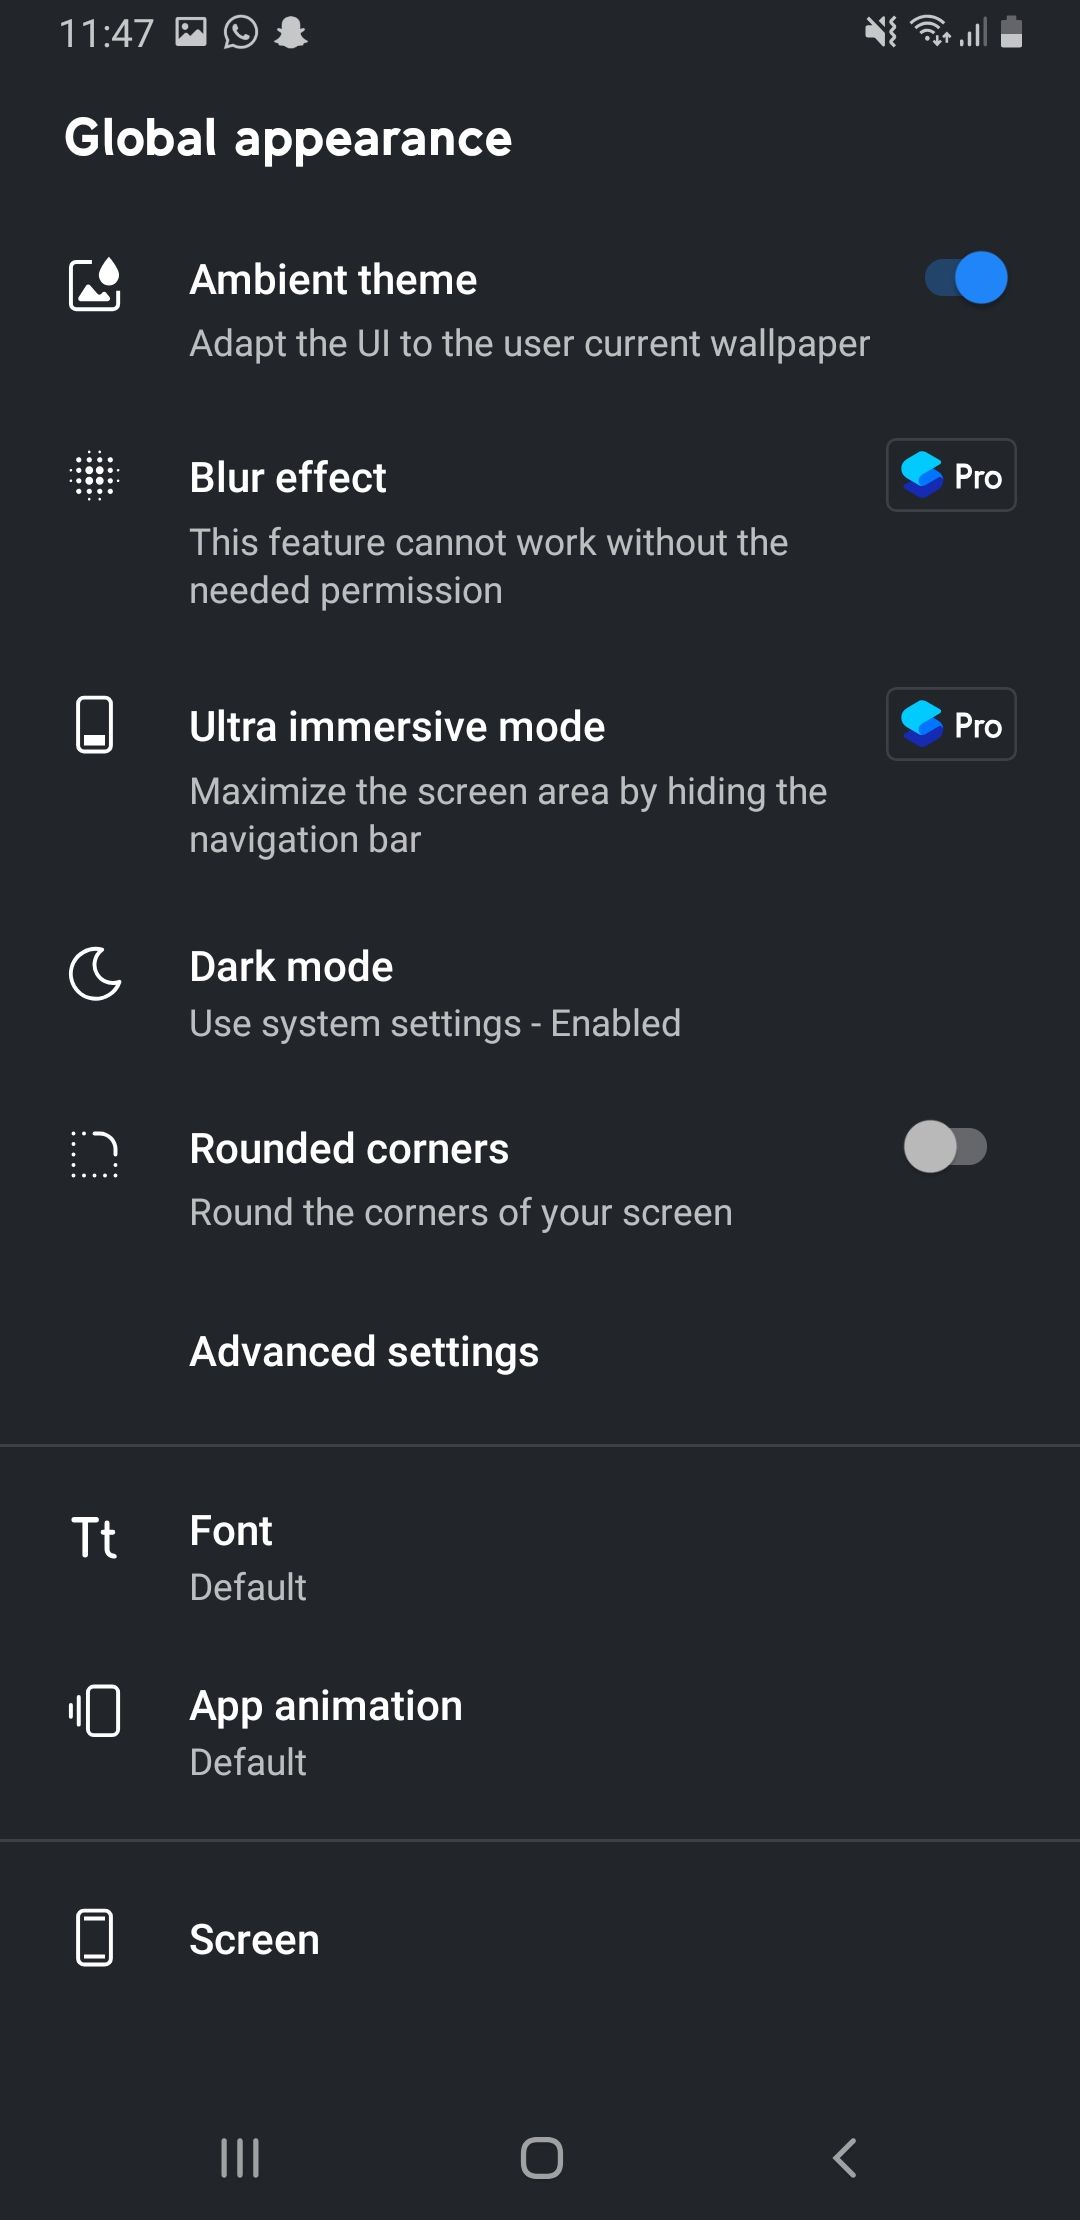
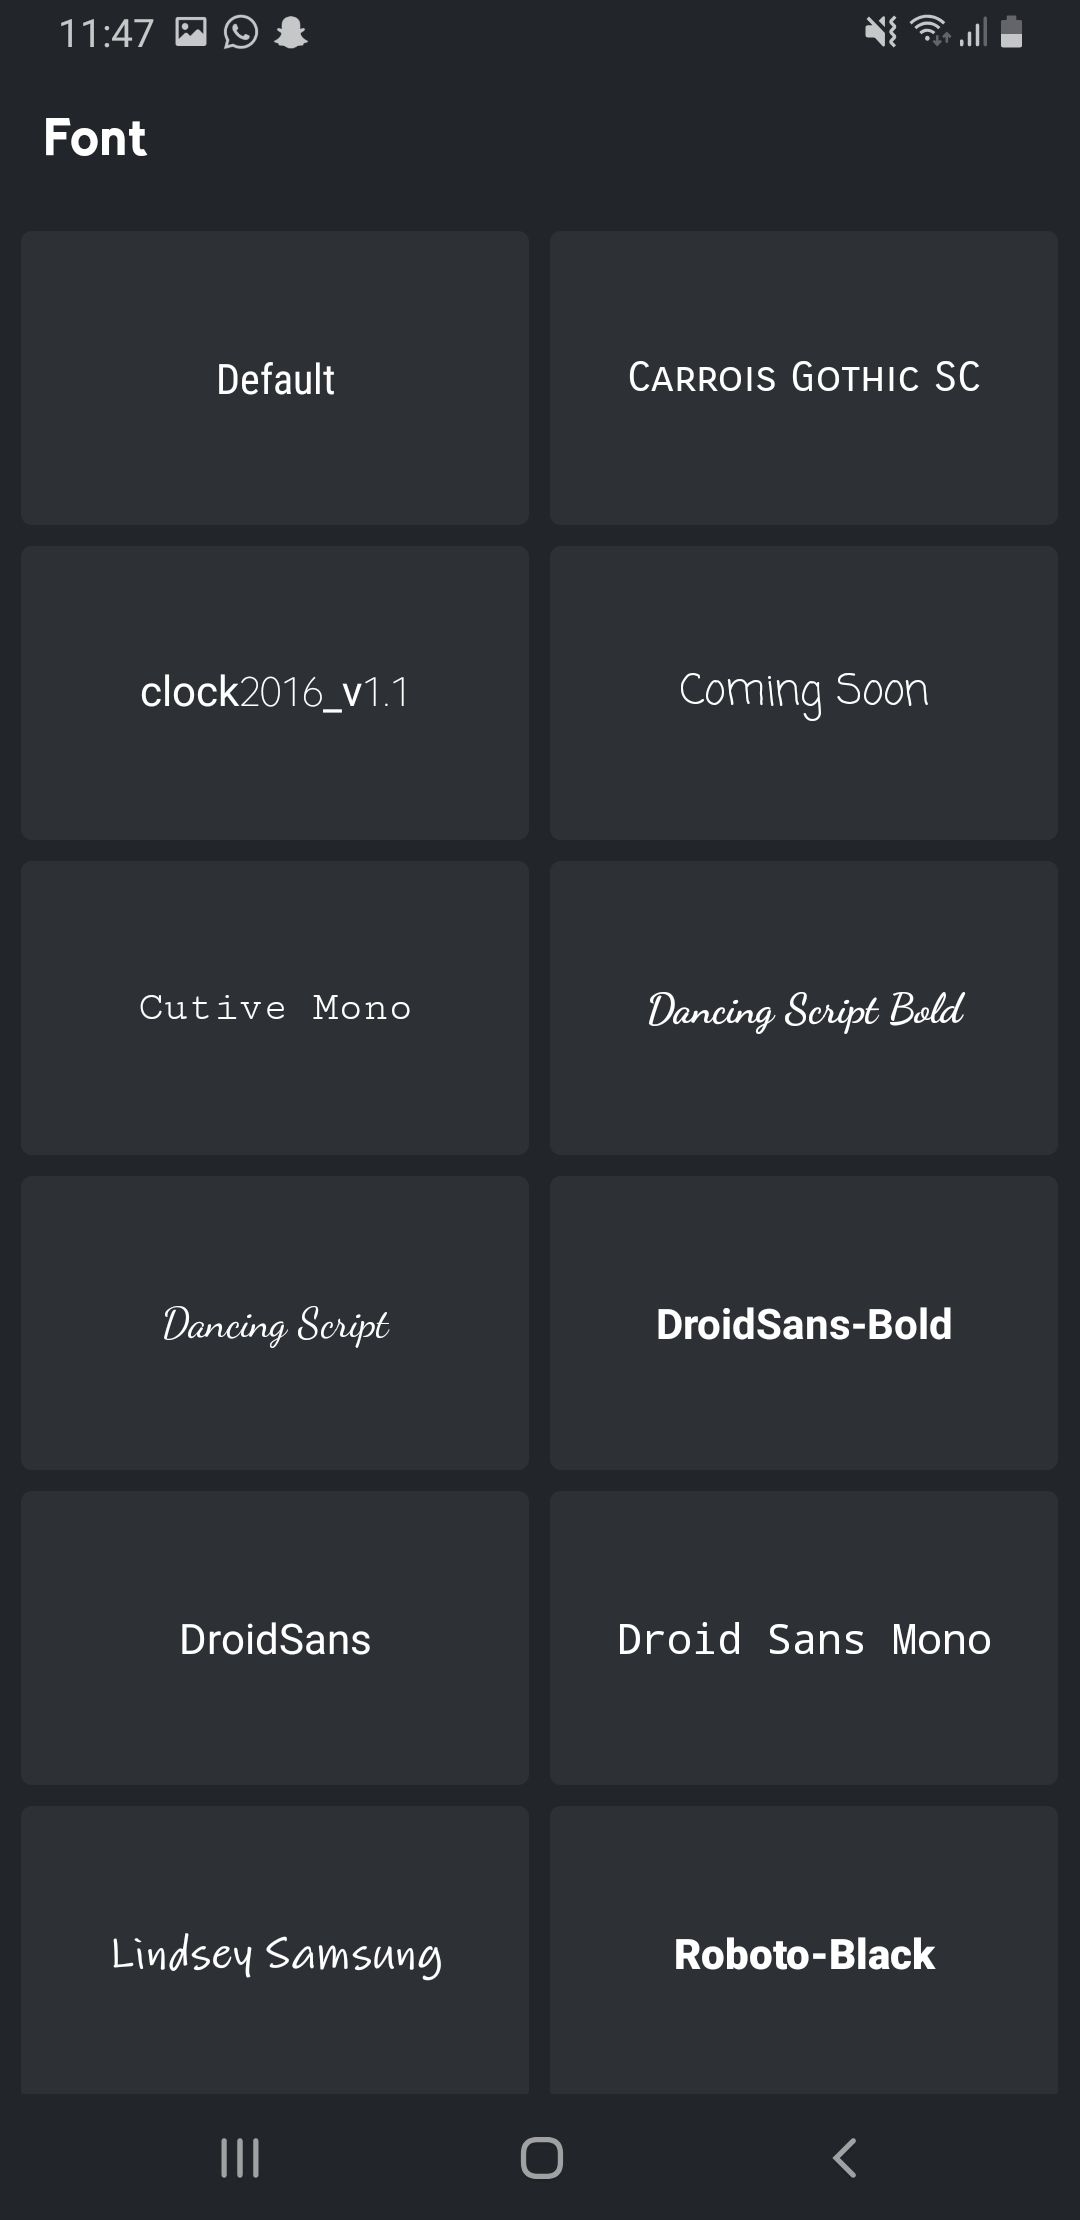
Another good option you can try is Smart Launcher. It comes with a wide variety of font options to choose from.
- After installing and enabling Smart Launcher, go to home screen, long press anywhere and then tap on Show All Settings.
- From the list, tap on Global appearance.
- Now, here tap on Font.
- Finally, choose the font you want to apply.
Method 2: Install Fonts on Android with iFont App
There is this singular app called iFonts which helps users to apply custom fonts on their phones. Through the app, you don’t need to use any launcher and it also changes the font completely within the OS. It supports both rooted as well as non-rooted phones.
How to Install Fonts on Non-Rooted Android Phones
If you aren’t running root, here are the steps to utilize iFont. Compatibility wise, our Samsung One UI phone wasn’t able to work with this but you will hopefully have luck with others.
- First, make sure you have Unknown sources enabled in Settings. You can do so by going to Settings and then Security.
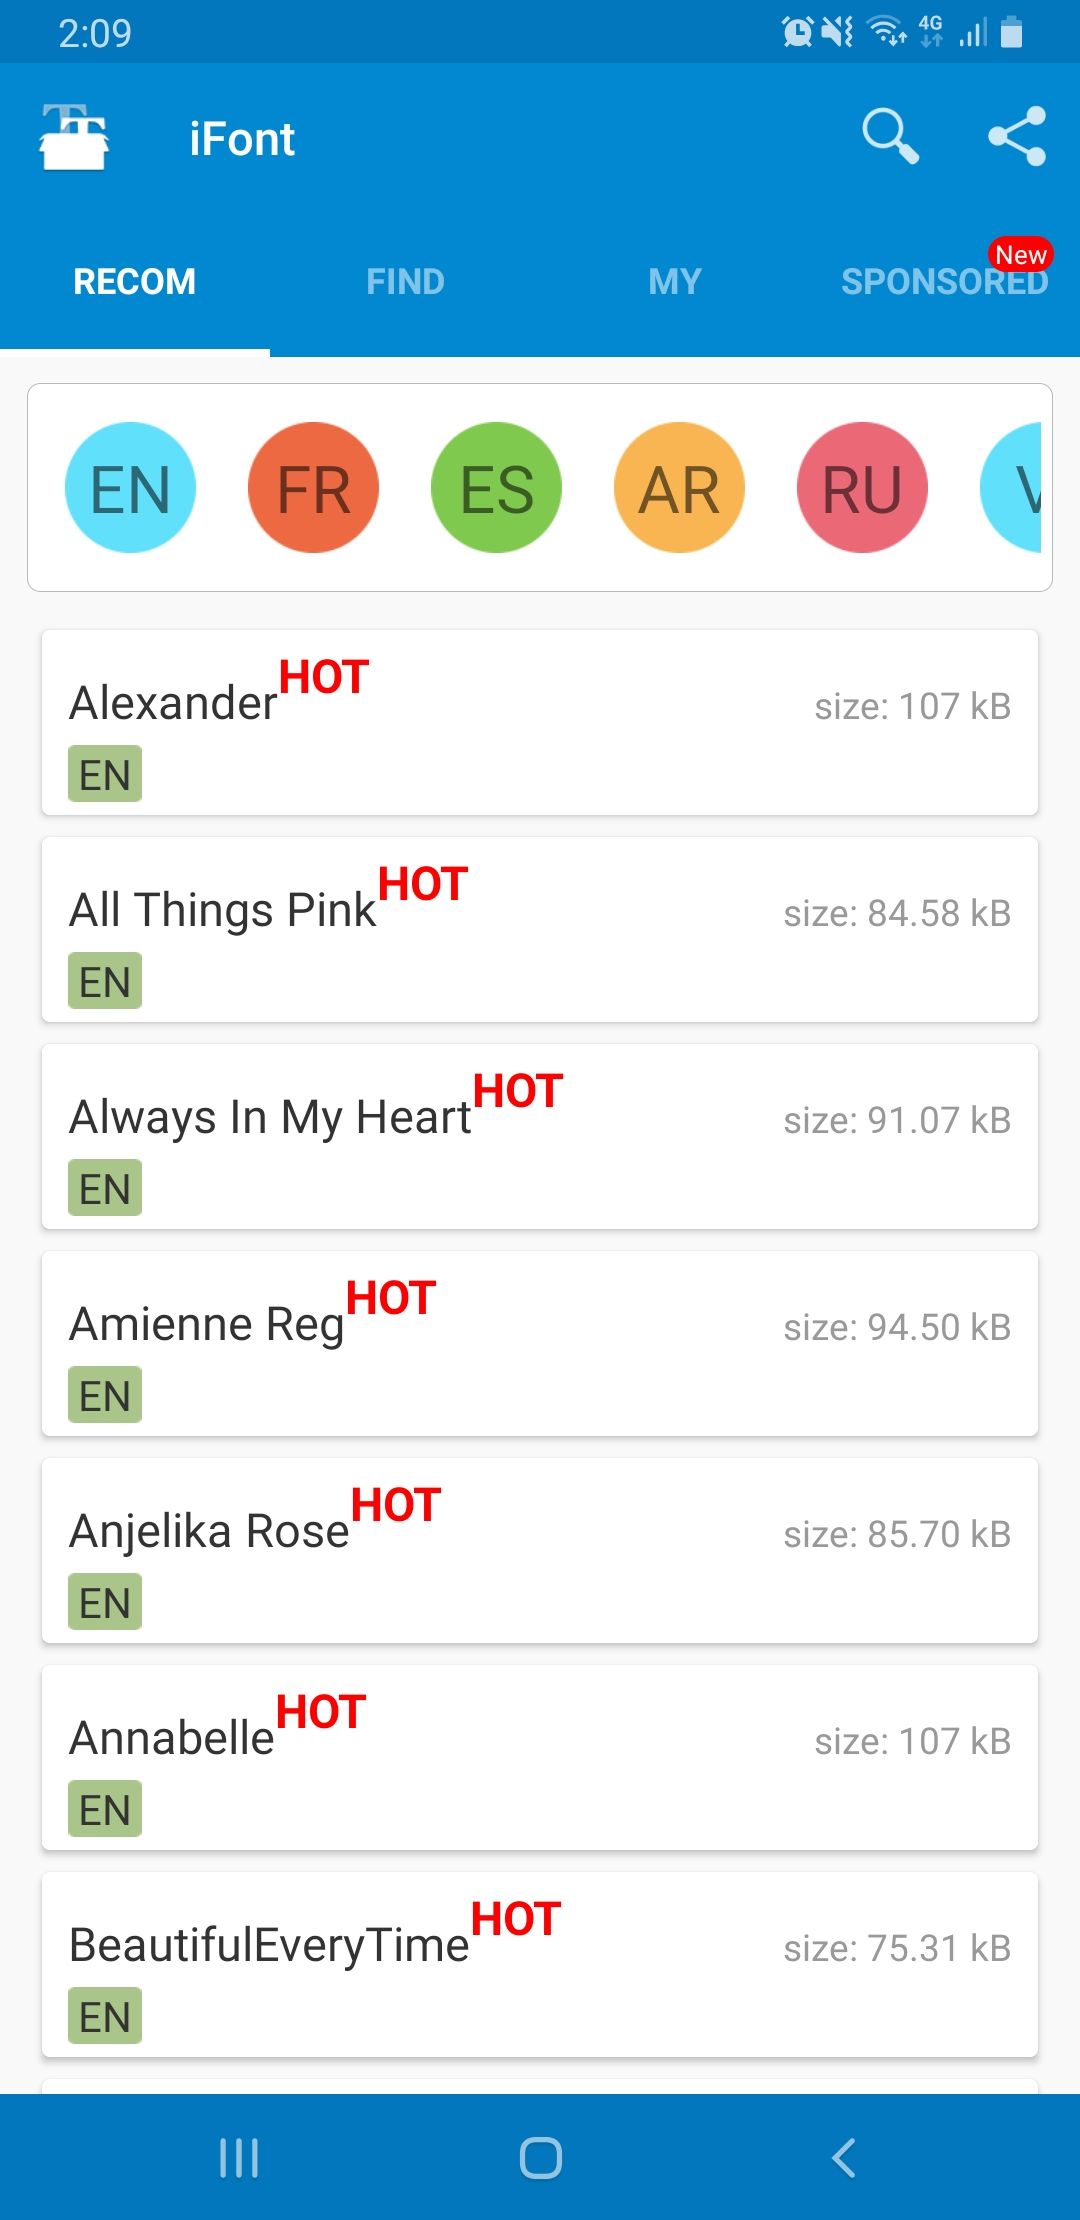
- Next, download and install iFont app. Open it and browse either RECOM or FIND tabs to find fonts.
- Once you find a font you like, tap on it.
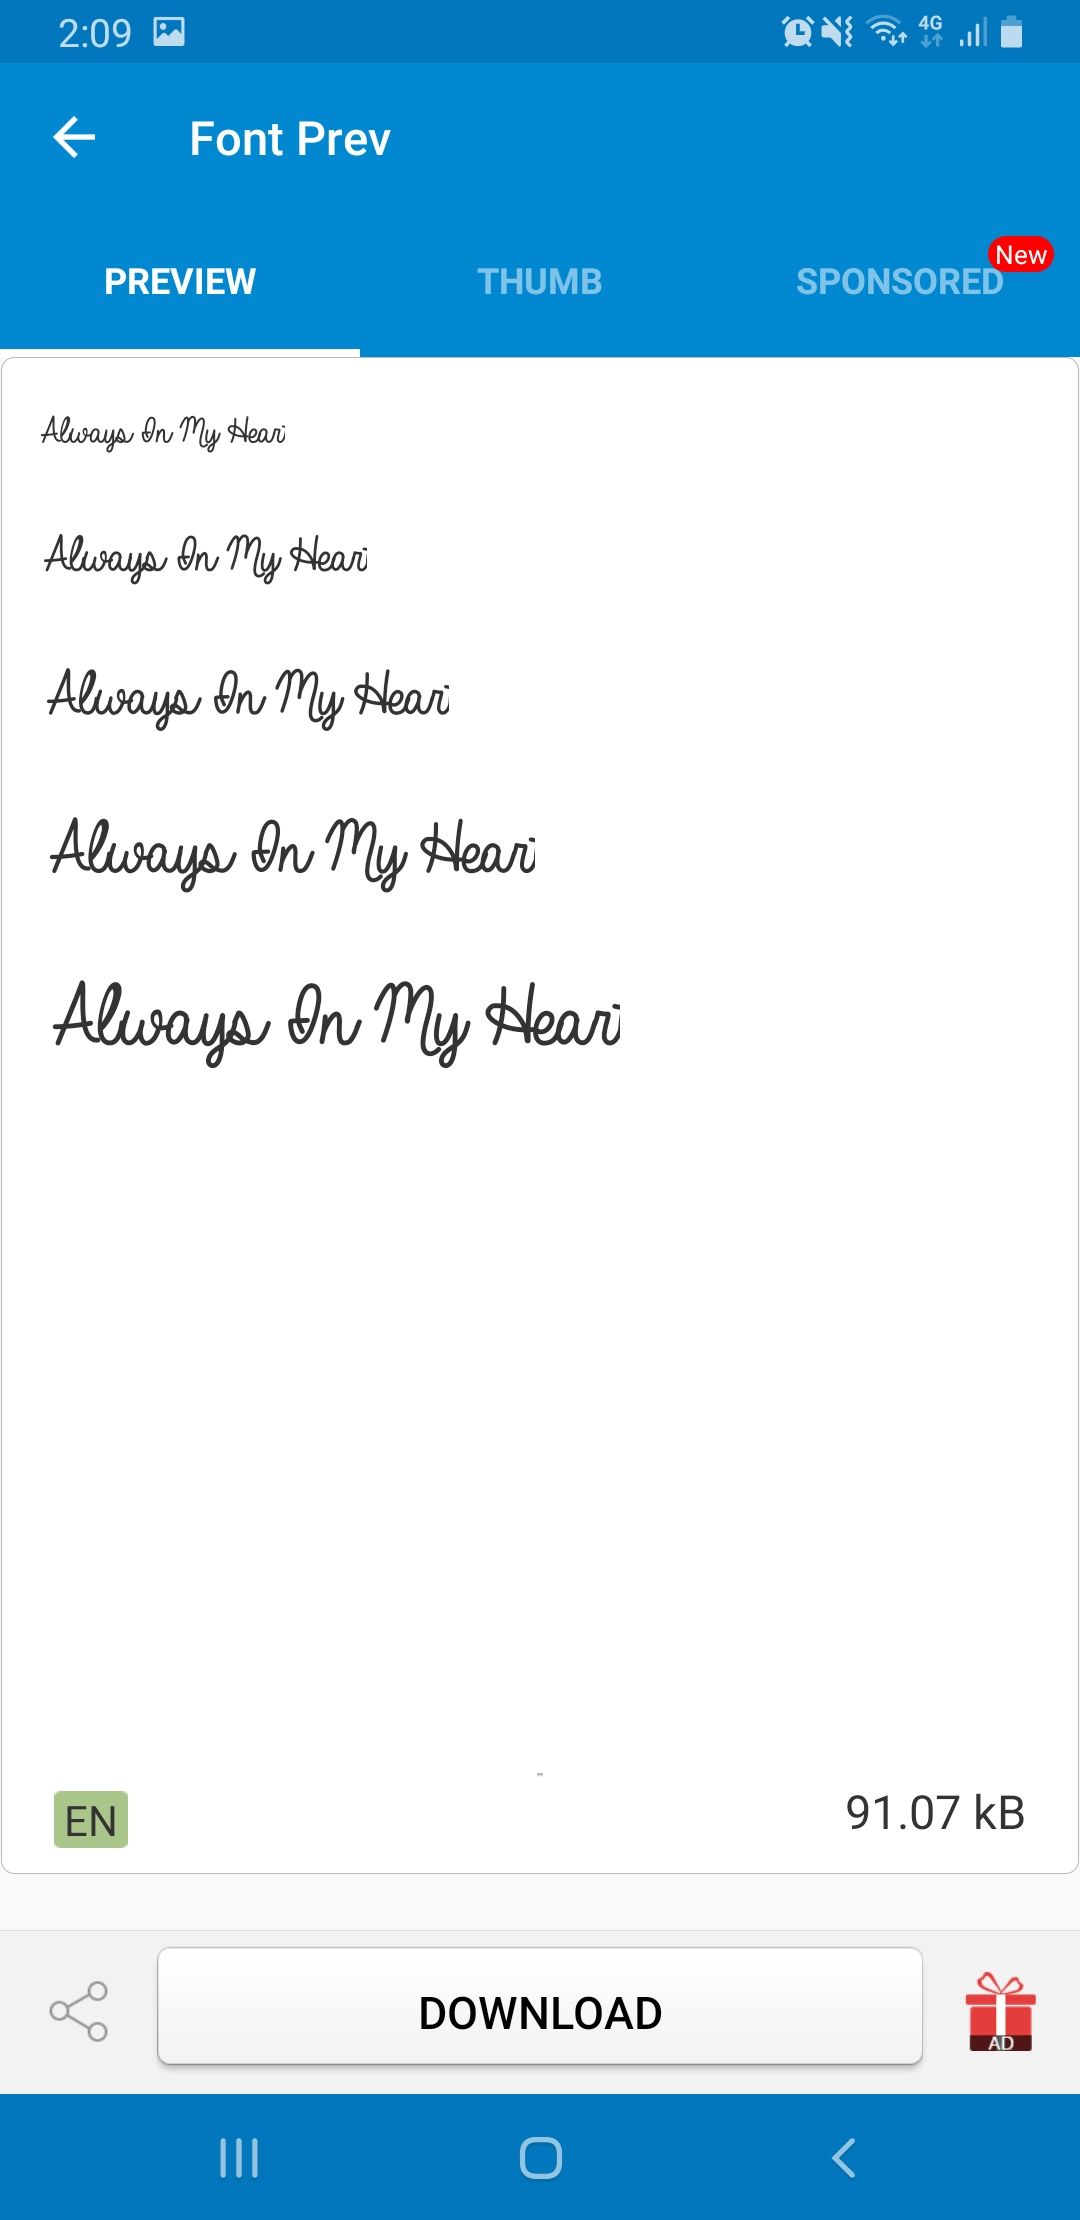
- Now, a preview of the font should be shown along with a Download button at the bottom, tap that.
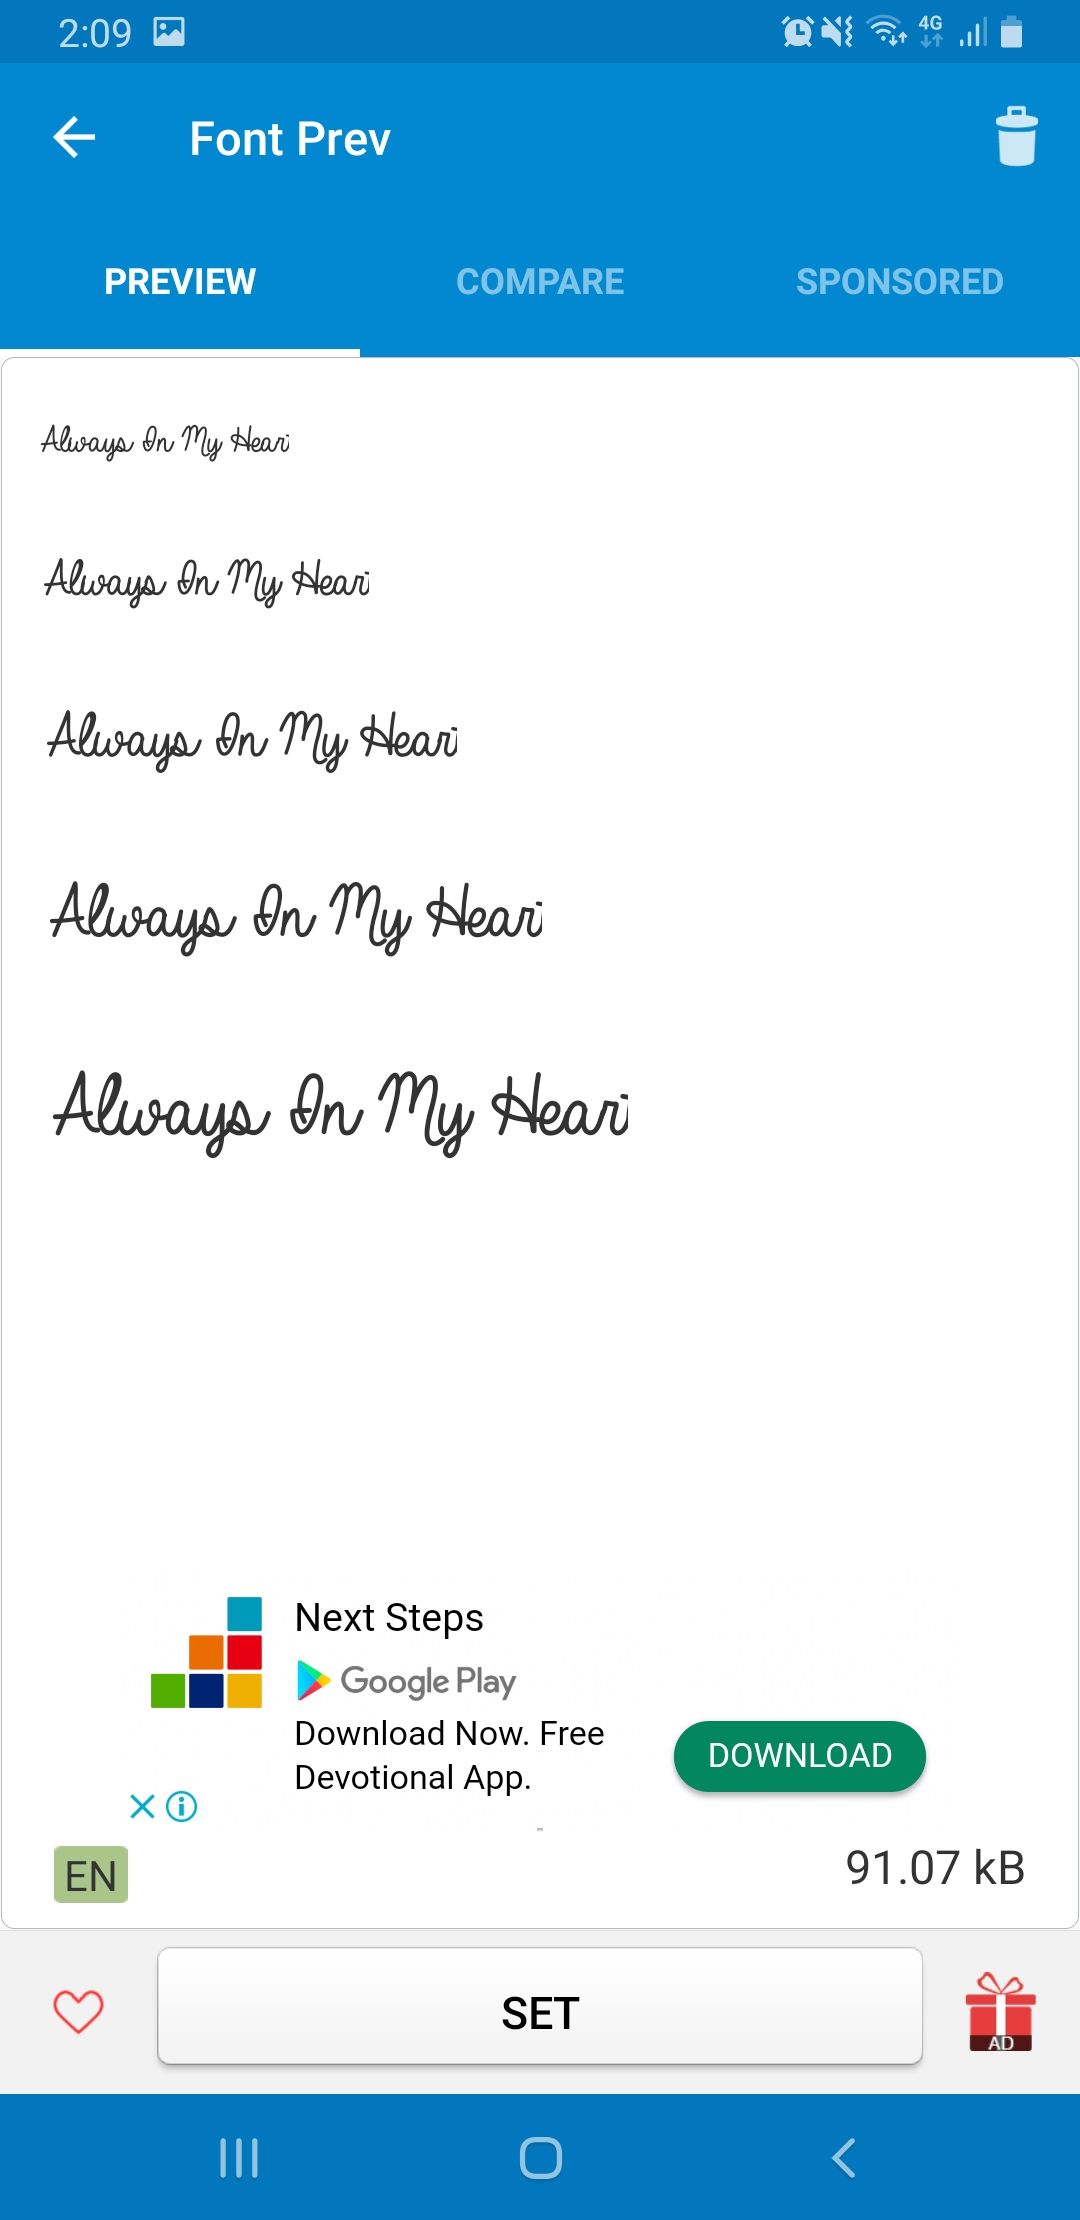
- After the font is downloaded, you would see the button now displaying Set, tap that.
- Once that is done, your font should change. If not, go to Settings, then Display and then Font. Within the list, newly installed font should show up.
How to Install Fonts on Android Rooted Phones
For some phones, the iFont app needs root permission so make sure you have rooted your phone and have granted access to iFont app. The procedure to change fonts with iFont using root is as follows.
- First, make sure you have Unknown sources enabled in Settings. You can do so by going to Settings and then Security.
- Next, download and install iFont app. Open it and browse either RECOM or FIND tabs to find fonts.
- Once you find a font you like, tap on it.
- Now, a preview of the font should be shown along with a Download button at the bottom, tap that.
- After the font is downloaded, you would see the button now displaying Set, tap that. A pop-up will appear detailing that iFont has been granted SuperUser permissions or it is requesting. If it requests, grant it!
- Once that is done, your font should change. If not, go to Settings, then Display and then Font. Within the list, newly installed font should show up.
Method 3: How to Install iPhone Font on Android – FontFix
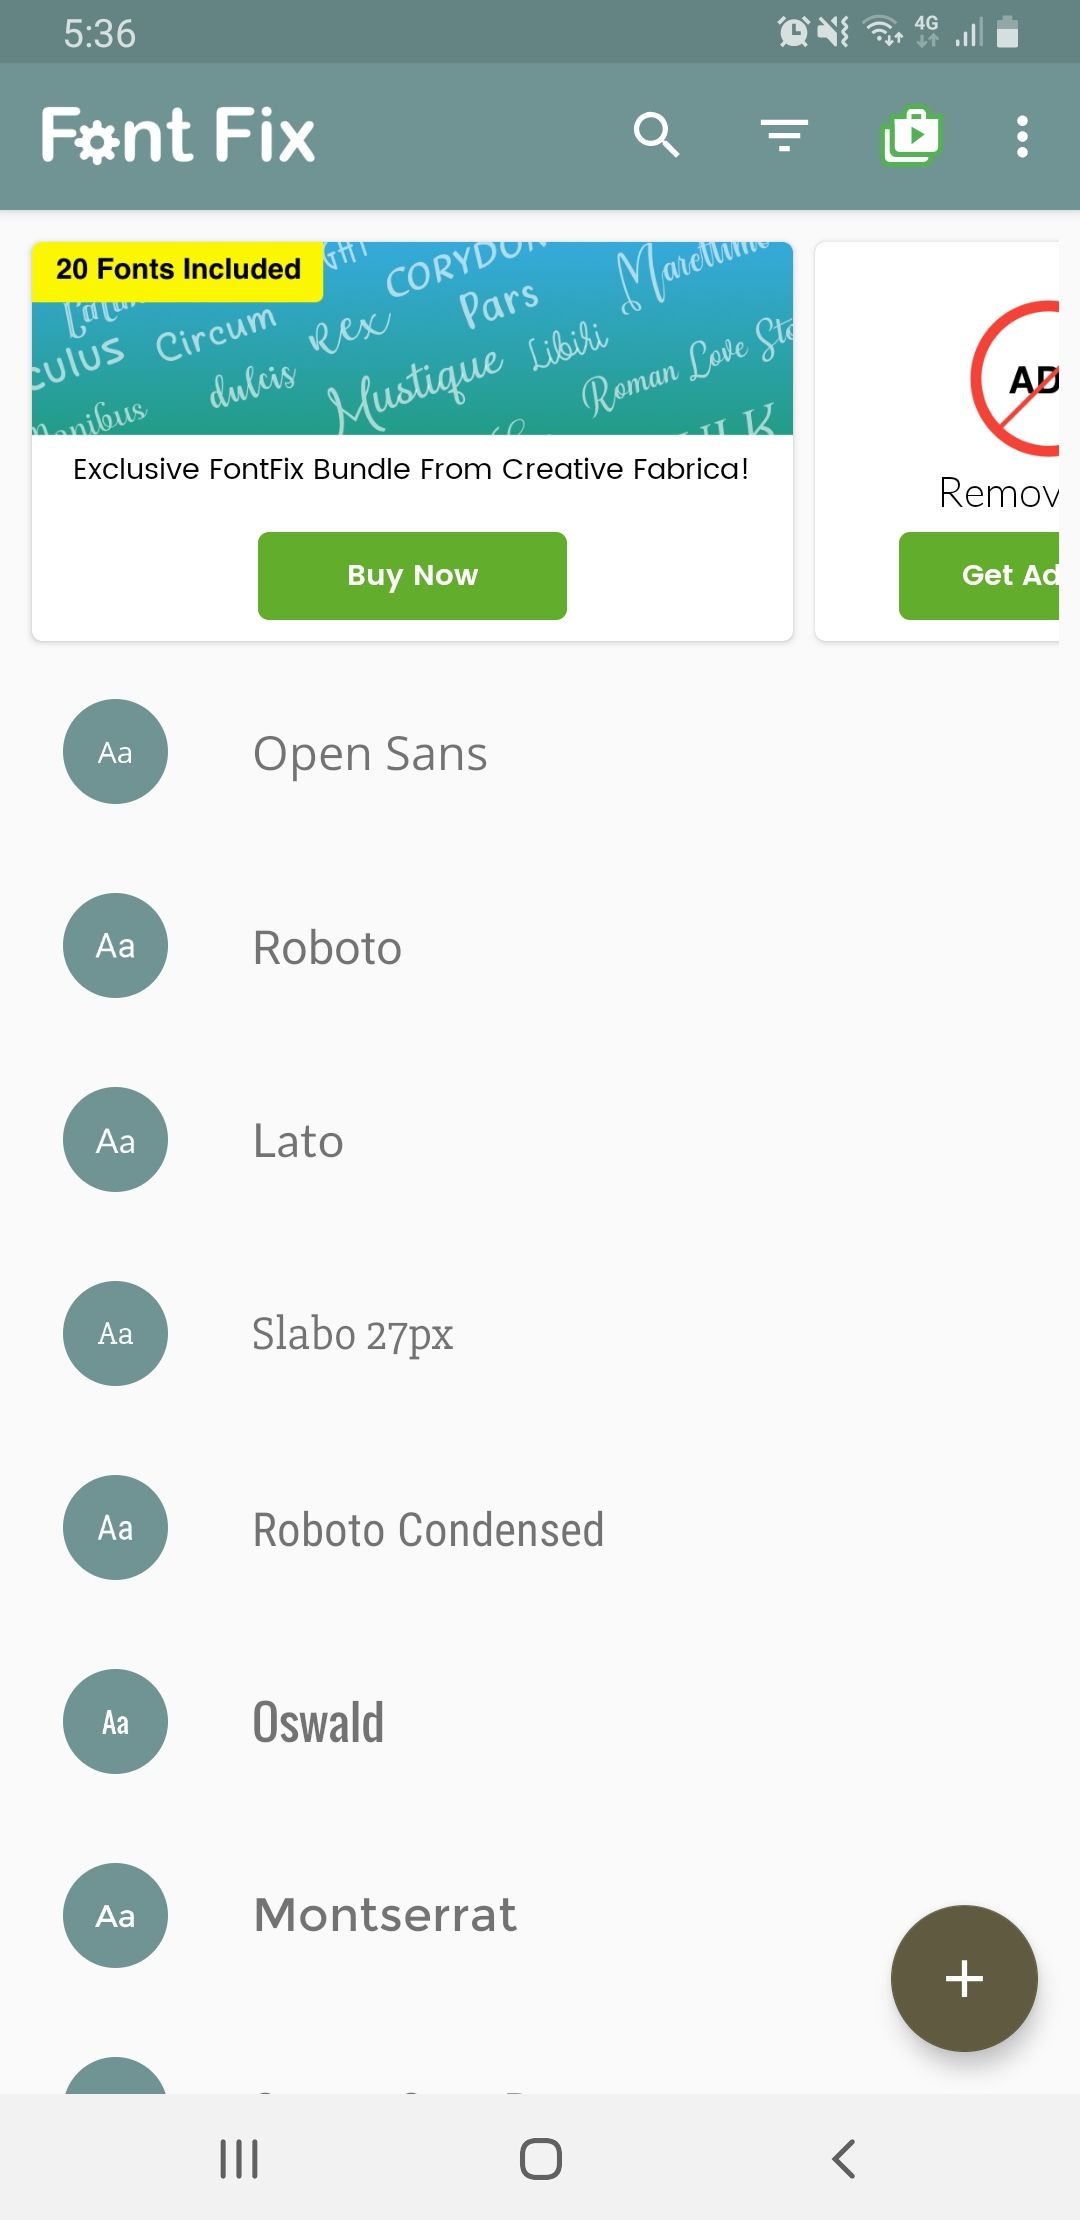
For users switching from iPhone to Android, a good modification to do on the new phone is to install iPhone font. By default, Apple ships a proprietary font on its iOS devices and with the steps ahead, you can install it on your Android device.
- For this app, you need to make sure your phone has root privileges / is rooted.
- Once made sure your device is rooted, install FontFix from Play Store.
- We will be using iPhone’s official San Francisco font which you need to download from here.
- After you download, extract the ZIP file anywhere on your device’s storage.
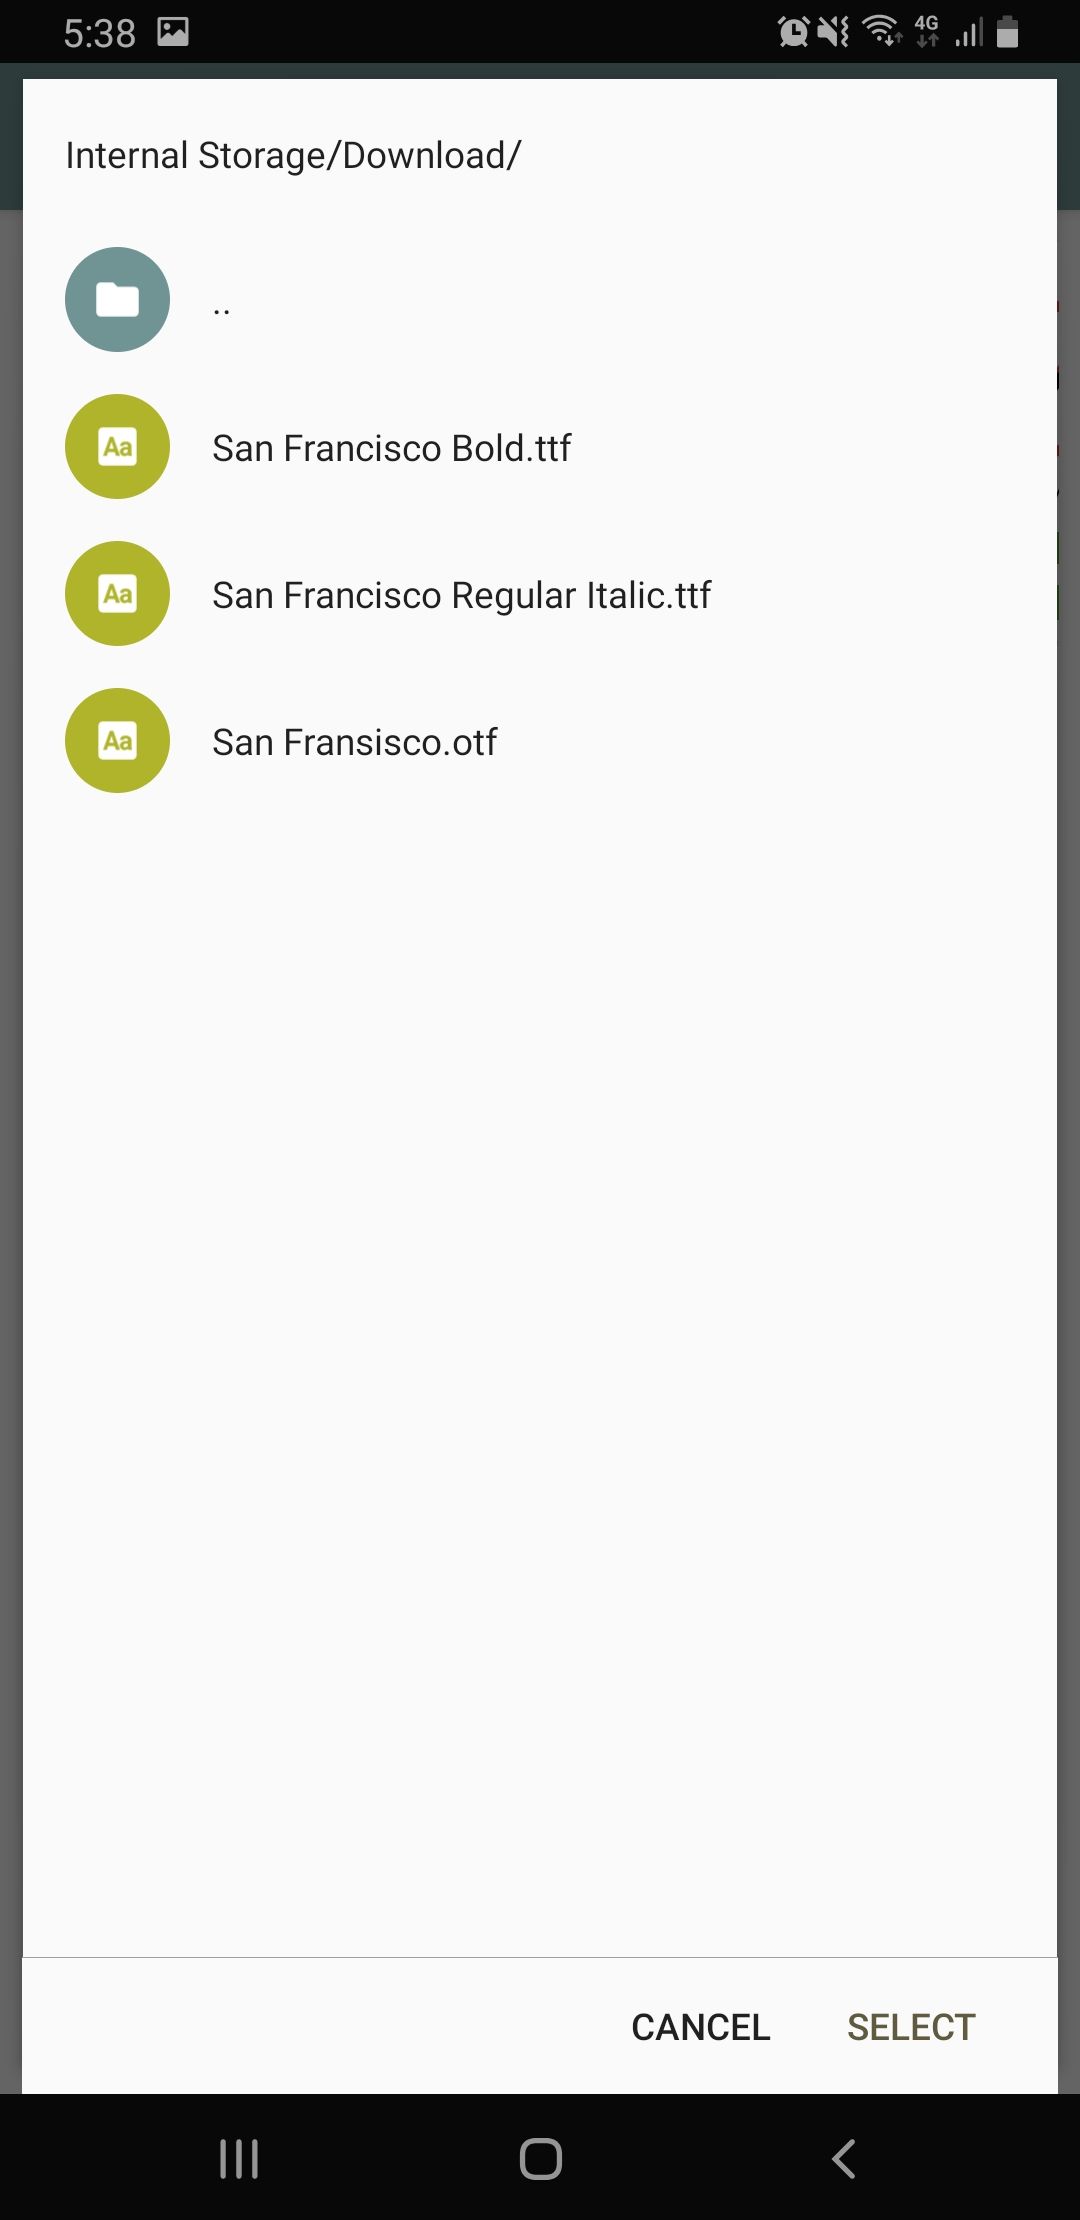
- Now, go to FontFix app and tap on the + symbol icon and then browse to the folder where you extracted the San Francisco font in the previous step.
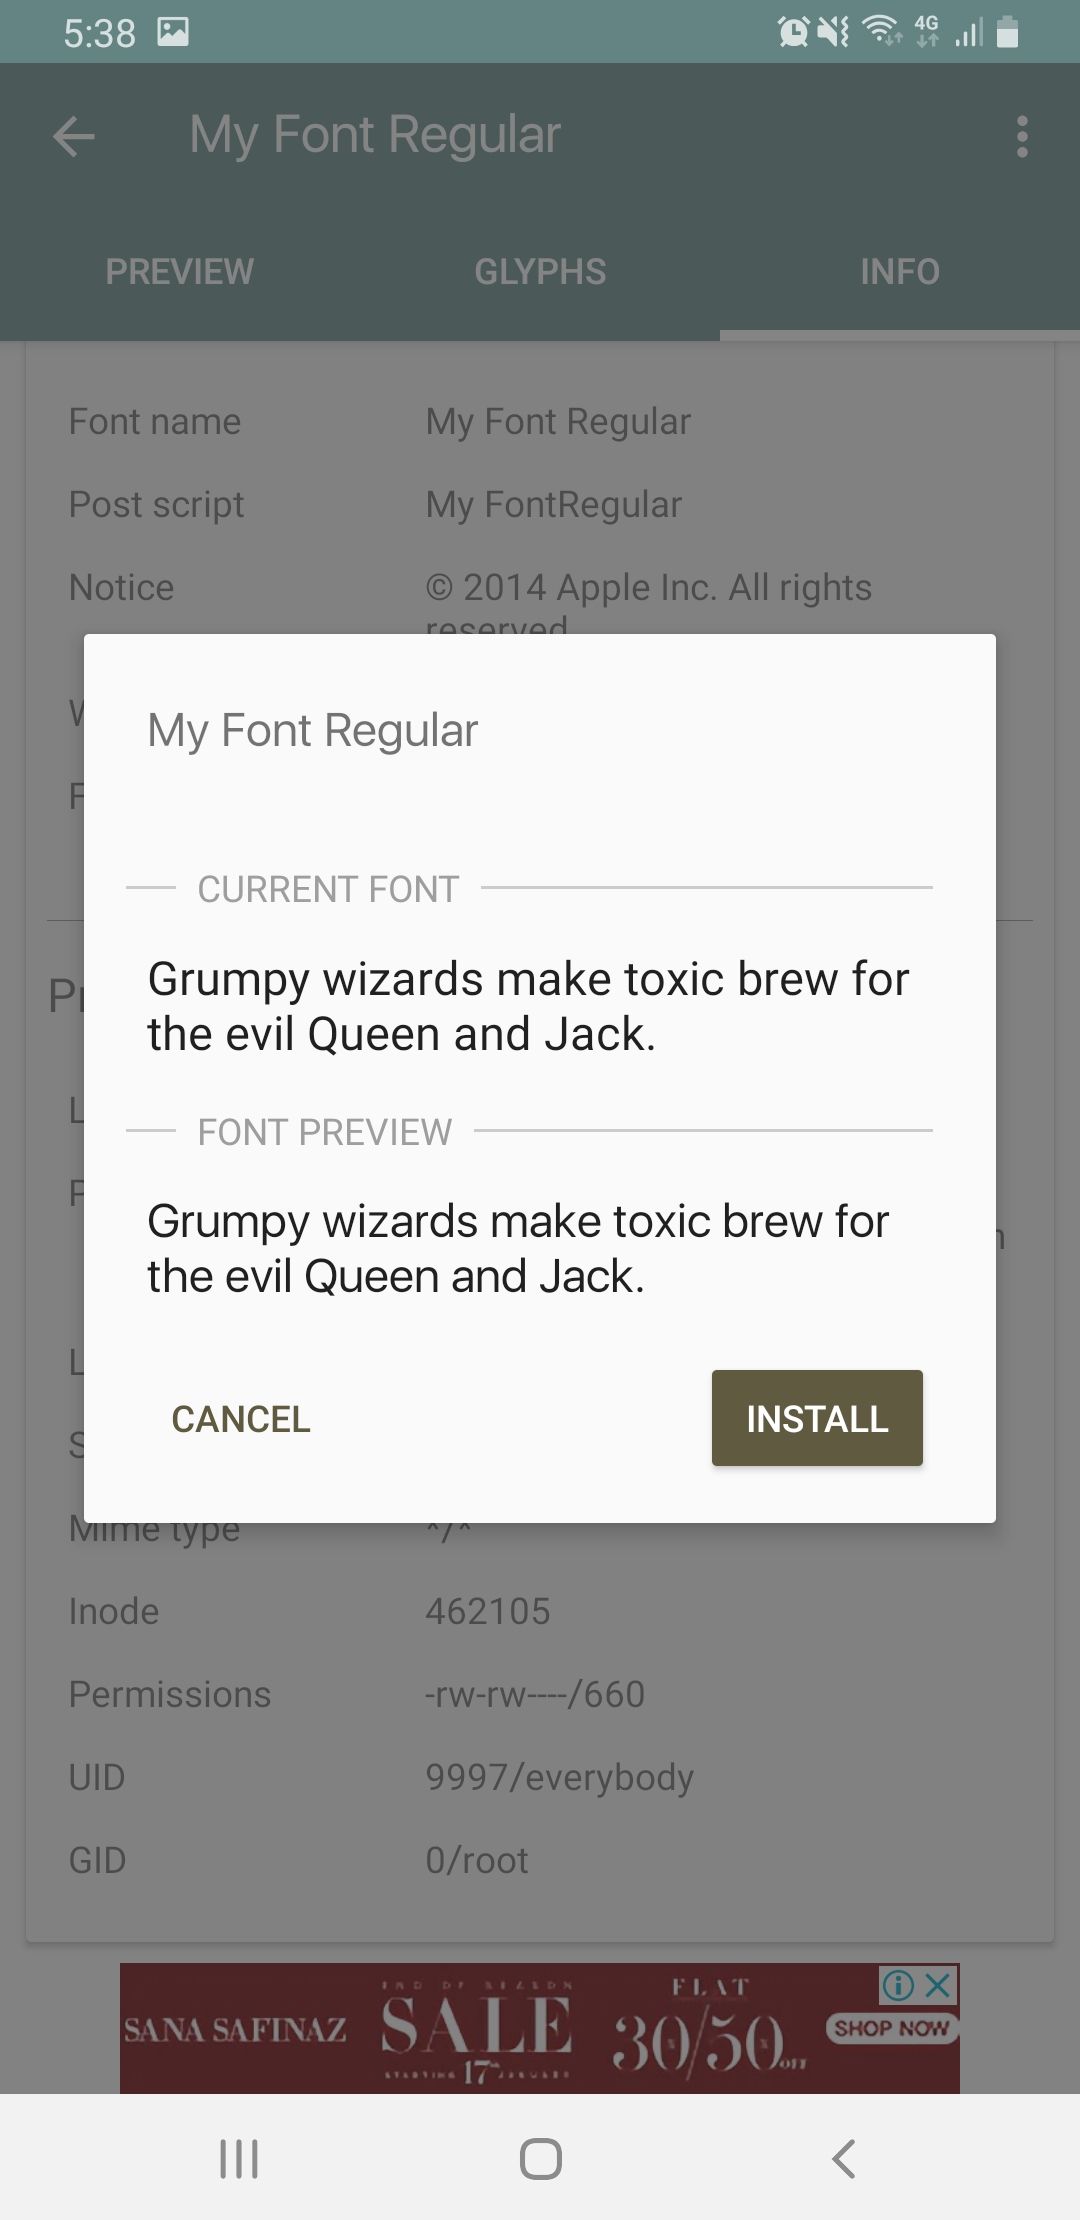
- From the three fonts, select San Francisco.otf font and then tap on Install and replace standard Roboto font.
- The app should ask for a reboot, select not now as there are two fonts pending to be installed.
- Now repeat the installation steps for Bold and Black Roboto variants and replace them with San Francisco Bold.
Method 4: Install Fonts on Android with Apps
A great method that allows users to install custom fonts on various devices is via apps. The compatibility of each app might change but all of them offer ease of use and are available directly via Play Store. Some have built-in repositories of fonts which you can choose from and download while others allow you to install your own font files.
However, root is a common requirement for these apps to work but then again, there are exceptions depending on which phone you have. We recommend giving all of these a try before rooting to see if your device can have custom fonts installed.
| App Name | Download |
| iFont | Play Store |
| HiFont | Play Store |
| FontFix | Play Store |
| Font Changer | Play Store |
| Fontster | Play Store |
Method 5: How to Install Custom .TTF Font Files on Android
A slightly complicated procedure but one that works quite well is installing custom .TTF files through ADB. For this method, you would need to have proper USB drivers configured on your computer, a USB cable to connect your phone and lastly, your phone should be rooted.
If you have fiddled around with ADB before, these commands are quite straight forward and easy to execute.
Step 1 – Make sure ADB is configured on your PC and your command line recognizes adb command.
Step 2 – Download your desired font, make sure it is in .TTF file extension format.
Step 3 – Connect your phone to your PC and execute following command.
NOTE: Make sure to replace FONTNAME with the actual file name.
adb push FONTNAME.ttf /sdcard/Step 4 – Now that the font has been pushed to your device, execute these commands to apply it.
adb shell

su

mount -o remount,rw /system

cd /system/fonts

mv Roboto-Regular.ttf Roboto-regular(original).ttf

cp /sdcard/Roboto-Regular.ttf /system/fonts

chmod 666 Roboto-Regular.ttf

exit
Once you reach the end and execute exit, reboot your phone. Once the phone boots back up, it should have a new font style all across.
How to Install Fonts from Other Android Phones
One more way to install fonts on Android is downloading them off from other phones. For instance, when the Samsung introduced their new One UI for their Android phones, they also introduced a new set of fonts. If you really liked those fonts and want to use them on your Android phone, you can download and use them.
Over the years, there have been several popular fonts in Android phones. We have compiled a list here:
- JetBrains Mono Font
- Samsung Galaxy S10 / S10+ Fonts
- Samsung Galaxy Note 9 Fonts
- OnePlus Slate Font from OxygenOS
- Google Sans Font aka Product Sans Font
Method 6: How to Flash Custom Fonts Pack for Android
To apply a custom font, you can also use custom recovery like TWRP to flash custom font packs directly onto your phone. The great thing with these flashable zip files is the process is pretty short and everything is automated. However, after installation, to revert back, you would need to flash stock firmware.
Step 1 – Download your font ZIP file. We found a great custom font ZIP repository from where you can get loads of different fonts:
NOTE: Need more fonts? We have links to several more font packs for your Android phones at the end of this article.
Step 2 – If you downloaded the ZIP file on your computer, transfer it to your PC. For readers who downloaded onto their phones, remember the download folder.
Step 3 – Boot into custom recovery.
Step 4 – Wipe Dalvik Cache from the options given.
Step 5 – Flash the custom font pack you downloaded by using Flash ZIP file option.
Step 6 – Reboot.
Once your phone boots back up, you should see the new font replacing the older one.
That’s all! Hopefully one of these methods will work for your Android device to install custom fonts. If you have any suggestions or problems when trying to install fonts, let us know in the comments.



This is good info.
But I’d like to go a step further and enable ligatures.
Is there a way to enable them?