This tutorial explains how to set up and install ADB and Fastboot using Android SDK / Android Studio on your computer. Android SDK is now a component of the whole Android Studio setup. Android SDK brings with itself the two most important tools needed for tweaking your Android phone, ADB and Fastboot. Why do we need them? ADB (Android Debug Bridge) and Fastboot / Bootloader helps us install a custom recovery which allows us to root our Android devices, install custom ROMs, debug apps, collect system data and perform many other system tweaks which are not otherwise possible. You can also flash bootloader updates or flash system images of various Android updates. Similarly, ADB allows you to access your phone directly from the computer while connected with a USB cable using command line tools.
We do so many tutorials daily on Team Android on how to root Android phones, install custom firmware etc. and we always recommend you should have your USB drivers properly installed and your Android phone should be working perfectly fine with ADB and Fastboot. Android SDK is now a part of Android Studio, Google’s new IDE for Android development. To work with the SDK or its tools, you need to have Android Studio installed on your computer.
Related Articles:
We also have some other related guides you might want to check out for setting up ADB and Fastboot i.e. installation on macOS, setting up Wear OS etc.
ADB and Fastboot for Mac: Are you a MacOS / OS X user looking for a installation method of ADB or Fastboot? Please read our complete guide:
Install ADB / Fastboot without SDK: Looking for a way to install ADB and Fastboot on Windows without having to download Android Studio or Android SDK Manager? Read our complete guide here:
Download ADB and Fastboot: You can now download ADB and Fastboot separately with updated binaries and code that support the latest Android 10 and other future releases. Get it from the following link:
Install Android Wear: You can also try Wear OS / Android Wear on your computer using the Wear SDK. How to do that? We have a detailed guide covered here:
This following tutorial lists down the steps you need for Android Studio installation and then making sure ADB and Fastboot work on your computer as expected. Let’s get on with the tutorial on how to set up ADB and Fastboot for your Android phone so that you never have to go through USB drivers issues again when trying out a custom firmware.
How to Set Up ADB, Fastboot, Google USB Drivers with Android Studio / SDK Manager
Here are the step-by-step instructions to install and set up Android Studio, SDK Manager, ADB, Fastboot drivers and Google USB drivers. Everything has been explained in detail below. Please make sure you follow the steps carefully and read this tutorial once before actually performing it.
Required:
- An Android phone. We will be using a Pixel 7 Pro (also works with all Nexus, Google Pixel and other OEM devices)
- MicroUSB / USB-C cable – depending on what your phone supports
- A computer with atleast 8GB of disk space
Jump to Pages:
If you already have downloaded and installed Android Studio and Android SDK, you can jump to the following pages to set up ADB or Fastboot. Or just follow all the steps as given below.
- Page 2: How to Install and Set Up ADB Drivers.
- Page 3: How to Install and Set Up Bootloader / Fastboot Drivers.
1. Downloading Java, Android Studio and Android USB Drivers
First, we need to get Java Platform installed and then download Android Studio so we can install all the required Android USB drivers (and some other tools) using SDK Manager. This is how it is to be done:
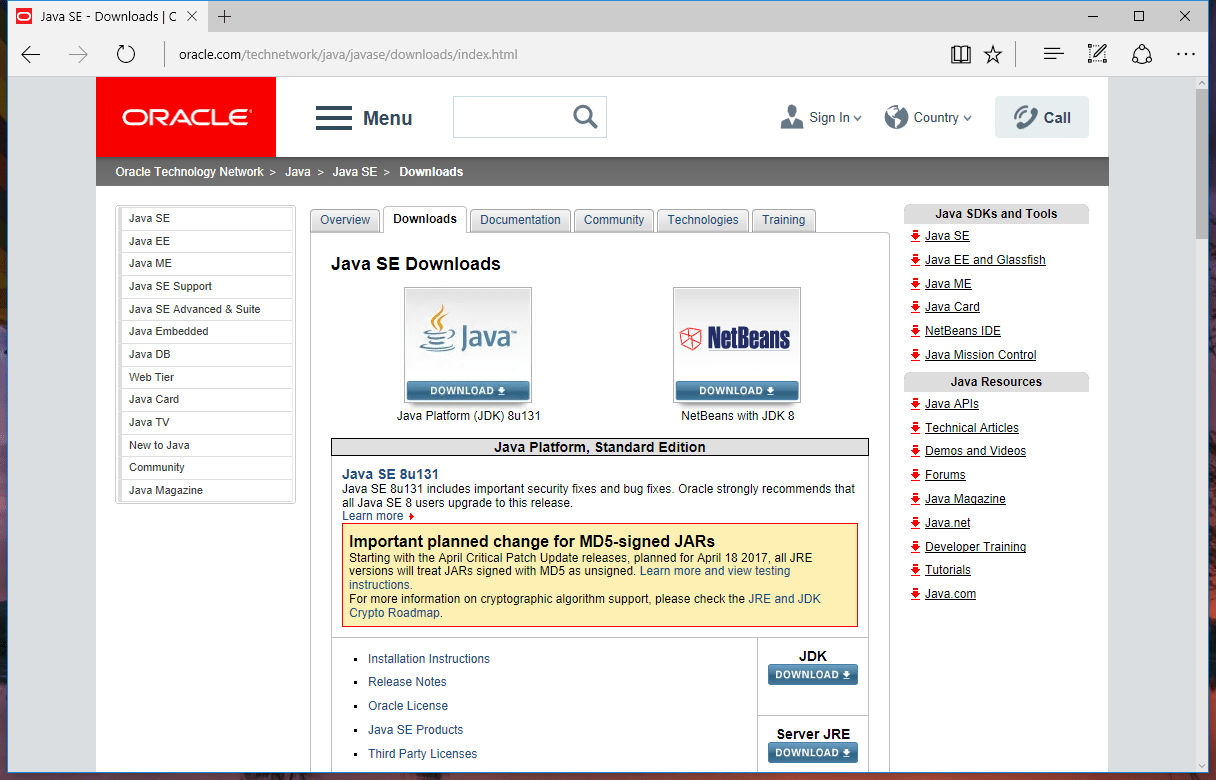
Step 1 – Download and Install Java Platform (JDK) from Java SE Software Development Kit (SDK) downloads page. Once installed, proceed to the next step.
Step 2 – Download Android Studio (android-studio-XXXX.X.X.XX-windows.exe) from the Android Developers website to your computer. This may take a while to download as the entire set up is about 2GB in size.
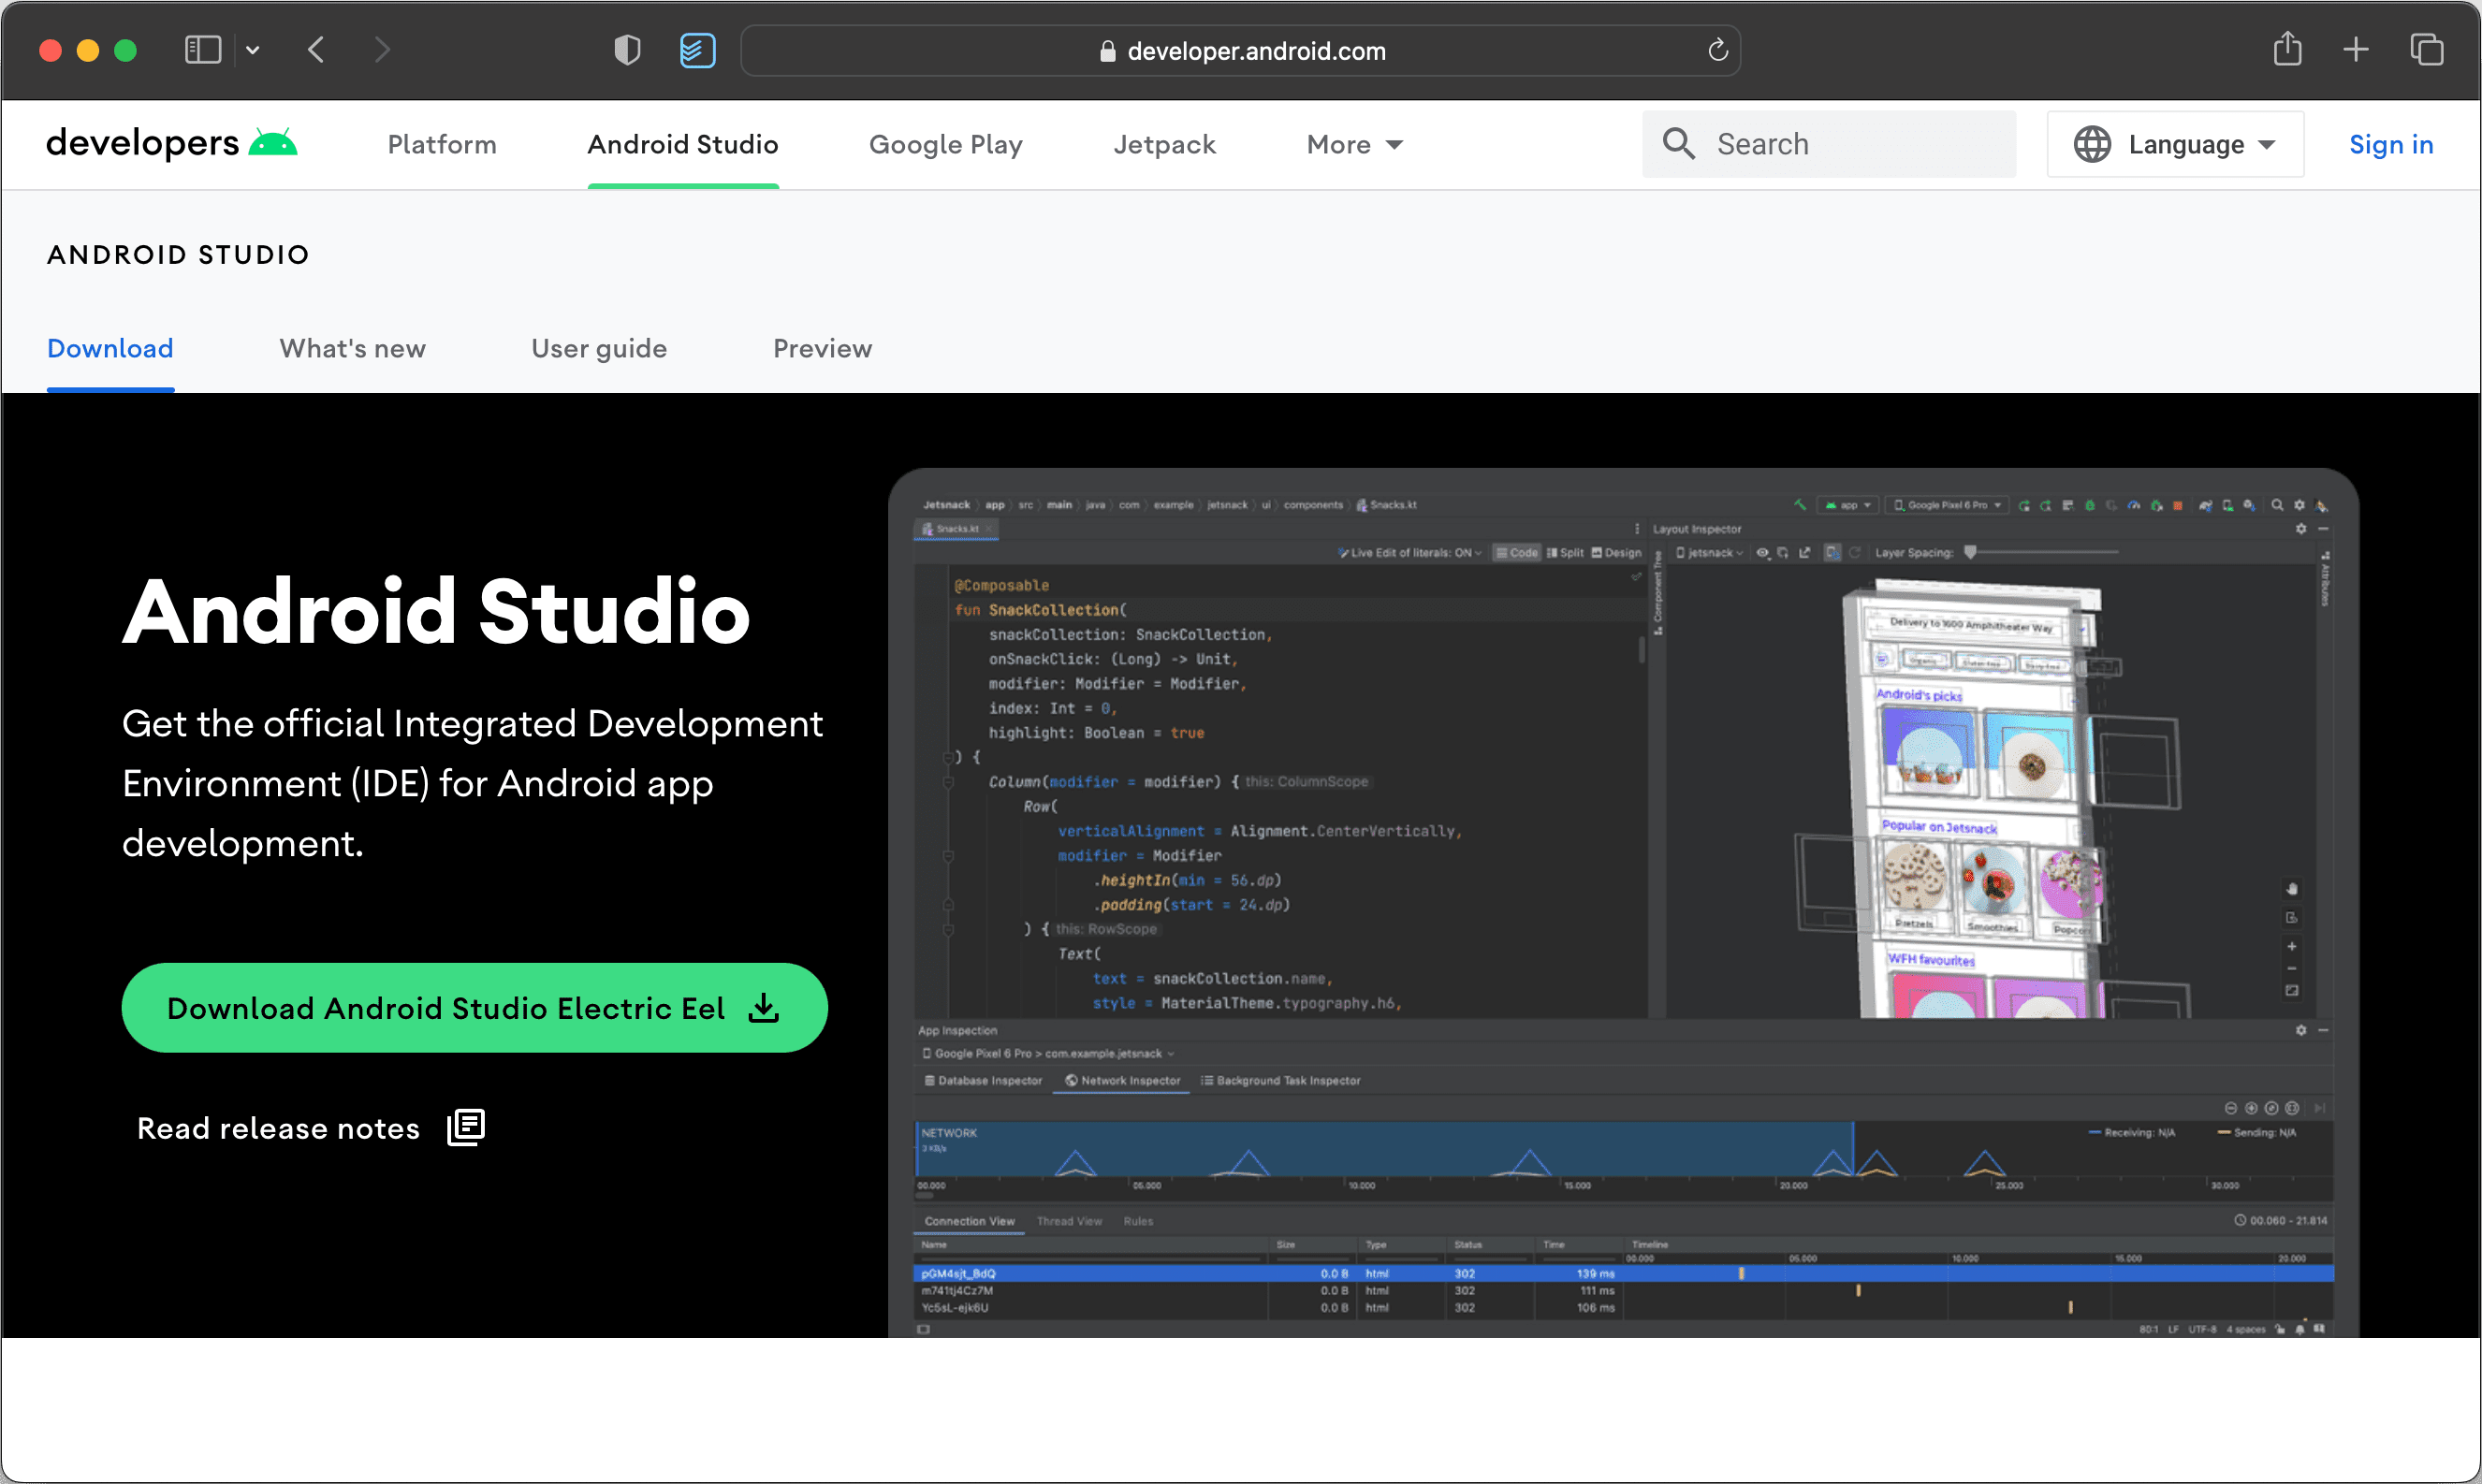
NOTE: Android Studio Electric Eel | 2022.1.1 Patch 1 is the latest version at the time of updating this tutorial with new information. Future releases install in the same way as shown below.
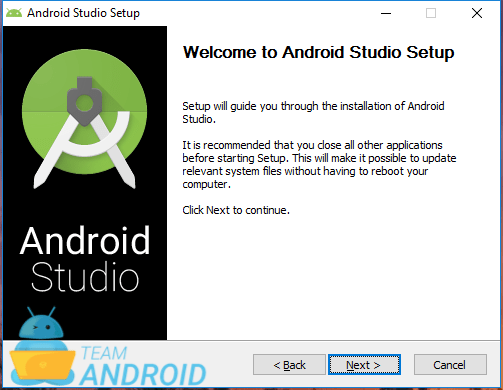
Step 3 – Run the EXE setup file you just downloaded. You may be prompted to grant permission to run the file depending on your Windows UAC settings. You should be greeted with a similar setup wizard screen as shown below. Click Next to begin!
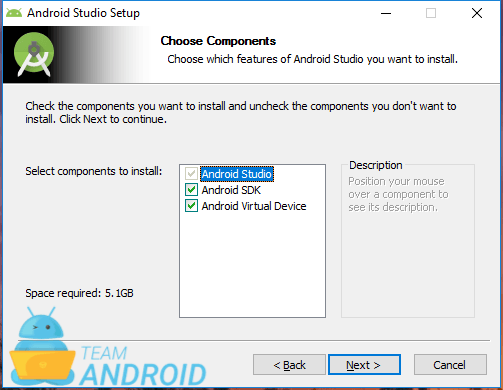
Step 4 – Keep the default components selected for installation. Click Next.
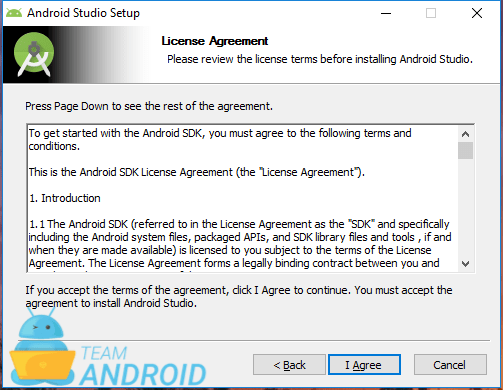
Step 5 – We are sure you would not want to read through the entire license agreement. Click I Agree.
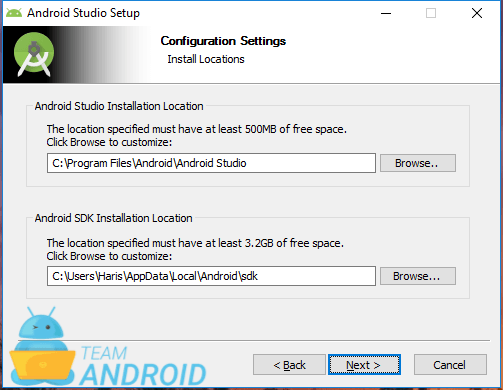
Step 6 – This is where you select the installation location for Android Studio and Android SDK. You may select another location / drive that has the required space available. Click Next to continue.
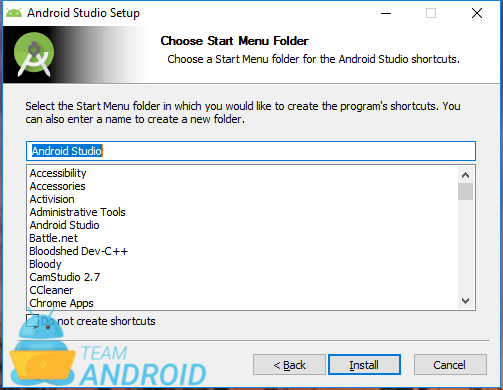
Step 7 – Yes, you would want to have to a Start menu folder. Just click Install to continue.
Step 8 – Installation should begin now. This may take a while for all the files to be extracted and installed to your computer.
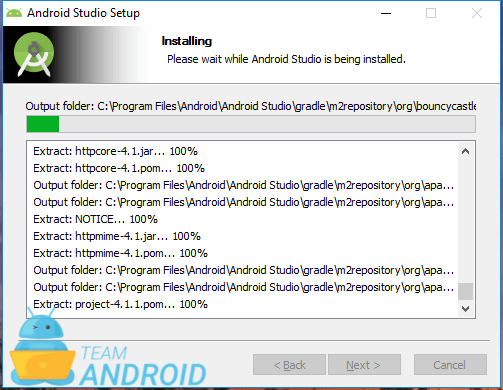
Step 9 – Once the installation is completed, click Next.
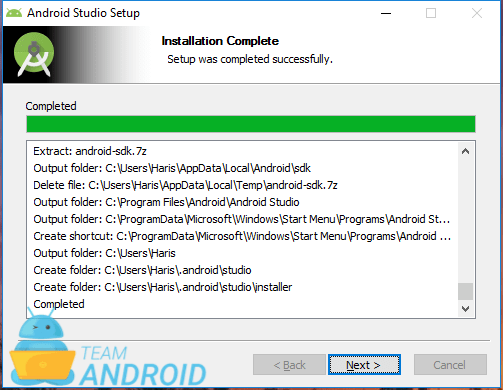
Step 10 – You are now all set to launch Android Studio for the first time. Click Finish to proceed.
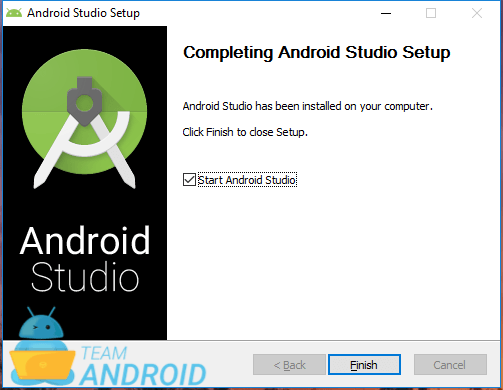
In the older setups of Eclipse and SDK Manager, you had to manually install the the Android SDK Platform-Tools (that includes ADB, Fastboot) and the Google Android USB driver. Now, everything comes bundled with Android Studio as the whole Android SDK component that we chose to install in Step 4.
If you uncheck Android SDK in Step 4, the setup wizard will ask you to enter the path to an existing installation of Android SDK. If you do not have that, the installation process will not proceed ahead. So eventually, whenever you install Android Studio, the whole SDK and its tools are automatically downloaded/installed on your computer.
NOTE: If you need any help with Android Studio installation, please read: How to Install Android Studio on Windows PC.
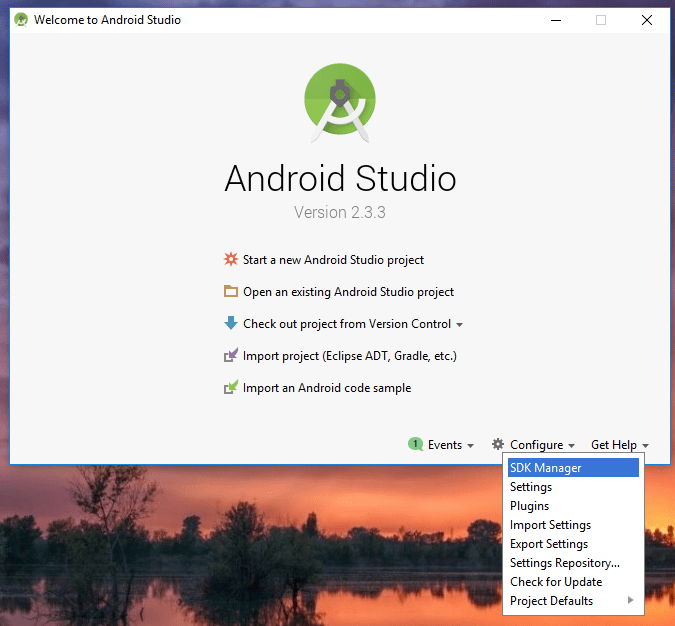
Step 11 – This is the main welcome screen for Android Studio. If you see this, it means everything you have done so far has been correct and working.
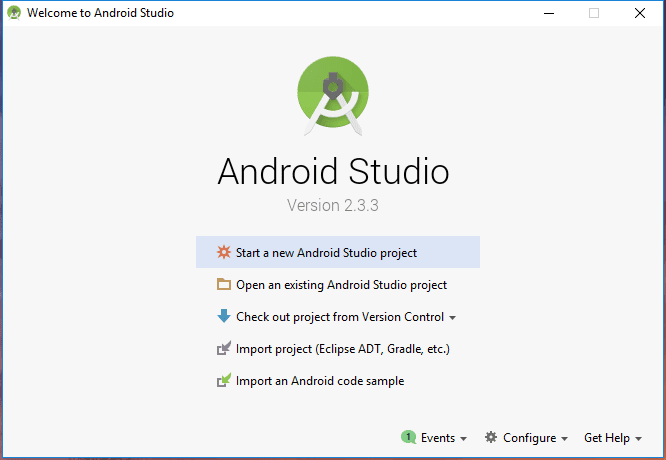
Step 12 – To make sure we have the required Android SDK Platform-tools installed, click on the Configure button and select SDK Manager.
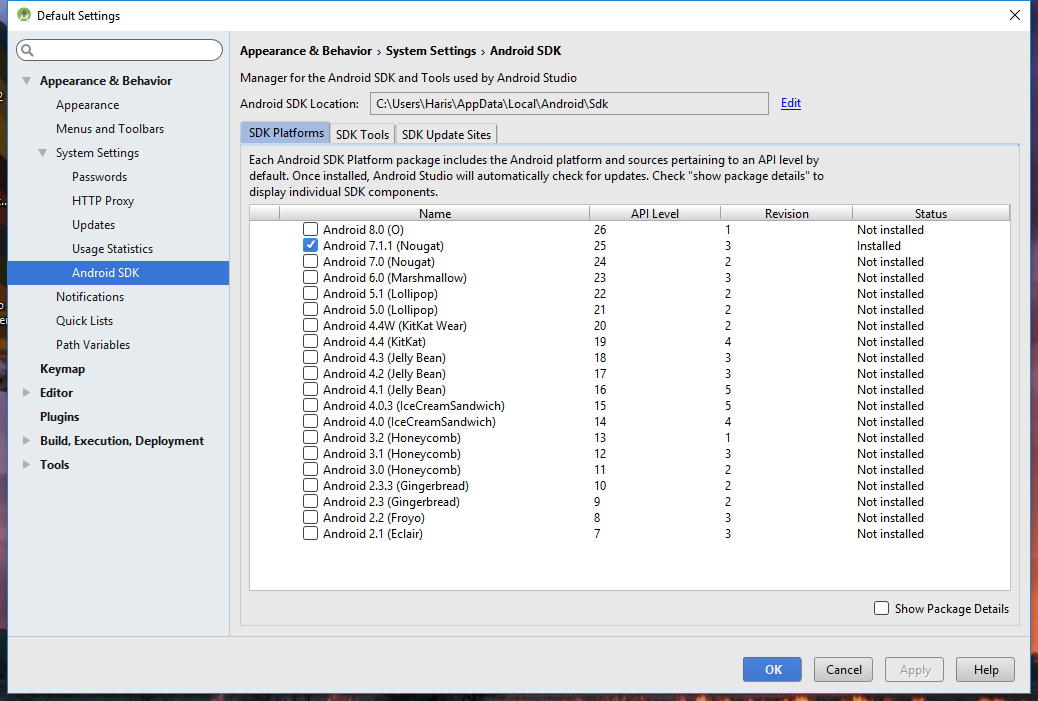
Step 13 – This is the main SDK Manager which is now a part of the main Android Studio settings.
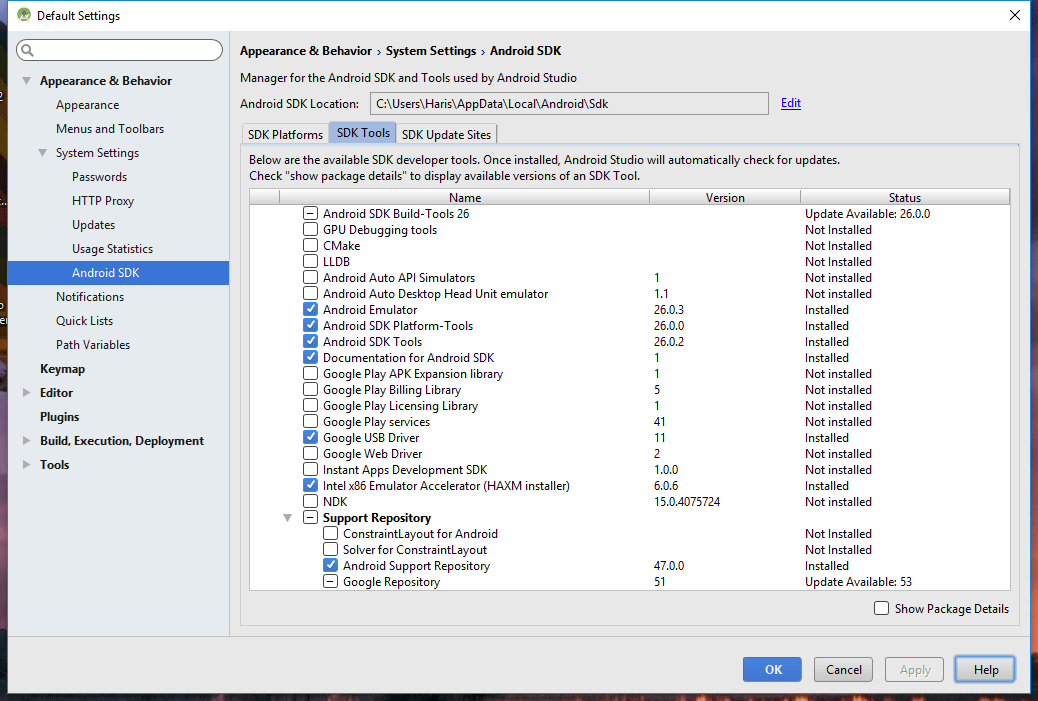
Step 14 – Click on the SDK Tools tab to see what developer tools are available to you, how many of them are already installed and which one of them have received an update.
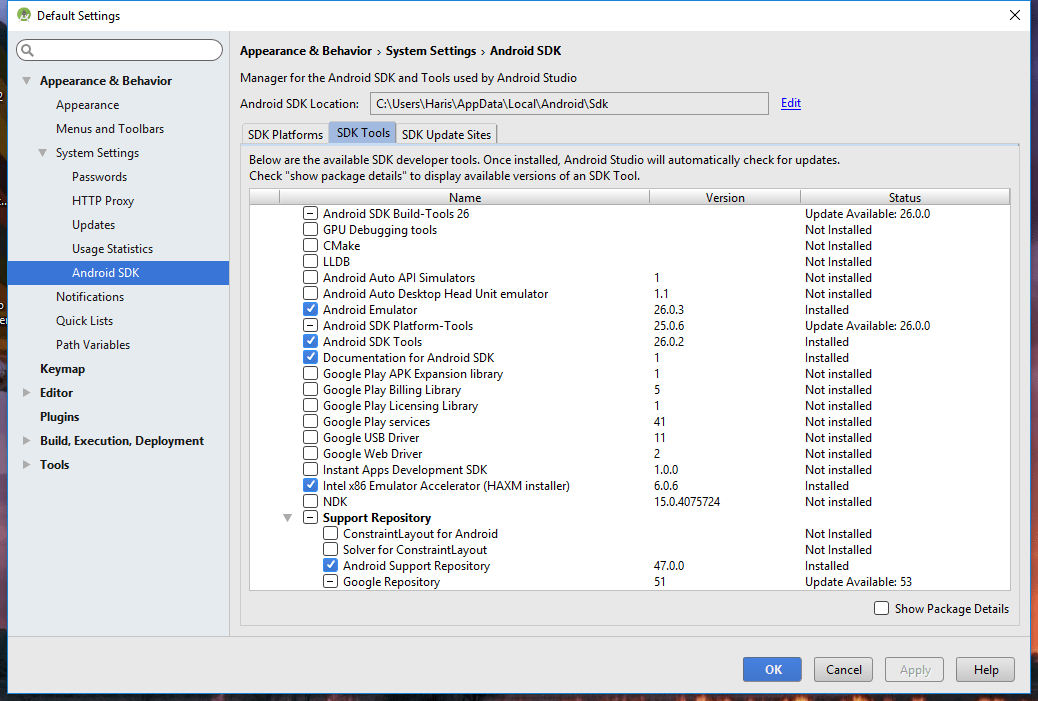
Step 15 – From the list, make sure the following tools are checked (among others that are checked by default) as we will need them for our tutorial:
- Android SDK Platform-Tools
- Google USB Diver
NOTE: If there is an update available to any of the above two mentioned tools, please check them to update.
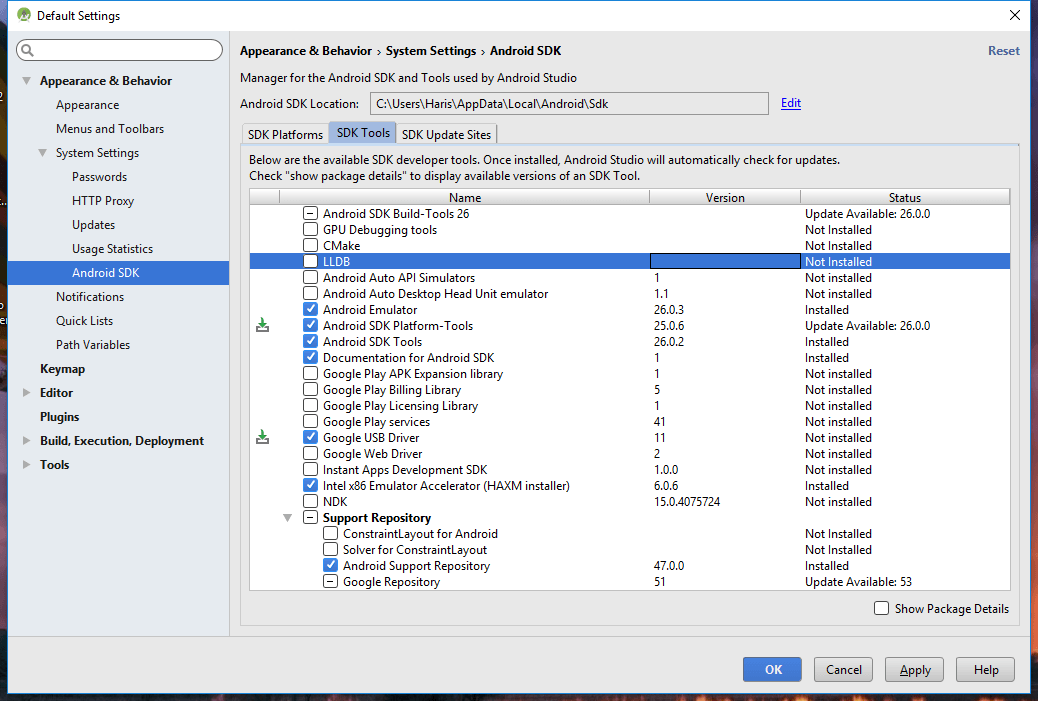
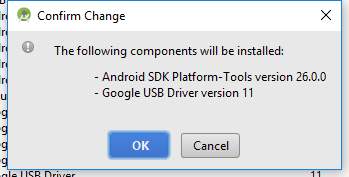
Step 16 – Click on the Apply button to proceed. A small popup will notify you of the new tools that are going to be installed in your Android Studio. Click OK to confirm the changes.
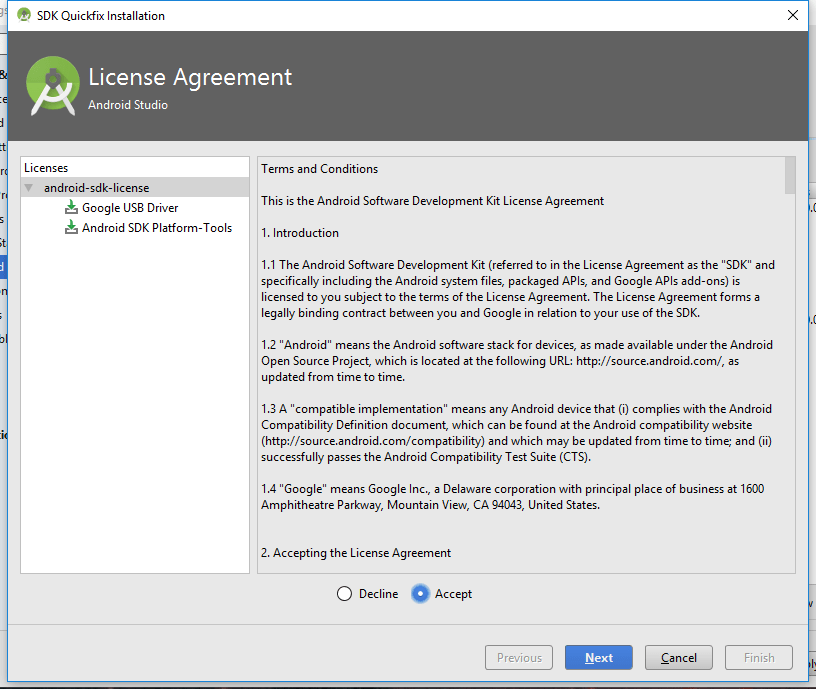
Step 17 – Another window will open where you have to accept the terms and conditions before installing the SDK tools. Select the Accept option and click Next to proceed.
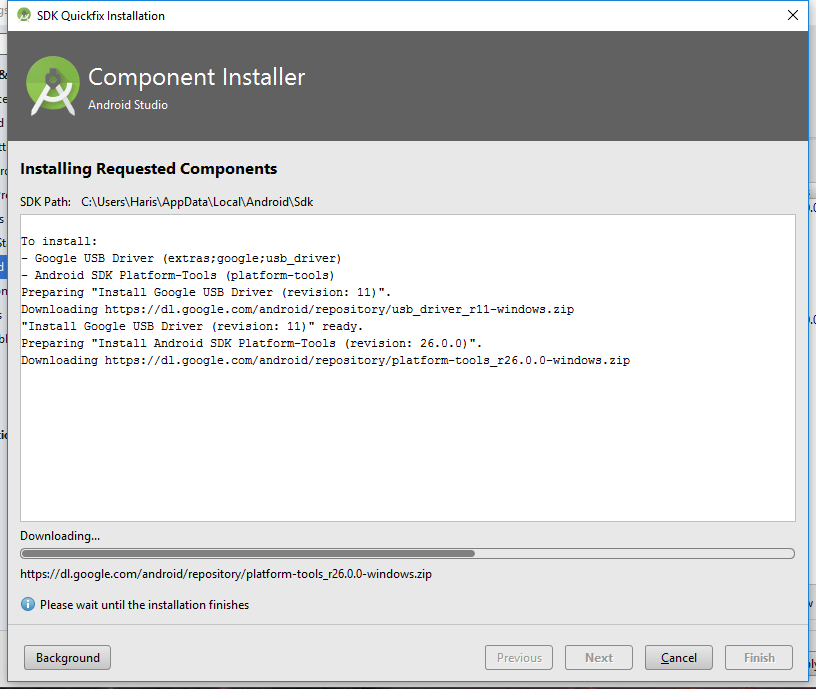
Step 18 – The downloading/installation will begin now. These should take a few minutes to complete.
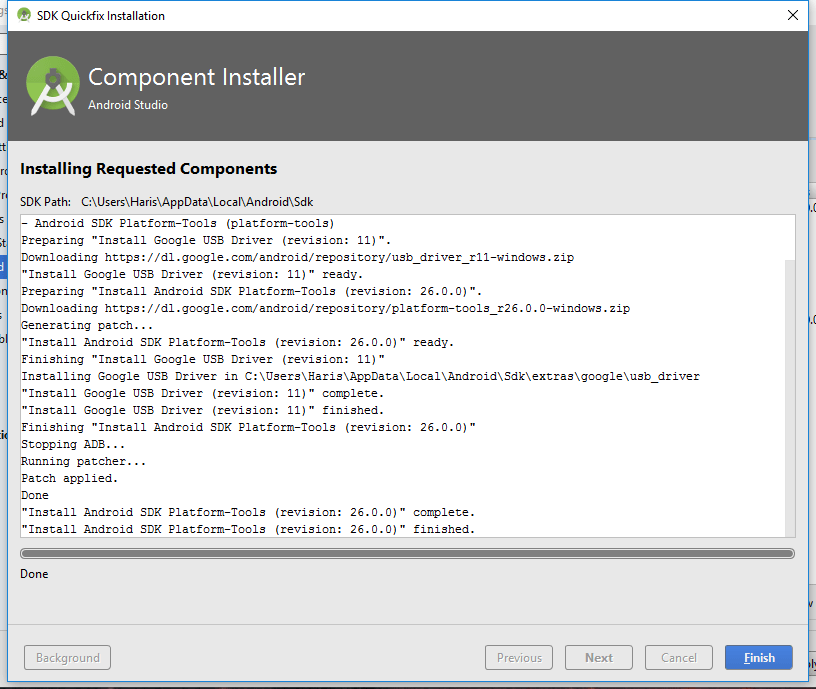
Step 19 – Once the Component Installer is done installing and setting up the tools, you will see a screen similar to the one shown below. Click Finish.
Step 20 – The new changes will now be shown in your SDK Manager. Click OK to close the window.

[…] MediaPad 10 FHD USB drivers are needed to connect the tablet with your computer. Once the drivers are installed, you can use ADB and Fastboot with the Huawei MediaPad or you can transfer files, photos and media files. you may also want these ADB / Fastboot drivers when trying to configure ADB and Fastboot using Android SDK. […]
[…] You will need to have the latest Motorola USB drivers in order to connect your Motorola device with ADB and fastboot. Follow our tutorial to connect your deice with both using Android […]
[…] help you connect your phone with a USB cable to your computer and most of all, you will be able to perform ADB and Fastboot commands as well […]
[…] 1 – Make sure ADB and Fastboot is configured on your PC. How? See here: How to Set Up ADB and Fastboot with Android SDK. This is […]
[…] Google Nexus: Google Nexus Drivers […]
[…] to root my Kindle fire 2nd gen (software version 10.1.3). I've found an incredibly useful tutorial (How to Set Up ADB / Fastboot with Android SDK for Any Andorid Device | Team Android), and was able to follow the steps up to step 24. I can't get Windows 7 to recognize my Kindle as […]
[…] Nexus: Download Google Nexus Drivers We Have Listed Drivers From Other Sites Or Official Sites Of Your Gadgets . So We Recommend You […]
[…] Step 1 – Download Android SDK from the Android Developers website and install. Also set it up with downloading platform-tools and USB drivers package in SDK. See: How to Set up ADB and Fastboot on Windows. […]
Windows XP shows “wrong driver error”. Is there other place to get this fastboot driver?
i’m french, and at step 28, no driver install :/ have you skype ? add me : blaster885
[…] 1: Make sure USB drivers / ADB drivers for Galaxy Note II have been installed and ADB is configured on your […]
[…] to enable connectivity with the computer.Download Galaxy Note 2 USB drivers and ensure that ADB is configured on your […]
[…] SDK from the developers’ site and install USB drivers (check here for a tutorial to set up Android SDK (Fastboot/ADB) on […]
[…] Step 1 – Download Android SDK from the Android Developers website and install. Also set it up with downloading platform-tools and USB drivers package in SDK. See:How to Set up ADB and Fastboot on Windows. […]
The folder you specify doesn’t exist in the android sdk anymore!
About which Directories are you talking?
where do I find this “Google USB Driver”
Use Android SDK and then install the Google USB Driver from the options given…
TVM
(I had downloaded the latest ADT (which says it includes the sdk, but it looks like the usb drivers are missing) so I separately downloaded the sdk and instaled the drivers as above, working now.
tvm.
i dont see a device name as in the screenshot.. is it connected properly?
cant find the google folder in sdk
Very Nice!!! Thanks TeamAndroid!
when i type ‘adb devices’ in the Command Prompt window and press Enter, there is “offline” next to the number instead of “devices”
why?
And are you sure all your USB drivers are properly installed?
Are your ports all free? There is something trying to stop ADB from starting.
I know this is a bit late (but in case you’re still having the issue). I had the same problem and I believe it is because I’m running 4.2.2, which has an added security feature. I fixed it by unplugging and then replugging the usb cord that connected my phone to the computer. After doing so, a notification popped up on my phone. I selected ‘always allow from this computer’ and gave the permission it needed.
At step 17 once i select the .inf file its telling me that “the specified location does not contain hardware information” (translation may be a little rough since its on spanish)
This is happening on windows xp sp3 with my chinese android tablet (absoluteley 0 info about it, box says nothing)
thank you
At device manager/ Other devices, all i get is “usb device”, could that be the issue?
I got stuck at step 17 too. And the same error “the specified location does not contain hardware information” after I picked the android_winusb.inf. What is an alternative to this. I’m on XP sp3 too.
If you get
“the specified location does not contain hardware information”
message, try doing this:
In my case (old HTC Wildfire S, old HP laptop with XP SP3), when I connect the phone to the computer via USB the driver is immediately installed automatically. When I uninstall it manually, the computer requires restart before I can proceed with manual installation as described in the article above. But after restart the default driver is installed automatically again – a vicious circle, and frustrating one 🙂 Here are steps to overcome this:
Note: this is experimental, you do this at your own risk!
1. Connect the phone to the computer, let it install drivers. When it’s finished, right click on My Computer and choose Manage. Click on Device Manager. Find your phone on the list and right click on it and go to Properties > Details tab > choose “hardware Ids” from the dropdown list. Write down the hardware id (in my case it was “USBVid_0bb4&Pid_0cb0&MI_01”). Go to Driver tab – uninstall the driver, do not restart the computer.
(thanks to Insta from xda-developers forum)
2. Disabling automatic driver installation:
Open registry editor:
menu start > run… > regedit
go to path:
HKEY_LOCAL_MACHINESOFTWAREMicrosoftWindowsCurrentVersion
(click on CurrentVersion)
From the right window right-click “Device Path” – Modify.
Cut all value data (leave it blank) and paste it somewhere so that you can restore it later (you can also export the path using menu file>export). Now XP should not be able to auto-install drivers without you manually pointing to them.
(many thanks to turd from overclockers forum)
3. I removed HTC Sync from autostart (don’t know if it’s necessary but I did it just in case)
menu start > run… > msconfig > startup > uncheck htcUPCTLoader on the list
4. After this you can restart without unplugging the phone. Since you disabled automatic installation, the system should not install the driver after the restart.
5. Next – to deal with the “the specified location…” error I had to manually add “hardware information” the system was looking for to the android_winusb file:
Browse to the location of the file “android_winusb.inf”.
In my case it was:
C:Program FilesAndroidandroid-sdkextrasgoogleusb_driverandroid_winusb.inf
Open the file using notepad (or other text editor) and use previously copied hardware id to create a new entry on the list of devices (in my case below the line “[Google.NTx86]”) – it should be formatted like this:
;
%SingleAdbInterface% = USB_Install,
%CompositeAdbInterface% = USB_Install, &MI_01
(sometimes there are more than 2 lines – try to search the net for your specific model)
In my case it looked like this:
”
[Google.NTx86]
;HTC Wildfire S
%SingleAdbInterface% = USB_Install, USBVid_0bb4&Pid_0cb0
%CompositeAdbInterface% = USB_Install, USBVid_0bb4&Pid_0cb0&MI_01
”
Save & close the .inf file.
6. After this you should install the phone manually as described in the article.
You start with the step 12, but you will not find your phone on the list of devices
(since you disabled automatic install :P)
Instead, in the Device Manager you should choose “Action” from the top menu and then
“Scan for hardware changes” – is should find your phone and start manual installation
(step 14 and so on – you use your modified android_winusb.inf file, that thanks to
modification should not result in the “the specified location…” error).
Remember – this is a little bit chaotic post of a first-time modder – viewer discretion is advised 😉
Anyway, hope this helps, cheers!
(based on:
http://www.overclockers.com/forums/showthread.php/247559-How-can-I-stop-Windows-XP-from-automatically-installing-drivers
http://forum.xda-developers.com/showthread.php?s=ff4e4f4841221d8d6b79e3de81361f2a&t=764944&page=2
http://androidyou.blogspot.com/2011/03/adb-driver-for-htc-wildfire-and-t.html
)
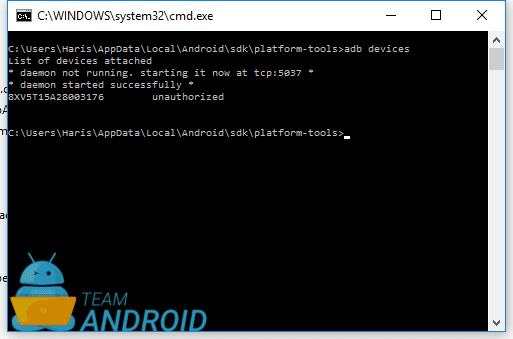
At the command prompt, it tells me that the device is unauthorized, can someone help please?
At the command prompt, t says the devices is unauthorized, could anyone help tell me what this means and how to fix it?
disconnect your usb cable and reconnect it. Security RSA feature will allow you to accept your PC. Then run adb devices in the command prompt again and the unauthorized indication should change to device.
Just to clarify this — the “security RSA feature” is a popup window on your Android device (not your PC) that asks if you want to allow USB debugging, and shows the computer’s RSA key.
at step 4 when I try to open sdk manager, it does not feth anything. a small screen like of command prompt flashes for a second only. and that’s it. it is not fethching any pakages
at step 12 i do not see my device. please anyone help me
Hi. I have Huawei Ascend P1. I get stuck in step 27. My phone won’t go to the Bootloader screen. It shows Huawei screen for some time and shuts back down. any help? thanks.
I’m afraid I can’t find my device in ‘Device Manager’ at step 12… Can anyone help me resolve this problem?
Brilliant instructions. I followed it to the letter and it worked like a dream. Thank you!
I am also stuck on step 17. My issue is as follows after I choose android_winusb.inf..
“The folder you specified doesn’t contain a compatible software driver for your device. If the folder contains a driver, make sure it is designed to work with Windows for x64-based systems.”
I have tried every windows download option from the website provided and yet the issue prevails.
I am using:
Windows 7 Home Premium
64-bit OS
Service Pack 1
if you installed drivers for your phone first before going through this whole process, then first uninstall them such that in Device Manager, you either see Android USB device or unknown device or your device name with the yellow warning sign.
Don’t worry about uninstalling your present drivers, you can always get them back (roll back).
After uninstalling, try going through the process again. This is what worked for me
yeah but if i uninstall the drivers, the moment i conect the fone to the pc it instal the drivers right away again
Try uninstalling the drivers while the phone is connected and do not refresh for hardware changes. Just go ahead with manually locating the driver you wish to install.
Connecting the phone to the pc or refreshing for hardware changes triggers the pc to search your device for the drivers you just uninstalled, and which it will most definitely find.
Hi Nileafter24. Thanks for trying to help. I’m having the same trouble as Korey Fonseca with my 64 bit Windows 7 computer. I tried following your instructions and uninstalled the driver for my android phone with the phone connected. In order for it to work the device manager requires a computer restart and then of course reinstalls the driver.
Is the restart required after installing the intended android adb interface driver?
I don’t think you need to restart your pc for the driver to work, even if it tells you should.
Try step 24. The driver may have installed properly but just doesn’t display the same way in the device manager as the author of this article’s does (my HTC phone was showing completely different stuff in DM).
If your step 24 shows an ID no. with a device then your adb driver has been set up correctly.
The restart seems to be required after uninstalling the driver because when I then try to “update driver” it just gives me a restart now or restart later message. When I clicked restart later, it cancelled the operation to update driver. It’s frustrating because I was almost at the point of being able to install the new rom.
I’ve just tried with another HTC phone and a Nexus. I unfortunately don’t come up with a forced restart like in your case.
I can only assume the forced restart is coming about because the current interface driver is still in use by another process and thus it cannot update without a restart. Try exiting all programs that could be using your phone (like sync managers) or cloud uploads or whatever. Try to make sure nothing is using your phones USB at the moment. Check in Task manager to make sure.
If that fails, try changing your USB port. If that fails, try another PC if you can access one (to rule out the PC being the root of the problem).
hi, i was having the same problem. What i found was you don’t have to uninstall the driver. Rather, enable ‘usb debugging’ from ‘developer options’ in your phone. This will show the device with the yellow sign as shown in step 12. hope it solves your problem as well. 🙂
it’s still not happening for me, with usb debugging enabled. In fact, my phone doesn’t even appear under the ‘other devices’ category as show in step 12. my phone appears under the ‘portable devices’ category. i know you posted your comment a year ago, but i’m still giving this a try.
As a “User”account, you cannot open Device Manager in Windows 7 and install “anything”, yet nowhere in this account does it warn you will need to setup ADB or indeed SDK as Administrator! I have read through many different accounts of installing ADB for Samsung smartphones and they are all frustratingly sparse as to detailed instructions! One of the worst areas is there is no advice about which of the many variants of SDK to download. Even SDK Manager, which has many possible options for downloading copious files, is given diddle squat detailed explanation. I have used Odin and CyanogenMod’s own Installer, both of which work like a dream. I mostly have Mac’s and almost given up on Windows after 35 years experience. This is just a waste of time when it is so poorly explained!
it says my folder does not have compatible folder for my driver when on step 21. it says i need one that works on a windows 32 bit system
i can’t open sdk manager. what do i have to do? please help me
Im stuck in 28, it doesnt install device
Thanks for this detailed post, it worked for Me. Can you let Me know how to transfer files between Laptop and OnePlus One android device now. (connected OPO to Laptop using an USB).
My GT-S5301 is not going into fast boot mode. It instead goes to safe mode. What can i do??
all correct, but in step 24, i didn’t see any devices :'(
Wowsome instructions! Thanks a lot, Sir!!
Thanks.
Can I use adb in my bootloop tablet? Is it possible to edit build.prop using it? because editing build.prop is the cause of this bootloop………
can i use this for my bootloop tablet?
no “android 1” in step 29 and also cmd prompt showing unauthorized device.. please suggest
Hi ,
I get unauthorized when i give adb devices . I followed all the steps but still i get the same
I succeeded at the first try. Now I updated my Nexus 7 to Android 5. Thanks for the tutorial.
Works perfect!! many thanks !!!!
Stuck at step 18
it does not show “Android ADB Interface” and “Android Bootloader Interface”
I’m stuck at step 34 where this come out after I select the android_winusb.inf . anybody know how to fix this ? :/
I’m stuck at step 34 where this come out after I select the android_winusb.inf . anybody know how to fix this ? :/
hi ridzwan were you able to fix tthe step 34 issue? I am facing the same problem?
me too
They are installed in that case.
hii i m Dharmendra singh
hii am jyoti my love Dharmendra
How to Get Step 39. Plz Help me
Hi I am trying to install android studio in Windows 8 when I am running adb devices it is not showing anything at all. Though in the background I could see the adb process. Have uninstalled and installed drivers multiple times of no help!
That is the error!
I don’t usually post, but I thought I say great work with this guide! Got me back on track with my mobile app development!
While working through the steps to set up ADB, something broke (I don’t know where) and now my Note 3 is stuck in a boot loop. The first (blue) line reports — Recovery Booting…; the 2nd (yellow) line reports — Set Warranty Bit: recovery. My searches for recovering from Boot-Loops has not found any procedures that work. (i’ve tried several) If anyone has a clue how to recover my Note 3, I would appreciate your ideas. At this point I have a recoverable device–just no way to do that, or a very spendy paperweight. Thanks for your ideas in advance.
work great!
thank you!
Thank you from France ^-^
Work great on Google Nexus 6 Marshmallow (6.0), thanks !
All done to the letter but when i type “adb devices” it doesn’t list any devices. any thoughts?
Hallo Salameh,
Did you make it wok eventually?
Thank you!
Thank you, it works for my Samsung Galaxy Grand GT-19060 🙂
i can’t find usbdriver folder in google folder
step 24 gives me this,
It will work on Windows 8? Thanks in Advance
¡Wow! muchísimas gracias, pues después de buscar y buscar por Internet pensaba que los drivers que tenía no servían o que los estaban instalando mal. Soy técnico hace años, pero a uno a veces se lo olvida las diferentes de formas de forzar un driver.
Tengo el HTC Desire 816 de Sprint, pero está bloqueado en mi país; o sea, vivo en República Dominicana, y aquí no he encontrado como desbloquearlo para poder usarlo.
Pero, vi en Internet un tutorial de como desbloquearle el Bootloarde para poder Liberarlo o ponerle una ROM, que pienso que con eso al menos luego podré desbloquearlo por IMEI.
Me faltaba el paso de conseguir el Token (y por el driver que me ayudaste a poner estaba parado), para enviarlo a la empresa https://www.htcdev.com y que ellos me envíen el código para desbloquear el Bootloader; pero, cuando pongo el Token me da error, por lo que les escribí y estoy en espera de alguna respuesta.
Luego de desbloquear el Bootloader pienso seguir los pasos del tutorial para poder liberar el móvil por completo (porque me hace falta primero lo del Bootloader), para ver si lo puedo usar en mi país.
Gracias nueva vez, y espero que este Post siga ayudando a más personas.
¡Saludos!
Hi,
I am unable to install the ADB USB Interface driver on Windows 10 64-bit.
Whenever I connect my Galaxy S5, Windows installs the normal composite driver and I don’t get the unidentified device.
I tried deleting the drivers and reboot the pc but as soon as I connect the phone, the Samsung USB drivers are installed automatically
Any thoughts?
Thanks
Eyal
LOOOOOOOL WHY I CANT INSTALL THIS STUPID SHIT ?
http://prntscr.com/bguud5
Im on windows 10 and I cant find the other devices tab in device manager. PLZ help. Maybe my computer isnt detecting the phone?
I have a Galaxy Note 4. I installed the latest SDK 24.4.1. When I go to “Have Disk” and select android_winusb.inf, Windows 10 (x64) tells me “The folder doesn’t contain a compatible software driver for your device,” and will not permit me to install it. It does the same thing on Windows 7 (x64).
Same problem with a Nexus 7. Followed all steps to this point, the selected the generic Windows USB driver that was offered. Driver install completed and I was then able to get the command line verification shown in this tutorial.
Apart from not showing up in other devices, and as a portable device, where my system jumps the tracks is at Step 35, where I get the message above instead of having it offer me any drivers. Alternate possible choices yield the message that the best driver is already installed. I can’t get to the place where Windows will allow the driver you’re referring to be installed under any circumstances I’ve yet discovered, so, no, not the same problem…
i HAD the same issue and spend many hours to fix this issue.
Following is for Yotaphone 2 but should be the same just be sure about you have the correct dirver
Plug your phone on the usb while holding the volume down button a small “downloading” in white should appear.
Then, go to Start -> Control Panel -> System -> Device Manager
Instead of the name of your mobile phone in the list of devices, you should have an android devices that appear. Install your driver on this devices.
You should then be able to flash your phone afterwards
Nope, that’s not what happens. No “downloading” message in white, and my phone appears under portable devices as the name of my mobile phone, not as an android device. Lots of ambiguity in your instructions though, including which driver, in your opinion, is the correct one.
i cannot find android 1.0 driver
Bravo ! It works.
Thanks a ton
i don`t have other devices !!
Me too
Wow…worked 100% for me. Thank you So much.
hello someone tell me if it works in the LG g5 h840 please tell me know ….
I’m stuck on step 17. When I click OK It says “The folder you specified doesn’t contain a compatible software driver……If the folder contains a driver make sure it is designed to work with Windows for x64 systems” Can someone help me please? Win10 x64 BTW.
Have the same problem…
it means it is installed already.. just see if fastboot works
it means it is installed already
Thank you so much Step 29 helped me
I have this issue, pc shows adb devices but when I try it with fastboot this happens, and I did all the steps correctly
https://uploads.disquscdn.com/images/6381b91e3a26d3ca92a9dda0ead7850851966b3eeebaeddea366f85a550b8cb3.png
I’m getting the same problem. I did all the steps correctly until I get here and never accepts the fastboot. I also tried allowing win 10 to install programs without known sources and did all the procedure again and still nothing.
Me too… Kinda cool to spend all that time going through all those steps, just to get jacked at the end ain’t it fellas???? smh….
https://uploads.disquscdn.com/images/3d43c0b0761e6fa3986222e353ba75607f2a80c7d1144b8032c0155a2572c54f.jpg
I did all the steps but when I’d like to unlock the bootloader (code from Sony developer site) it sends this failure ( Sony Xperia X). Do you guys have any idea what causes it?
This worked perfectly for my Oneplus One! Thanks so much.
Be warned – there is no such thing as fastboot mode for most Samsung Galaxy devices – you’ll be wasting your time doing this and typing “fastboot devices” for many hours!
If you have problems with your recovery, it works to just reflash the CF-autoroot kit, which happens to flash the cache partition too. My problem was a bootloop with TWRP’s obviously buggy OpenRecoveryScript, which was installing a ZIP file over and over again.
Al querer realizar el paso ” Paso 17 – Haga clic en el botón “Utilizar disco”. Ahora navegar a D: android-sdk-windows extras Google USB_Driver directorio y seleccione android_winusb.inf . Haga clic en Abrir. Luego haga clic en OK. ” me aparece una ventana diciendo:
La carpeta especificada no contiene ningún controlador de software compatible con el dispositivo. Si contiene un controlador, compruebe que esté diseñado para funcionar con windows para sistemas de 32 bits.
Saludos, espero que me puedan ayudar lo mas rápido posible.
Links are outdated? Link to download Android SDK is now something called Android Studio, that just appears to be a great big load of bloatware… 45 mins and I’m still waiting for this to install… probably only to find out that it doesn’t have SDK within it. Not good.
It doesn´t word I had to google sdk manager to download it
I have a Samsung A5(2015) and I can’t make it work. I get to see the device in the ADB and boot in fastboot mode. But then when I want to list the devices using “fastboot devices” nothing shows. The driver showed in the Device Manager is “Samsung Mobile USB Modem”. I tried to replace it with the drivers from Google, but Windows won’t let me.
Any advice?
it doesnt work to install any drivers. my control panel just crash when i click show all devices. wtf can i do. im so confused.
Hi Haris,
I hope you can tell me if I am even in the right place; and if so, what I’m doing wrong.
I have a Dell Venue 8 (HW 3830, or maybe 3840, Android ver 4.2.2, I think) that simply stopped booting properly. When I try to boot it normally, it hangs showing the ‘Dell” logo. I have tried all the simple recovery methods – clear user data, clear cache, etc – and am pretty sure I need to reload the boot memory/program. After stumbling around the web for a while, I ended up here.
I have downloaded the SDK platform ,etc, and (after having edited the inf file to add the VID/PID for my tablet) have gotten to ‘step 34’; that is, in some but not all tablet recovery modes, I can get ABD.exe to show me device “DellVenue8000154633”.
(I am a retired firmware programmer who worked on some USB devices in the past, so I have a reasonably good idea about USB inf files, and VID/PIDs, etc.)
When I try to do the ‘update drivers’ for the ‘Android Bootloader Interface’ pointing it to the edited inf file, I get a message saying ‘hash not found in cat file’. (Steps 39-46, etc) Is that telling me that the cat file, etc is preventing me from doing any further damage to my tablet? That I’m completely on the wrong track when trying to use your tools etc on a Dell?
When I boot the tablet with ‘power plus vol down’ I can get to a Dell recovery screen that (among other things) says “fastboot cmd waiting…”. Is that the equivalent of “Bootloader / Fastboot mode” at Step 37? At that screen, the Dell tablet is presenting a Dell VIP/PID (413C-B111 or – B112) and ADB.exe doesn’t see it.
If while on that screen, I select ‘recovery’, I get to a screen with the android guy on his back and nothing else (ie. no ‘start’ etc). In that mode, the tablet is presenting the same Dell VID/PID, but ADB.exe does see it, with the same “DellVenue8000…” label.
If I simply plug the USB cable into a powered off tablet, the tablet comes alive, shows a USB symbol on the screen with a ‘progress bar’ underneath, and presents an IBM VID/PID (8086-09EE). Trying to ‘update driver’ in this mode generates the same ‘hash not found in cat file’ error (with the inf edited to include the VID/PID).
Really sorry to bother you, but I think all I have to do in find the right incantation, and I’ll be able to ‘unbrick’ my tablet; I don’t think there’s anything fatally wrong with the hardware, etc. But I’m stuck.
Thanks, Robert
I know it’s over four years later, but I stumbled on this looking for that VID/PID. That 8086 is not IBM, it’s Intel. I’ve got a completely different tablet (Acer A1-830) which briefly shows up as 8086:09EE and then switches to its “proper” id 0502:0a14. From dmesg, the first id shows a product label of CLOVERVIEW, which I suspect is the chipset used in both tablets. I know it’s not helpful to the OP, but it might help future searchers.