If you are developing a mobile application, more specifically an Android one and your client wants to integrate in-app purchasing in the application and this is the domain you have no experience in. You frantically look on the web and see com.android.vending.billing being the solution but you’re confused about what it does and how do you integrate it. Along with that, you may see another term called “Google Play Billing Library” associated with it. Are they both the same? How to set up the billing library and how to amalgamate it into your application?
Or if you want to purchase a product from an application and have wondered how this X application takes my real money and gives me the in-app product. Is it even safe to use? Are there any risks involved in trusting the application’s billing process? Will I get robbed? These are the most frequent questions that normally would come to mind.
Well, for starters, it is safe to use the application if it is verified by Google Play and as a developer if you want your application to be verified quickly, using the com package or the billing library is a great start! In this article, we’ll talk about the com package and the billing library and how to integrate them into your app.
What is com.android.vending.billing?
The com package called com.android.vending.billing is a package that supports in-app billing in your Android application. This package was used in Android applications where you would add the package in the manifest file and add some relevant dependencies. It is a Google API that provides the permission of adding in-app purchases to your application and adding them to the manifest file allows it to make billing available to your app.
What is Google Play Billing Library?
The Google Play Billing library is the modern way to add purchasing in your application. This library is used to integrate Google Play’s billing system into your Android app which is a service that prompts you to sell your digital products and content in your app. This system makes sure that you can do safe purchasing of products in your application whether it is a one-time purchase or subscription based.
How the billing library integrates the billing system to your android application can be described in a block diagram:
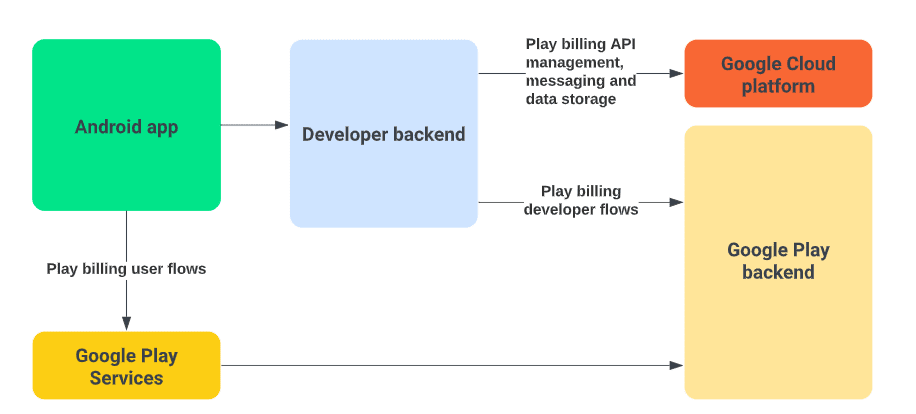
Along with adding the system to the android app, this should also be added to your server backend for efficient developer flows and secure purchasing of products.
Flow of Purchase of Products
Through code examples, we’ll discuss the integration of the Google Play billing library into your application. But before that, the question arises: What is the normal flow of a purchase of an X product either through a subscription or a one-time purchase. We’ll talk about both of them here.
One-Time Purchase
The following applies to a one-time single purchase of any in-app purchase (IAP) that is initiated in an app or game:
- Show the user what they can buy.
- Launch the purchase flow for the user to accept the purchase.
- Verify the purchase on your server.
- Give content to the user.
- Acknowledge delivery of the content. For the case of X consumable product, consume the purchase so that the user can buy the item again.
Subscription-Based Purchase
Subscriptions have states that they are in and it is usually renewed unless they are manually cancelled. The states are below:
- Active: User has access to the subscription.
- Cancelled: User has cancelled but still has access until expiration.
- In grace period: User experienced a payment issue but still has access while Google is retrying the payment method.
- On hold: User experienced a payment issue and no longer has access while Google is retrying the payment method.
- Paused: User paused their access and does not have access until they resume.
- Expired: User has cancelled and lost access to the subscription.
How to Integrate Google Play Billing Library into Your Android App
In the following section, you will read about how to add the com.android.vending.billing library and permissions into your Android app or game:
1. Initialize Connection to Google Play
This step has been broken down into three separate steps to make it easier to understand for you.
Step 1 – Add Dependency
The first step to integrate the library to your app is to make sure that you initiate the connection to Google Play correctly. For that, add the Google Play Billing Library dependency to your app’s build.gradle file.
dependencies {
    val billing_version = "6.0.1"

    implementation("com.android.billingclient:billing:$billing_version")
}

Or if you’re using the KTX module:

dependencies {
    val billing_version = "6.0.1"

    implementation("com.android.billingclient:billing-ktx:$billing_version")
}
The billing version can be changed with time, add the one that is more stable. At the time of writing this article, the 6.0.1 version is the most stable.
Step 2 – Initialize Billing Client
After adding the dependency, you have to add the billing client which is the main interface for communication between the Google Play Billing Library and the rest of your app. To create a BillingClient, use newBuilder(). You can pass any context to newBuilder(), and BillingClient uses it to get an application context. It makes sure there are no memory leaks.
private val purchasesUpdatedListener =
   PurchasesUpdatedListener { billingResult, purchases ->
       // To be implemented in a later step.
   }

private var billingClient = BillingClient.newBuilder(context)
   .setListener(purchasesUpdatedListener)
   .enablePendingPurchases()
   .build()
Step 3 – Connect to Google Play
After adding dependency and initializing the billing client, establish the connection to Google Play. For that, call startConnection() Also, implement a BillingClientStateListener to receive a callback once the setup of the client is complete and it’s ready to make further requests.
There will be instances where your connections to Google Play will be lost, to handle those, override the onBillingServiceDisconnected() callback method, and make sure that the BillingClient calls the startConnection() method to reconnect to Google Play before making further requests.
billingClient.startConnection(object : BillingClientStateListener {
    override fun onBillingSetupFinished(billingResult: BillingResult) {
        if (billingResult.responseCode ==  BillingResponseCode.OK) {
            // The BillingClient is ready. You can query purchases here.
        }
    }
    override fun onBillingServiceDisconnected() {
        // Try to restart the connection on the next request to
        // Google Play by calling the startConnection() method.
    }
})
2. Show Products Available to Buy
You have made sure that you are connected to Google Play, now the fun begins as we now have to showcase the products to the users. But before that, we have to query them as it returns localized product information. For subscriptions, ensure your product display follows all Google Play Developer policies.
To query for in-app product details, call queryProductDetailsAsync(). To handle the result of the asynchronous operation, you must also specify a listener which implements the ProductDetailsResponseListener interface. You can then override onProductDetailsResponse()
val queryProductDetailsParams =
    QueryProductDetailsParams.newBuilder()
        .setProductList(
            ImmutableList.of(
                Product.newBuilder()
                    .setProductId("product_id_example")
                    .setProductType(ProductType.SUBS)
                    .build()))
        .build()


billingClient.queryProductDetailsAsync(queryProductDetailsParams) {
    billingResult,
    productDetailsList ->
      // check billingResult
      // process returned productDetailsList
}
)
3. Process the Result
The Google Play Billing Library stores the query results in a List of ProductDetails objects. You can then call a variety of methods on each ProductDetails object in the list to view relevant information about an in-app product, such as its price or description. Some of the common methods that can be used are:
| Data Type | Method Name | Description |
|---|---|---|
| String | getDescription() | Returns the description of the product. |
| String | getName() | Returns the name of the product being sold. |
| ProductDetails.OneTimePurchaseOfferDetails | getOneTimePurchaseOfferDetails() | Returns the offer details of a one-time purchase product. |
| String | getProductType() | Returns the BillingClient.ProductType of the product. |
| List<ProductDetails.SubscriptionOfferDetails> | getSubscriptionOfferDetail() | Returns a list containing all available offers to purchase a subscription product. |
| String | getTitle() | Returns the title of the product being sold. |
4. Launch the Purchase Flow
To start a purchase request from your app, call the launchBillingFlow() method from your app’s main thread. This method takes a reference to a BillingFlowParams object that contains the relevant ProductDetails object obtained from calling queryProductDetailsAsync(). To create a BillingFlowParams object, use the BillingFlowParams.Builder class.
// An activity reference from which the billing flow will be launched.

val activity : Activity = ...;

val productDetailsParamsList = listOf(

    BillingFlowParams.ProductDetailsParams.newBuilder()

        // retrieve a value for "productDetails" by calling queryProductDetailsAsync()

        .setProductDetails(productDetails)

        // to get an offer token, call ProductDetails.subscriptionOfferDetails()

        // for a list of offers that are available to the user

        .setOfferToken(selectedOfferToken)

        .build()

)

val billingFlowParams = BillingFlowParams.newBuilder()

    .setProductDetailsParamsList(productDetailsParamsList)

    .build()

// Launch the billing flow

val billingResult = billingClient.launchBillingFlow(activity, billingFlowParams)
The launchBillingFlow() method returns one of several response codes all with int datatype some of them which are listed in the table below:
| Response Codes | Description |
|---|---|
| BILLING_UNAVAILABLE | A user billing error occurred during processing. |
| DEVELOPER_ERROR | Error resulting from incorrect usage of the API. |
| ERROR | Fatal error during the API action. |
| ITEM_ALREADY_OWNED | The purchase failed because the item is already owned. |
| ITEM_NOT_OWNED | Requested action on item failed since it is not owned by user. |
| ITEM_UNAVAILABLE | The requested product is not available for purchase. |
| OK | Success! |
| USER_CANCELED | Transaction was canceled by the user. |
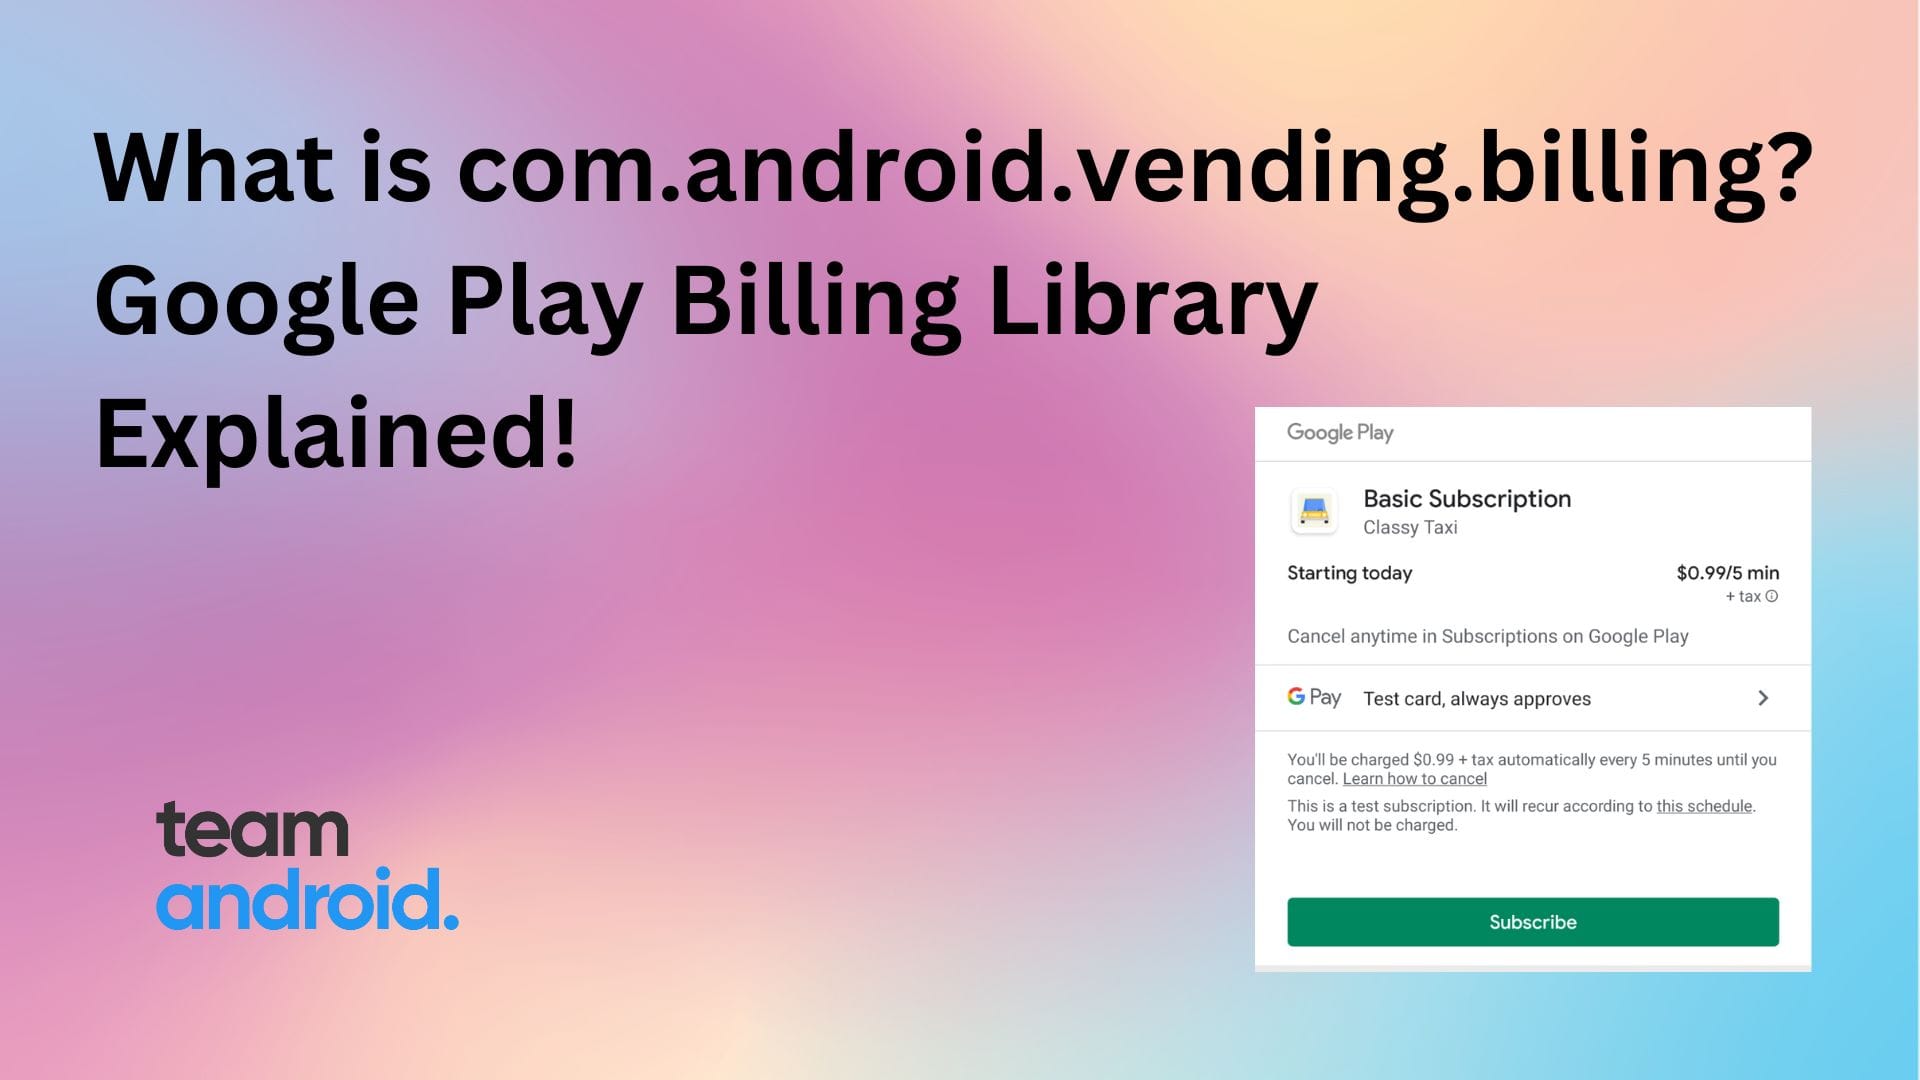
On a successful call to launchBillingFlow(), the system displays the Google Play purchase screen.
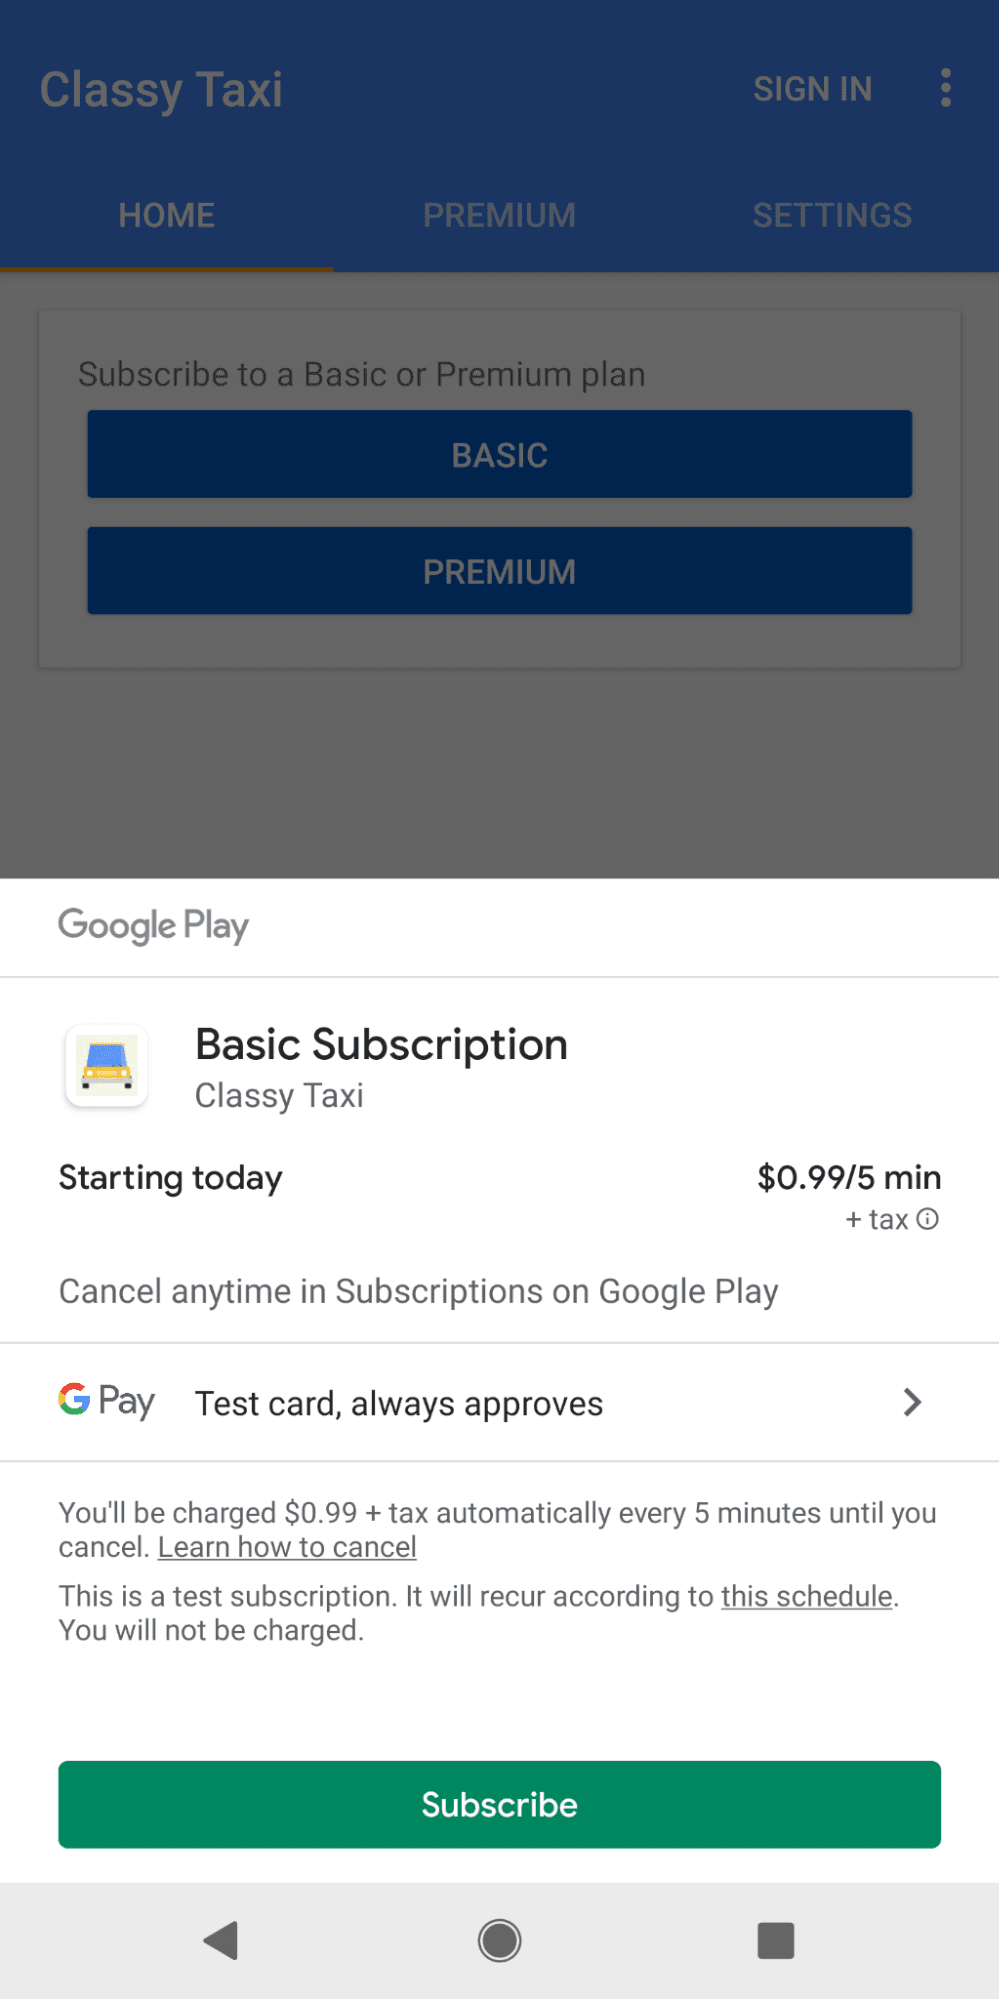
Google Play calls onPurchasesUpdated() to deliver the result of the purchase operation to a listener that implements the PurchasesUpdatedListener interface. The listener is specified using the setListener() method when you initialized your BillingClient.
override fun onPurchasesUpdated(billingResult: BillingResult, purchases: List<Purchase>?) {
   if (billingResult.responseCode == BillingResponseCode.OK && purchases != null) {
       for (purchase in purchases) {
           handlePurchase(purchase)
       }
   } else if (billingResult.responseCode == BillingResponseCode.USER_CANCELED) {
       // Handle an error caused by a user canceling the purchase flow.
   } else {
       // Handle any other error codes.
   }
}
Subscriptions vs. One Time Purchases: Which is Better?
It depends on your business model and how you want to generate revenue from your application. The one-time purchase as the name suggests is a one time payment, usually used to buy the whole application or the content in itself. While the subscription method is the limited access of the product to the users with respect to time, after that set time, they’d have to pay for the access again.
If you’re building an application that has limited scale and is made to do a limited set of tasks, the one-time purchase is better for that. If you’re looking to grow your application such that it will have enhanced performance overtime or new functional features then a subscription based strategy is better, it all depends on the goals of building the application in the first place along with revenue expectations, spending habits of your customers or how much time you are willing to commit to it.
Is it Safe to Use com.android.vending.billing (Google Play Billing) Library?
As mentioned earlier, the Google Play Billing Library is absolutely safe to use. In fact, it is recommended to make your apps and games robust enough to combat fraudulent activities. But as such with many other libraries, you still need to be careful of the clever workarounds that can still happen. We’ll discuss one such that can potentially make your billing process vulnerable along with how to fix it.
If your app is invoking the in-app billing service without setting a target package for the intent. This can enable a malicious package to bypass the Google Play Store billing system and access items that have not been purchased.
How to Fix:
- If you are using IabHelper, please start using the latest SDK.
- If you are manually invoking the In-app billing service, please ensure that you are calling Intent.setPackage(“com.android.vending”) on any intents to “com.android.vending.billing.InAppBillingService.BIND”.
- Sign in to your Developer Console and submit the updated version of your app.
- Check back after five hours – it’ll show a warning message if the app hasn’t been updated correctly.
How to Uninstall com.android.vending.billing?
In older versions, you could omit the com.android.vending.billing package but in later versions of Android devices, this package is now built in. In building applications, this package is already built in the manifest file and so you don’t have to write it yourself. The key point is there is no known way to uninstall either from the AndroidManifest.xml file or from the device itself.
Google Play Billing System FAQs
Here are some commonly asked questions regarding com.android.vending.billing or the Google Play Billing system:
What apps need to use Google Play’s billing system?
For higher chances of your apps to get into Google Play that offer in-app purchases on products, they have to use the Google Play’s billing system.
Can I communicate with my users about alternate ways to pay?
You cannot do it within your application. You have to do it through some alternatives outside of your application.
Can I have different app features, prices and experiences depending on the platform?
You can have different pricing for different app features and experiences. You can even create multiple versions of your app to support different platforms and pricing models.
Does your billing policy change depending on what category my app is in?
Irrespective of the category of your application, the billing policy remains the same.
Can I offer my customers refunds directly?
You definitely can offer refunds to users through the Google Play billing system, and you can refund directly or any customer support that you can provide.
If you enjoyed reading this article, there are some more Android development related explainer guides that you’d find helpful:
- What is Android CellSignalStrength API? Explained!
- Is it Possible to Run Docker Containers and Kubernetes on Android?

