Here are the latest Samsung Galaxy S2 ROMs you can download. The Samsung flagship from 2011 has received various official as well as third-party ROMs. Custom ROMs themselves are based on Android 10, Pie, Oreo or even Android 5.0 Lollipop. Close to being a decade old, Galaxy S2 is definitely one of the key phones that have shaped and progressed Android OS. With its top-class hardware back in the day and relatively more open access to system files, it quickly became a developer and enthusiast favorite. So much so, to this day, if you have a Galaxy S2, you can install new Android 10 OS on it. Find out how ahead.
Samsung stopped releasing firmware updates for the phone after Android 4.1 Jelly Bean but thanks to the third party community, it has gotten every Android release after that in the form of various custom Galaxy S2 ROMs. In this guide, we will be listing a complete how-to procedure that will enable users to flash Galaxy S2 ROMs ranging from various Android revisions to latest Android 10.

Samsung Galaxy S2: A Brief Overview
Samsung’s rise to fame can be accredited to the Galaxy S series, out of which, Galaxy S2 has its own unique importance. Previously, Samsung shipped phones with its own OS and only one year before the S2 did the brand announce an Android phone — original Galaxy S. While the Galaxy S has its own place in the brand’s history, Galaxy S2 is what put Samsung on the map.
Equipped with a large display that made use of Super AMOLED technology, amazing processor, great camera and a classy design — S2 was the phone to purchase, at the time. In terms of software, Galaxy S2 originally shipped with Gingerbread and on top of that, Samsung deployed its own software skin (theme), named as TouchWiz. The brand continued to update the phone up till Android 4.1 Jelly Bean.
What also made the Galaxy S2 so successful is the software support it got from third-party developers. Android’s key factor that puts it ahead of others is the fact that it is Open Source and developers can modify it. Crafting various iterations of Android, implementing mods and combining that with Galaxy S2’s hardware worked out amazing. Also, Galaxy S2 was relatively easy to mod thanks to the general openness from Samsung’s side.
Backup and Some Important Tips
Before installing a custom ROM on your phone, a backup is essential to preserve user data from one system version to the other. The following are some key tips to help you create a user data backup of your phone.
Usually the most important things to look for to backup are:
- Camera photos and videos
- Music
- Account information (logins and passwords)
- WhatsApp messages – Check out our full guide on how to backup WhatsApp messages and media.
- Downloads
Conveniently, Samsung also provides a proprietary tool for creating a complete backup of your phone including settings, app data, photos and more. Named as Samsung Smart Switch you require a computer with ample space to store a complete backup of your phone.
A few more optional tips that you should remember:
- Having problems connecting your Android phone to the computer? You need to enable USB debugging mode. See here: How to Enable USB Debugging.
- Make sure your Android device is charged up to 80-85% battery level.
- Most of the tutorials and how-to guides on Team Android are for factory unlocked Android phones and tablets. We recommend NOT to try our guides if your phone is locked to a carrier, unless we have specified the carrier name or device model.
Done with the backup? Let’s proceed towards installation.
Samsung Galaxy S2 ROMs
As the phone is quite old now and has had one of the largest custom ROM / modding community, there are loads of Galaxy S2 ROMs available. Ranging from Android KitKat going all the way up to Android 10; a total of 7 major versions! From this singular article, you can directly download multiple custom ROMs and try them out. Further, you can also find out how to download official ROMs as well but keep in mind, the latest official ROM you can try is based on Android 4.1 Jelly Bean.
As Galaxy S2 has a basic structure of system software, it is generally very easy to modify. Further, developers have already drafted loads of utilities for it.
Custom ROMs for Galaxy S2
In this section, you can directly download custom ROMs and use the steps ahead to install them on your Galaxy S2.
Download Android 10 / Pie / Oreo Custom ROMs for Galaxy S2
Here is a list of custom ROMs available for Galaxy S2. Download the ones you like and proceed ahead to learn how to install it on your S2.
| Custom ROM | Android Version | Download |
| LineageOS 14.1 | Android 7.1 Nougat | Download |
| LineageOS 15.1 | Android 8.1 Oreo | Download |
| LineageOS 16 | Android 9.0 Pie | Download |
| LineageOS 17.1 | Android 10 | Download |
How to Update Samsung Galaxy S2 with Custom ROMs – Android 10, Pie, Oreo
In order to get a custom ROM installed on Samsung Galaxy S2, there are two main procedures. As Android Pie brought with itself changes that effect device partitioning, it requires a different method as compared to all custom ROMs leading up to Android Oreo.
Nonetheless, we have compiled both methods which you can implement directly depending on which ROM you are trying to install.
For Android 8.0 Oreo and below
Step 1 – Download your ROM file and place it on the microSD card.
Step 2 – Make sure you have TWRP installed.
Step 3 – Turn off your phone and then boot to TWRP by pressing and holding Volume Up + Home + Power buttons together.
Step 4 – Wipe your data from Wipe option in TWRP.

Step 5 – Go to Install option and then select your ROM.
Step 6 – After the install is finished, flash Google Apps or just simply reboot!
That’s all for installing custom ROMs that are based on Android Oreo and below.
For Android 9.0 Pie and above
As Android Pie has a different system structure, the process of installing an Android Pie ROM is a bit lengthier but definitely worth it! Here’s how:
Step 1 – Download the following files on your computer.
Step 2 – Copy the ROM file to your microSD. Make sure to copy it over to an external card as internal storage will be wiped.
Step 3 – Turn off your phone and then boot it into Download Mode by using Volume Down + Power + Home button.
Step 4 – Download Odin and make sure proper USB drivers are configured on your PC.
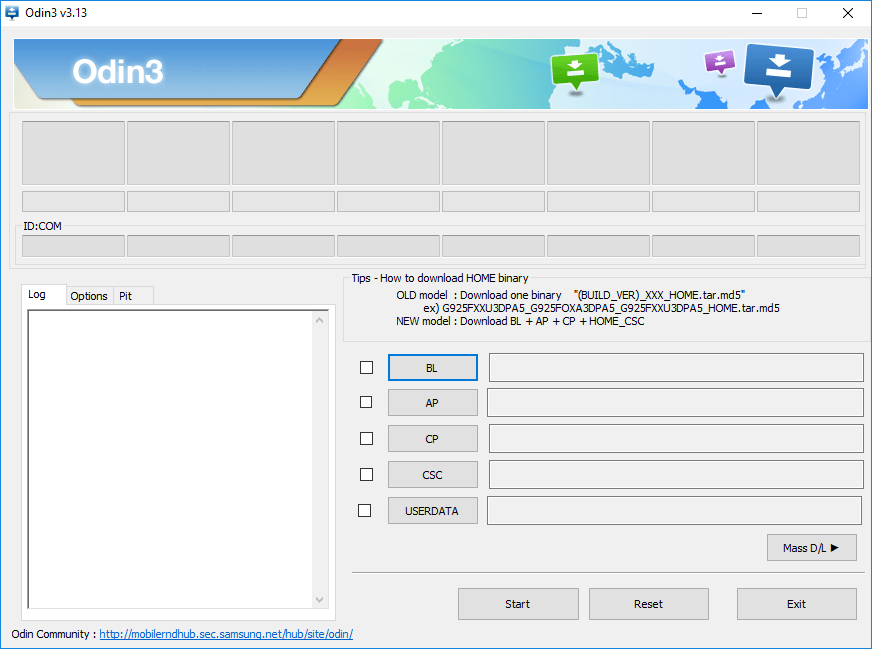
Step 5 – Open up Odin and connect your phone.

Step 6 – Setup Odin options by unchecking Auto Reboot and checking Re-Partition.
Step 7 – Now, for PIT file select the PIT file you downloaded in Step 1 and same for PDA file.
Step 8 – Click on start and wait for successful flash.
Step 9 – Reboot into TWRP by pressing and holding Volume up + power + home button for 10 seconds, letting go and then continuing again for 10 seconds.
Step 10 – Once in TWRP, swipe to allow modifications.
Step 11 – Now, go to Wipe then Format Data and then type yes.
Step 12 – Again, go to Wipe then Advanced Wipe and then select following things and wipe them:
- Davik / ART Cache
- Cache
- System
- Non-emulated Storage
Step 13 – After all is wiped, proceed to install ROM zip file which you placed on your microSD card. Once you flash the ROM, you can also flash Gapps.
Step 14 – Reboot!
That’s all! Hope you enjoy your new custom ROM on your Galaxy S2.
Official ROMs for Galaxy S2
If you are looking for an official firmware experience on your Galaxy S2, you can use the links ahead to download latest firmware. Once that is done, we have a complete installation procedure explained as well to install these Galaxy S2 ROMs.
Download Official Samsung Galaxy S2 ROMs
Here is a list of custom ROMs available for Galaxy S2. Download the ones you like and proceed ahead to learn how to install it on your S2.
| Build Number | Android Version | Download |
|---|---|---|
| I9100XXMS7 | Android 4.1.2 | Download |
| I9100XWLP7 | Android 4.0.3 | Download |
| I9100XWKI4 | Android 2.3.4 | Download |
How to Install Official ROMs on Samsung Galaxy S2
Once you have successfully downloaded the desired official Galaxy S2 ROMs, follow these steps for flashing:
Step 1 – Extract the ZIP file of the firmware you downloaded anywhere on your computer.
Step 2 – Download Odin and make sure proper USB drivers are configured on your PC.
- Download Odin (All Versions) — we recommend using older Odin 3.07.
- Samsung Galaxy S2 USB Drivers
Step 3 – Switch OFF your phone. Now go to Download Mode. How? Press and hold the Volume Down + Home buttons together, and then press the Power button till you see the construction Android robot and a triangle. Press Power again to confirm to enter into Download Mode.

Step 6 – Open ODIN on your computer. Connect your phone to your computer while your phone is in the Download Mode.
Step 7 – If your phone is connected successfully, one of the ID:COM boxes will turn yellow with the COM port number. This step might take some time.
Step 7 – Now select the files that you have to flash/install on your phone. These files are to be found from the extracted files in Step 1.
- Click on ‘PDA’ and select file with ‘CODE’ in its name.
- Click on ‘Phone’ and select file with ‘MODEM’ in its name. Ignore this step if there is no such file.
- Click on ‘CSC’ and select file with CSC’ in its name. Ignore this step if there is no such file.
- Click on ‘PIT’ and select the .pit file. Ignore this step if there is no such file.
Step 8 – In ODIN, check the Auto Reboot and F. Reset Time options. As for the Re-Partition option, check it ONLY if you selected a .PIT file in the above step.
Step 9 – Now click on the Start button in ODIN. Installation process will start and would take a few minutes to complete.
Step 10 – After the installation is completed, your phone will restart. After you see the home screen, unplug your phone from the computer.
This was a complete look on how to download as well as install Samsung Galaxy S2 ROMs! Let us know which ROM you went for and how long have you owned the iconic phone?


