Here is a detailed guide for users to transfer files wirelessly from their Android devices to their PC computer using AirDroid — both Windows and Mac supported. Practically, AirDroid has been the pioneer of connecting your computer and Android device together without any sort of wires. It initially came out years back and since then, the UI has improved a lot and so has the functionality. The underlying goal, however, remains to be giving users a method to transfer files to and from their Android smartphones over WiFi. You can read the instructions ahead on how to use AirDroid effectively to copy over files wirelessly on both Windows and Mac.
The technology that helps power AirDroid is quite simple. There are two main parts to it, one the Android host and second, the computer. On the host device, you need to install AirDroid, which, after installation would mimic a local server. Second, you need your computer to be on the same WiFi network as AirDroid and also have access to a decent browser such as Google chrome. Do note, internet connection is a plus but not necessary. For complete tips on how to use AirDroid for wirelessly transferring files, read ahead.

Unlike other solutions i.e. Portal to transfer files wirelessly, AirDroid seems to offer dual way transfers. You can transfer files to your Android device with AirDroid as well as use it to extract files. As AirDroid relies on a WiFi connection for transfers, the speed is quite adequate and feasible for large and multiple files.
Secondly, AirDroid tries to mimic a desktop environment on your browser window which is a big plus. It goes on to add extended functionality such as Notification monitoring, access to stock apps like messages and more. However, in our guide, we will use AirDroid’s file transfer capabilities only.
How to Transfer Files Wirelessly with AirDroid to Android Phone
Let’s take a look at how to transfer files with AirDroid to your Android smartphone or tablet.
Requirements:
- Download AirDroid from the Google Play Store.
- A Windows/Mac/Linux computer on the same WiFi network as the phone.
- Your Android device should be running at least Android 5.0 Lollipop, older versions have limited functionality.
Let’s get down to the actual tutorial now on how to backup Android apps on a phone or tablet using AirDroid, the easiest method to do it.
Step 1 – Download the app from the Play Store on the device for which you want to transfer files:
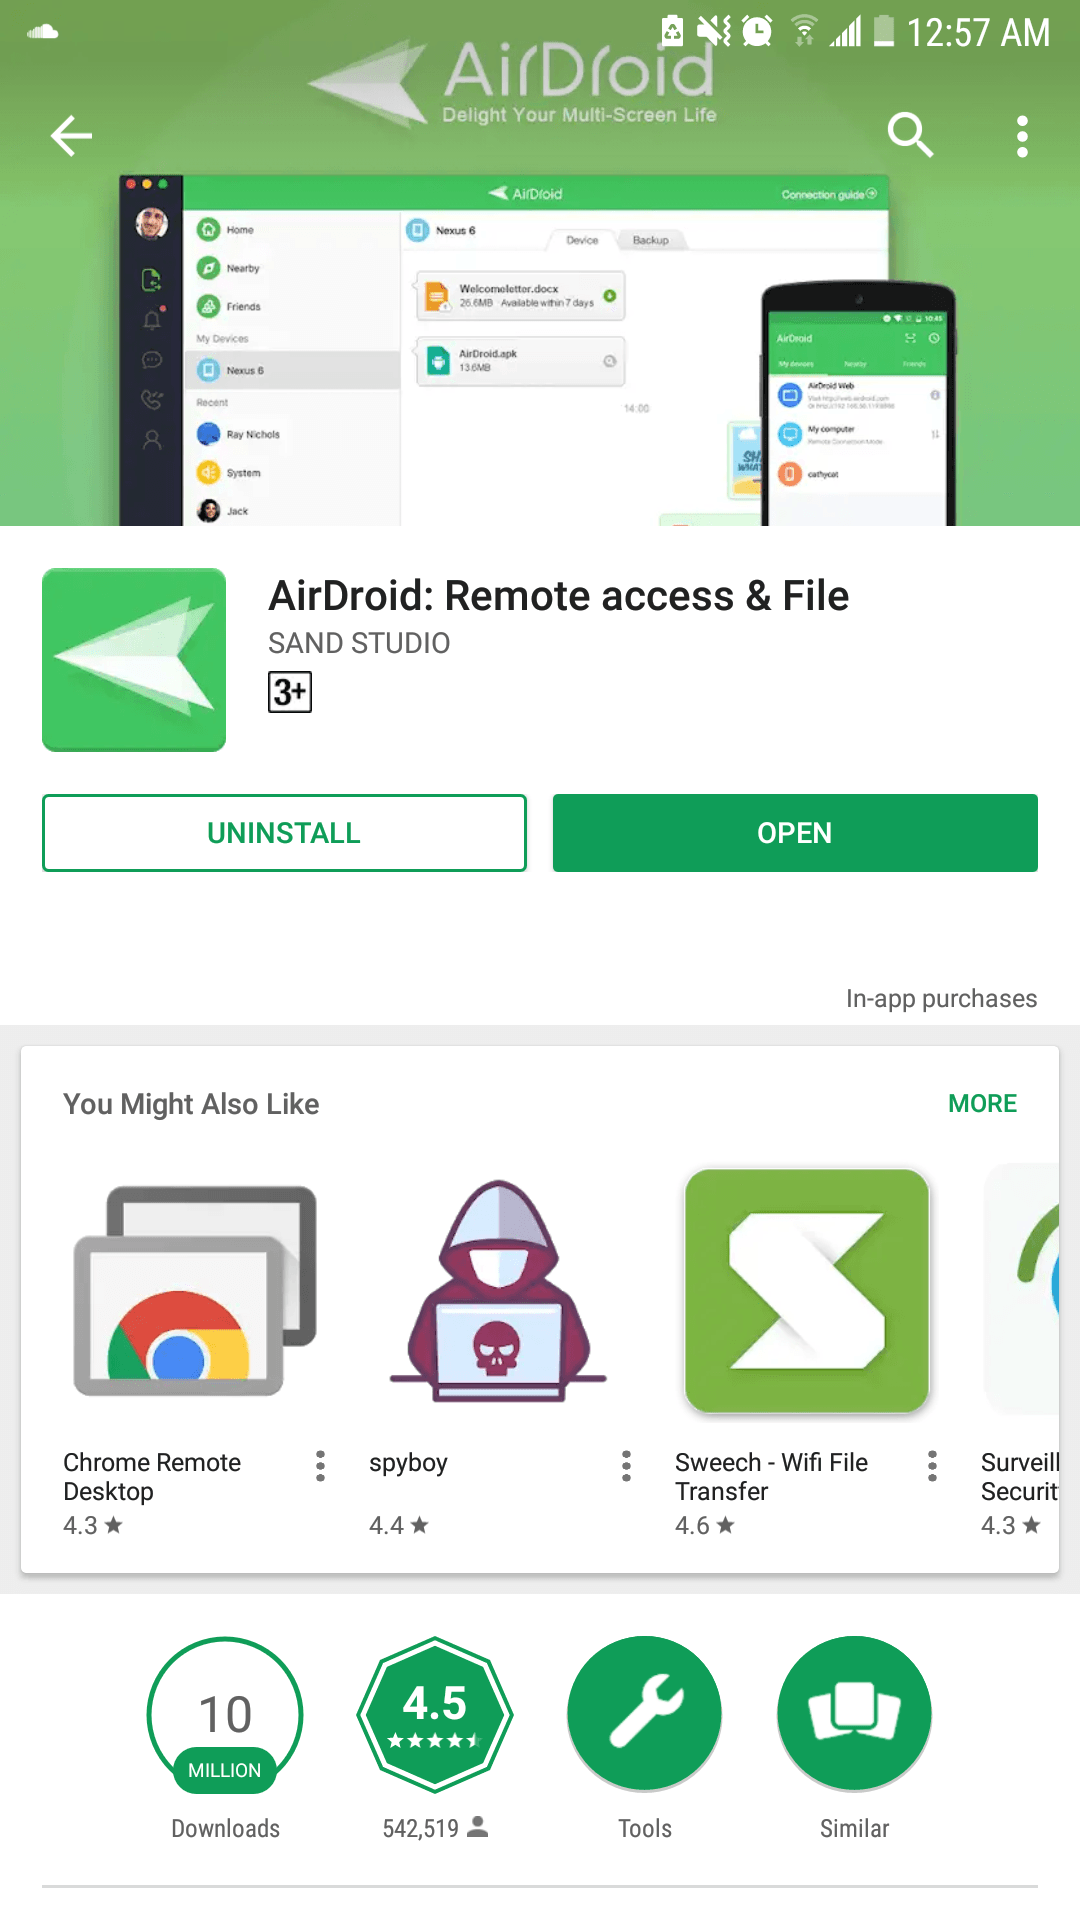
Step 2 – Open the app after its done installing and go through the welcome screen.
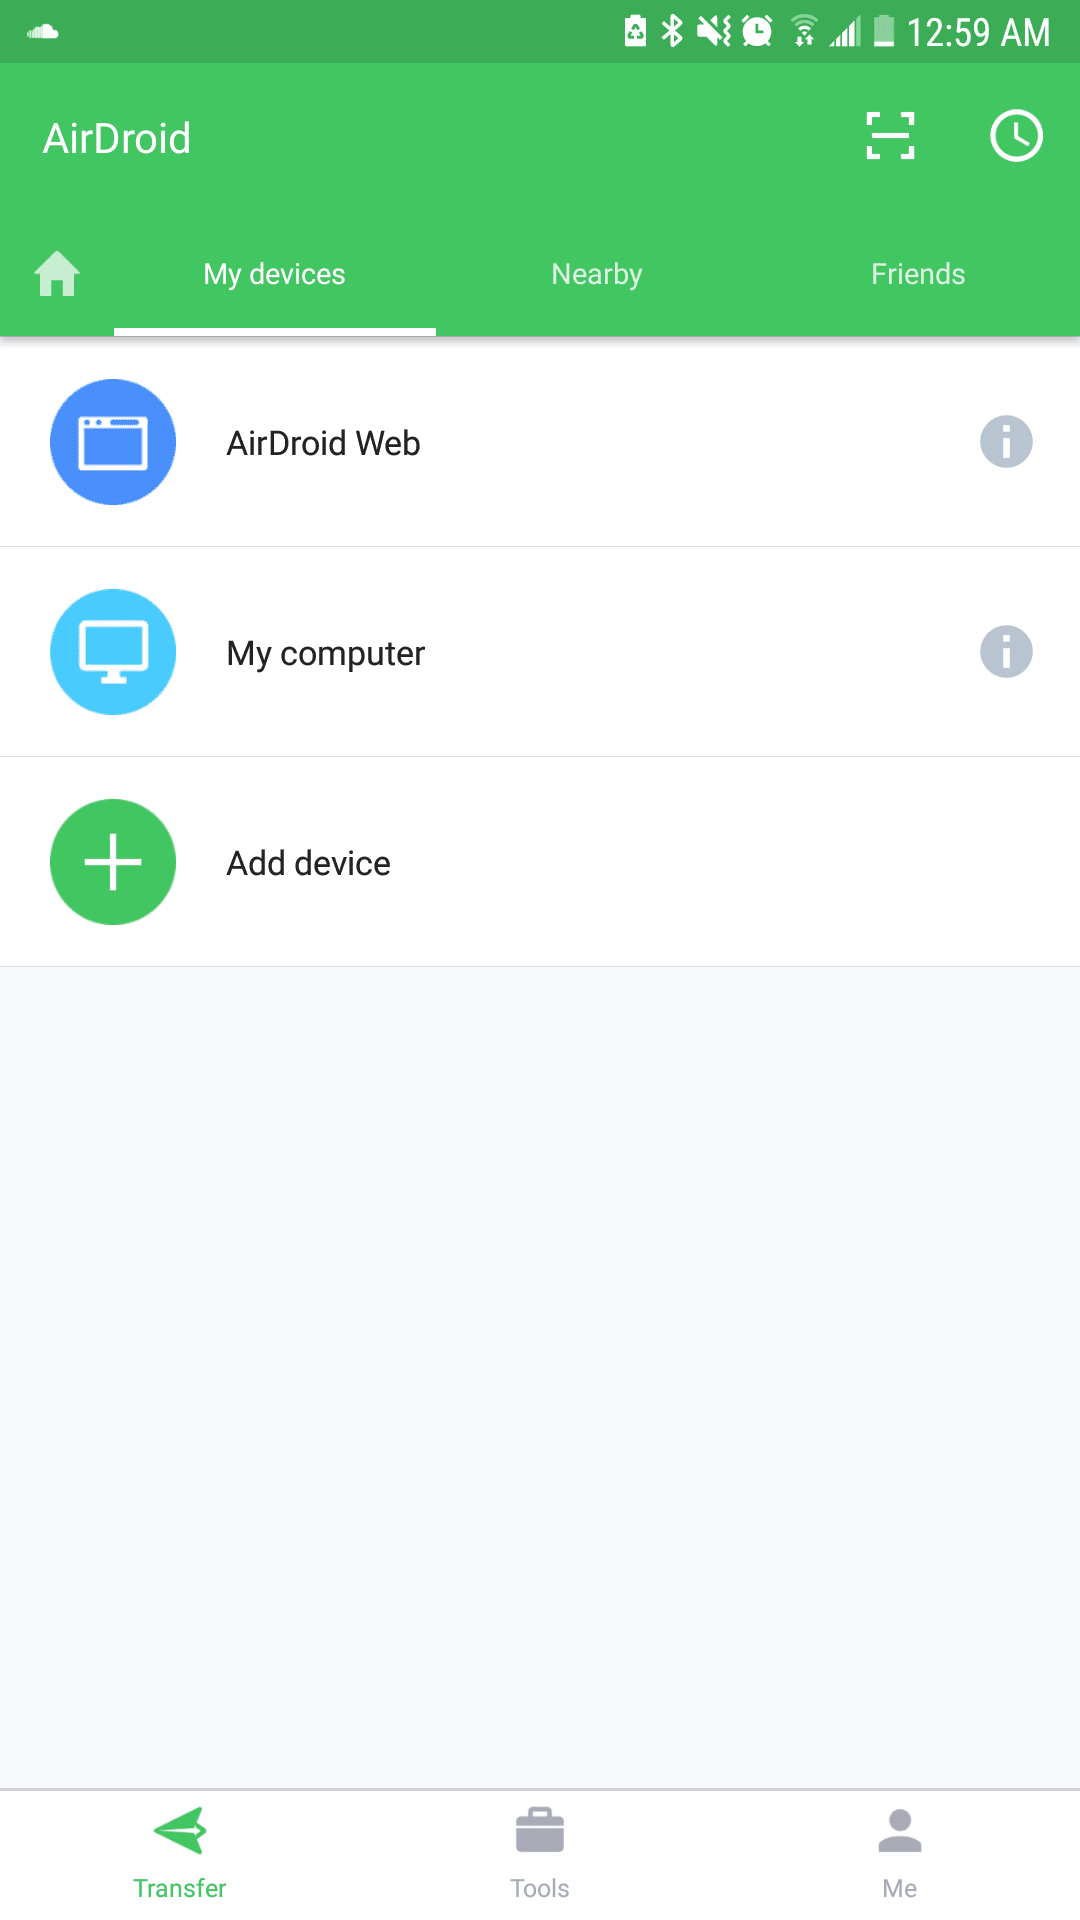
Step 3 – From the main screen, tap on AirDroid Web. Do note, you can use AirDroid without signing up but if you do, your preferences would be saved and you would not need to scan the QR code each time you want to transfer data.
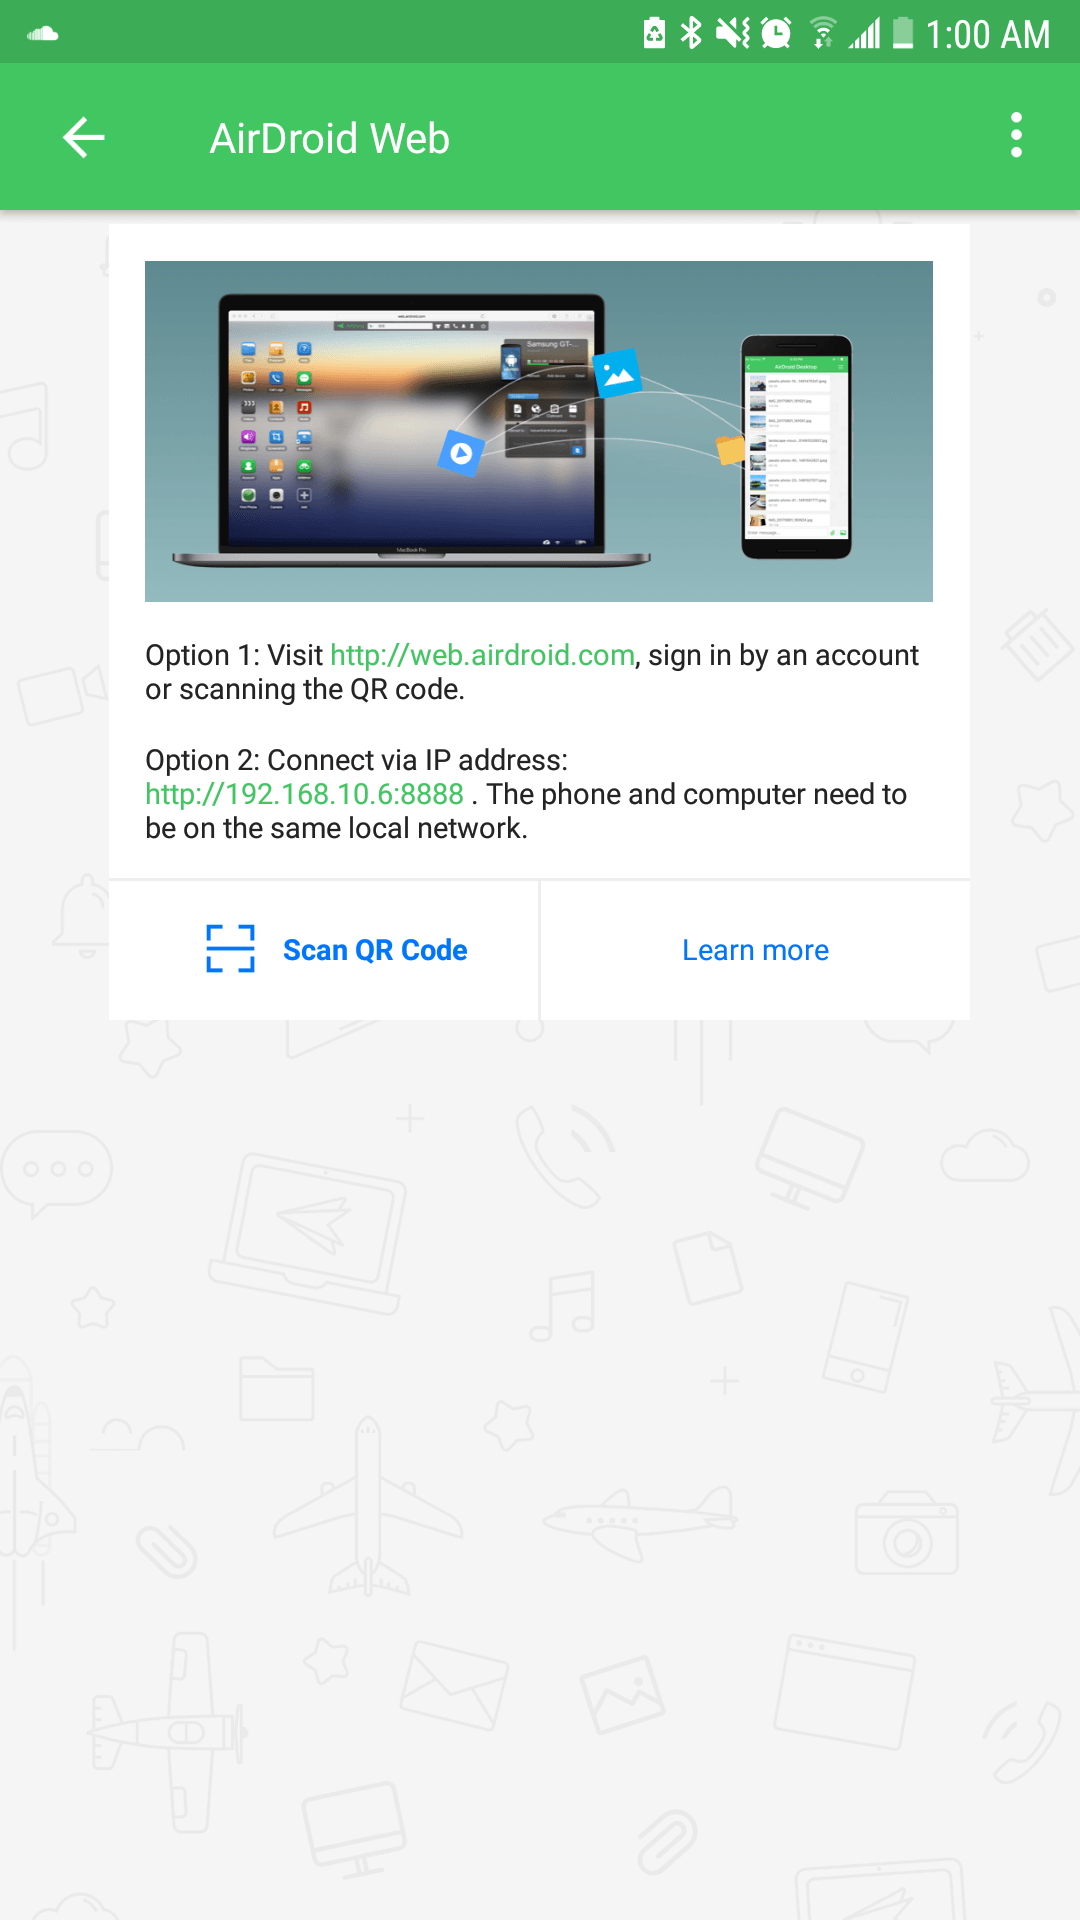
Step 4 – On your computer go to the following URL: http://web.airdroid.com/. There would be a QR code displayed on this webpage, on your phone tap on Scan QR Code and point your camera towards your computer screen.
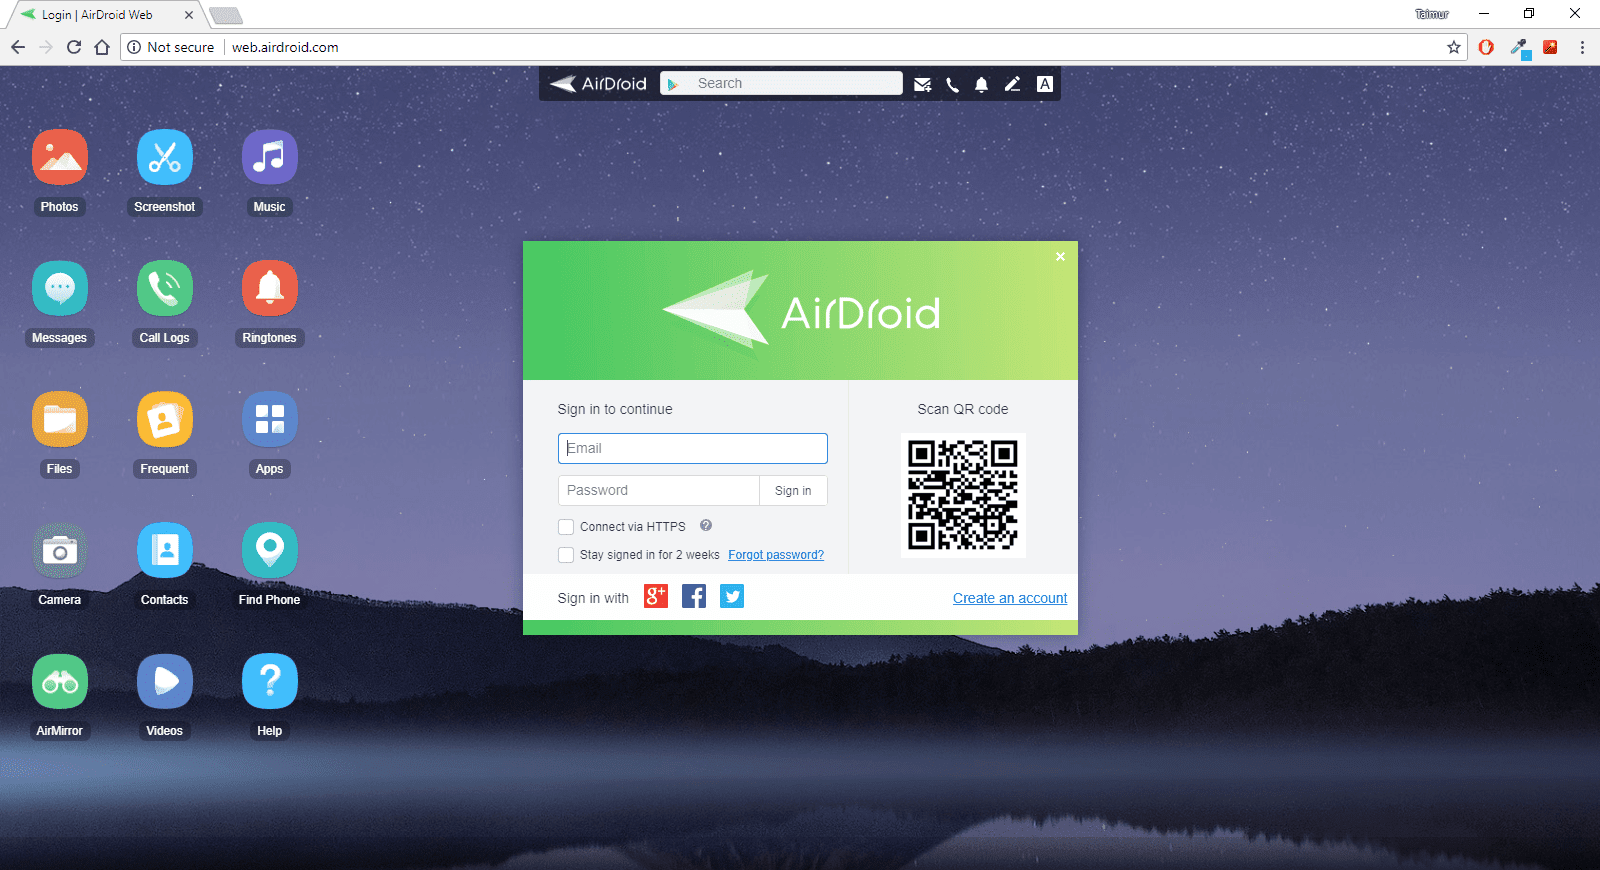
Step 5 – It should instantly recognize the code and give you an option to connect. Tap on Sign In.

Step 7 – Here is the fun part, click on the files shortcut being displayed. Once you do, an explorer would open up. Now browse to the folder you want to upload your file/files to.
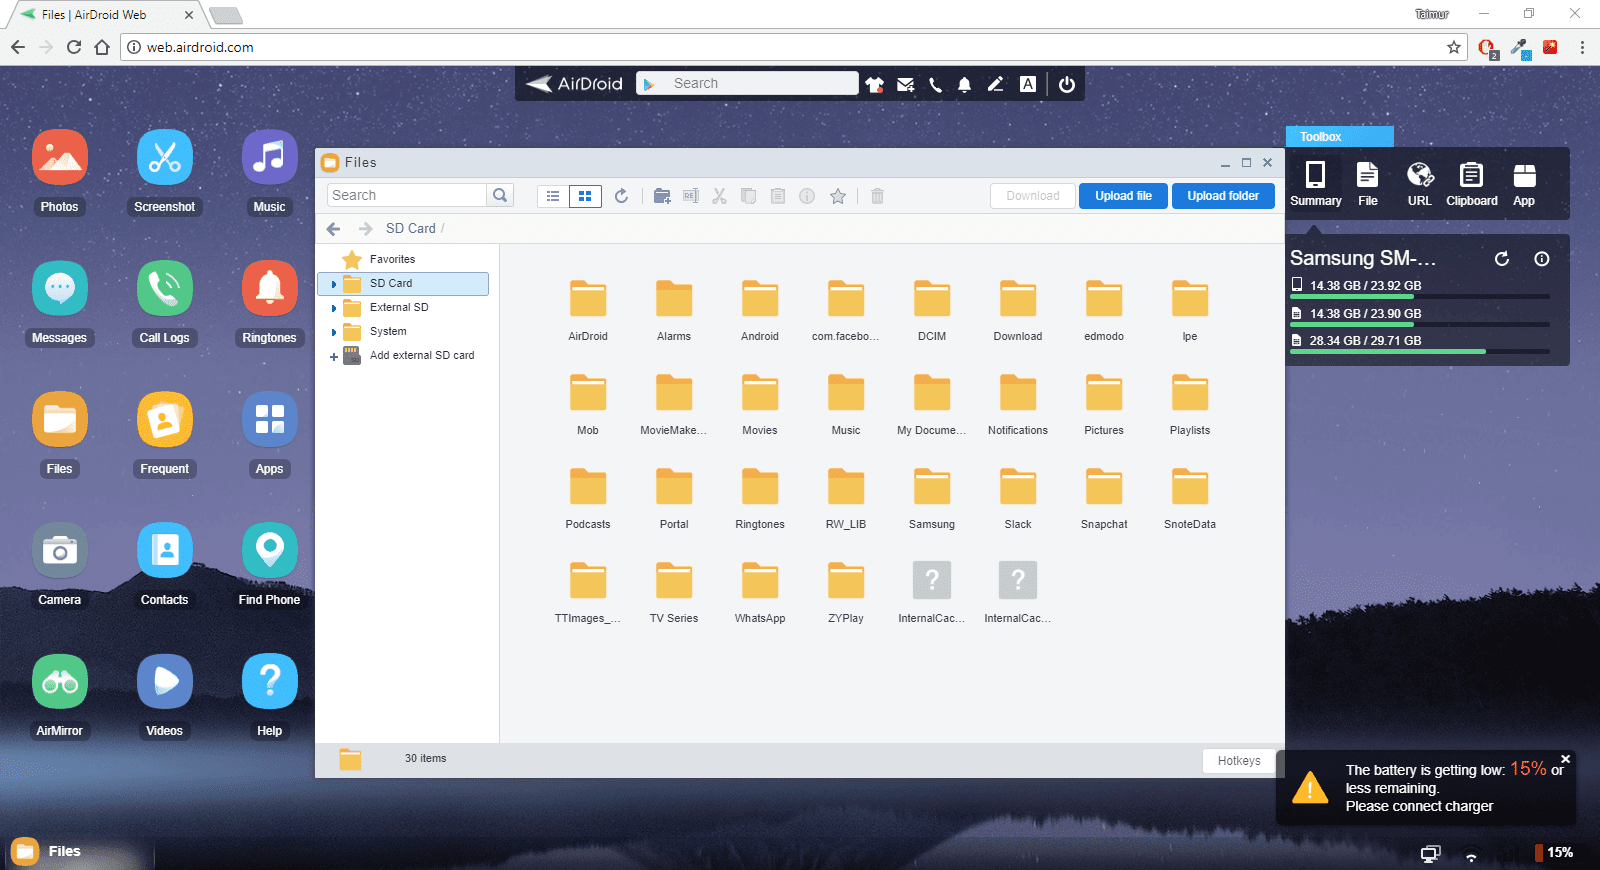
Step 8 – Once you find yourself in the correct directory, click on upload and a local explorer window would open up letting you choose files to upload.
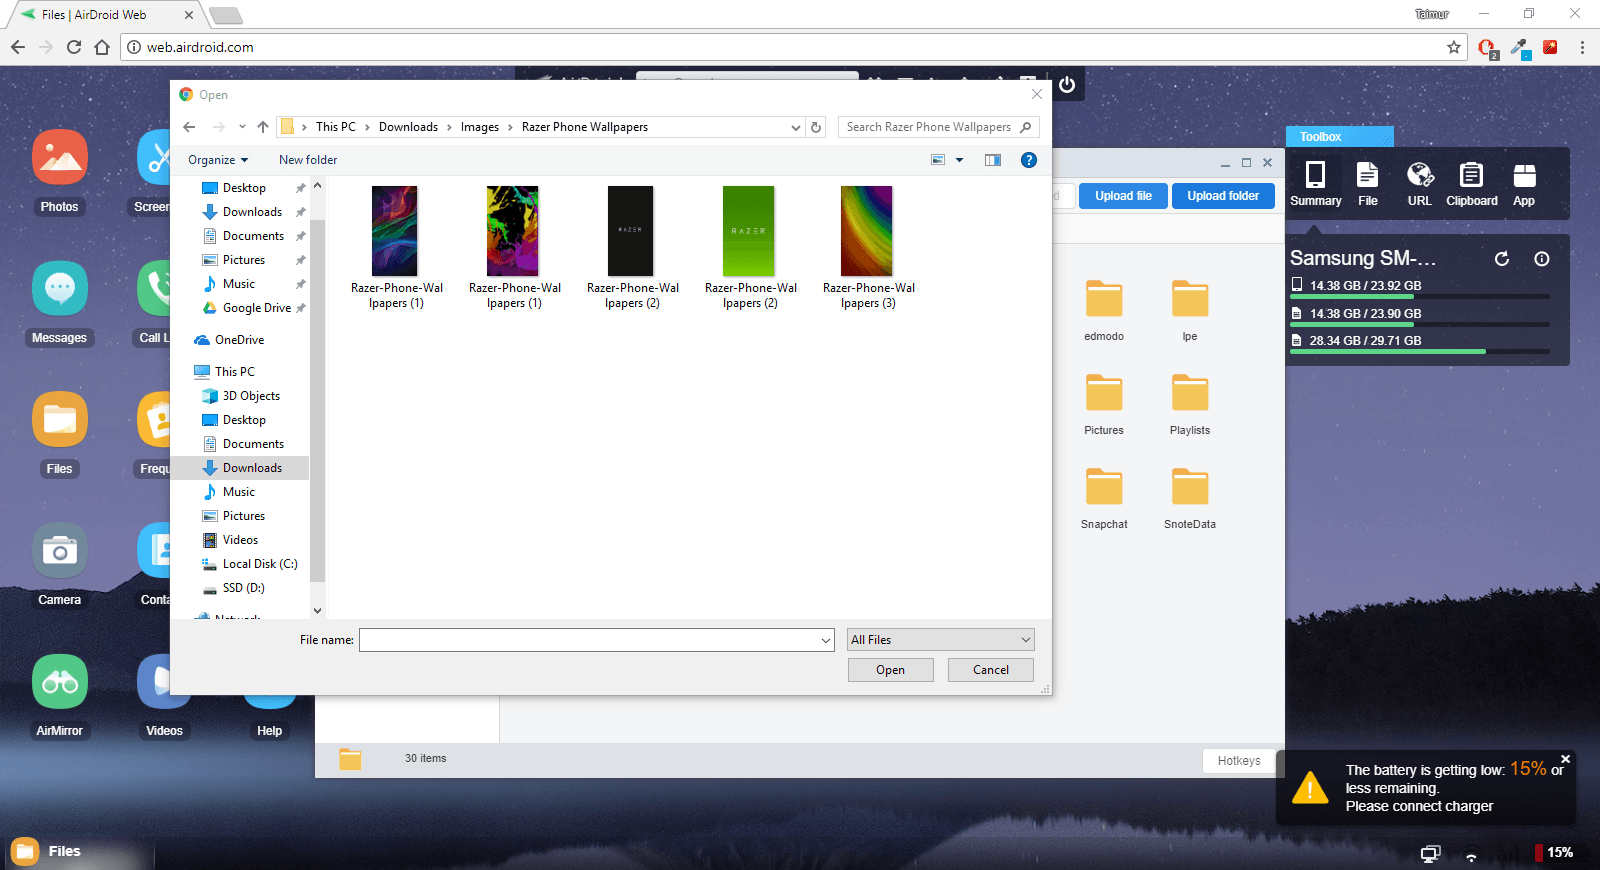
Step 9 – Select either individual files, set of files or complete folders to upload and then click on Open.
Hint: You can also just drag and drop files from your computer’s explorer to AirDroid’s web explorer.
Step 10 – Once the upload is completed, the files will show up in AirDroid’s web explorer.
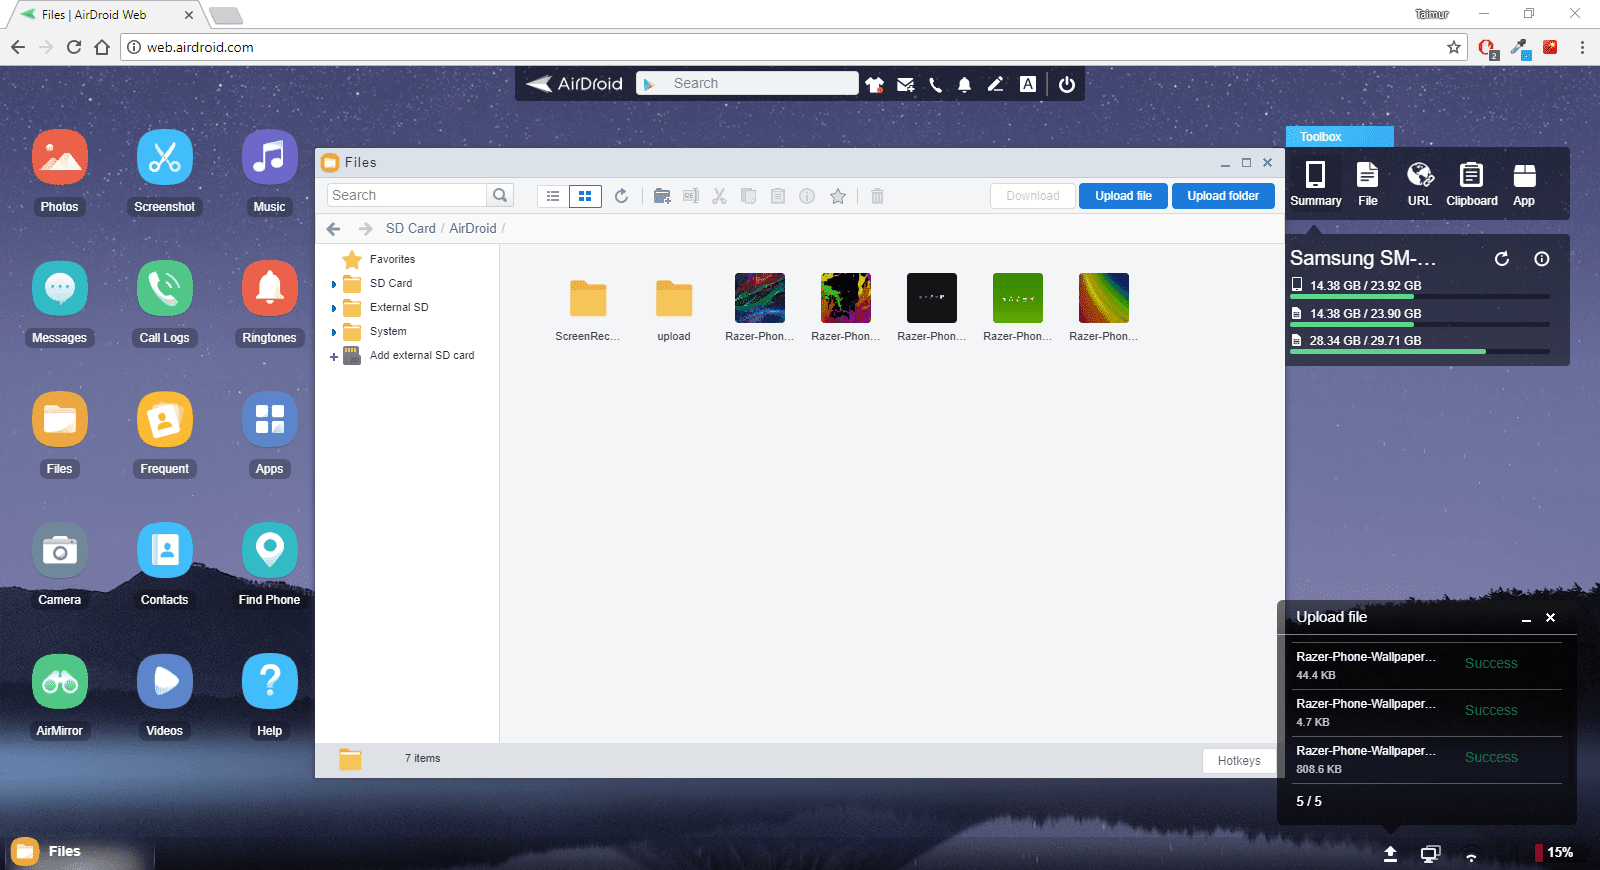
That’s pretty much all! You can now transfer files to your Android device wirelessly without any sort of physical connection. Further, AirDroid has multiple other functions, as discussed before, which you can explore and utilize.
Why choose AirDroid?
As with each app, there is always an alternative. However, the functionality and reliability provided by AirDroid is unparalleled. AirDroid started off with a sole purpose of allowing users to transfer files but it has grown to become much more than that. It now mimics a complete desktop environment on your computer and mirrors most of your smartphone’s crucial features such as messaging, calls and more.
If you have any issues with the steps listed or are stuck anywhere, reach us in the comments and we will respond as quickly as possible.

